Making a crochet rose flower is a fun and easy project for beginners! Here’s a simple step-by-step guide to crochet a rose:
Advanced Crochet Rose Pattern
Materials Needed:
- Yarn (choose a soft, medium-weight yarn in your desired colors)
- Crochet hook (size G/6 or H/8, depending on your yarn weight)
- Yarn needle
- Scissors
Instructions:
Step 1: Make a Magic Ring (or chain 4)
- Magic Ring: Create a magic ring by wrapping the yarn around your fingers and crocheting into the ring. If you’re new to the magic ring, there are many tutorials online, but you can also use Chain 4 and slip stitch into the first chain to form a ring. If you’re using the chain method:
- Chain 4, then join with a slip stitch into the first chain to form a ring.
Step 2: Round 1 – Petals
- Into the ring, crochet 10 double crochets (dc). If you’re using the chain 4 method, just crochet these directly into the ring formed by the chain.
- Once you’ve completed 10 dc, pull the yarn tail tightly to close the ring.
- Join with a slip stitch to the first dc. You should have a small, circular base with 10 double crochets.
Step 3: Round 2 – First Layer of Petals
- Chain 3 (counts as the first double crochet).
- In the same stitch, make 2 double crochets (this creates a cluster of 3 dc in one stitch).
- In the next stitch, make 3 double crochets.
- Continue this pattern of making 3 double crochets in each stitch around. You’ll have 5 petals, each made of 3 dc.
- After you’ve crocheted all 5 petals, join with a slip stitch to the top of the first chain 3. Cut and fasten off the yarn.
Step 4: Round 3 – Second Layer of Petals (Larger Petals)
- Now, join your yarn at any point between the petals from the previous round.
- Chain 3 (counts as a dc).
- In the same space, make 2 double crochets (forming a cluster of 3 dc).
- In the next space between petals, make 3 double crochets.
- Repeat this pattern around to form 5 larger petals.
- Join with a slip stitch to the top of the first chain 3.
- Cut and fasten off the yarn.
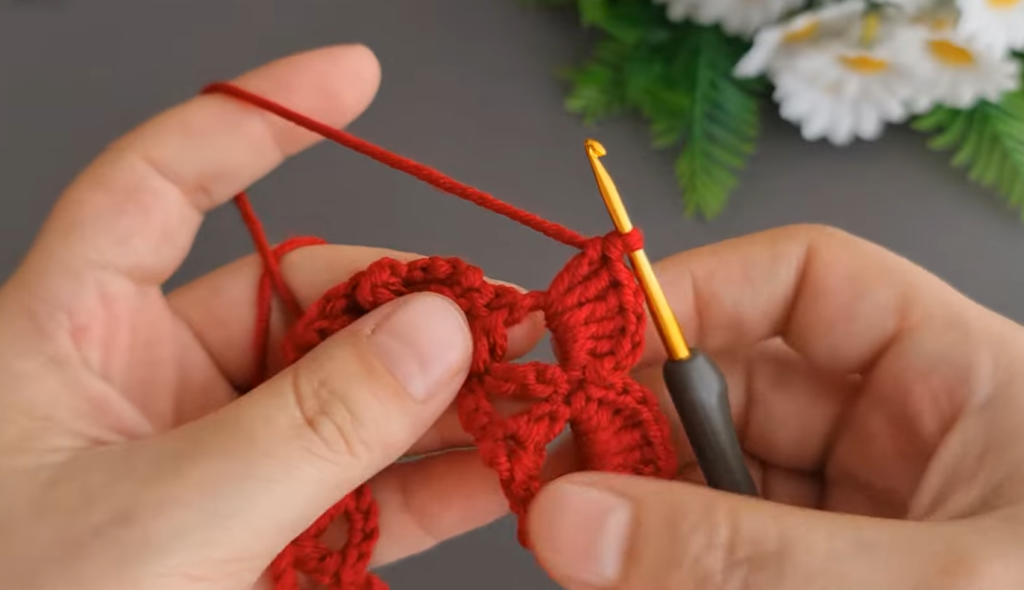
Step 5: Round 4 – Final Layer of Petals
- Attach the yarn again to the space between any two petals from Round 3.
- Chain 4 (counts as a double crochet and a chain 1).
- In the same space, make 2 double crochets, followed by a chain 1.
- Skip a space, then in the next space between petals, repeat this: 3 double crochets, chain 1.
- Repeat this around to form 5 petals.
- After you complete the round, join with a slip stitch to the top of the first chain 4.
- Fasten off and cut your yarn.
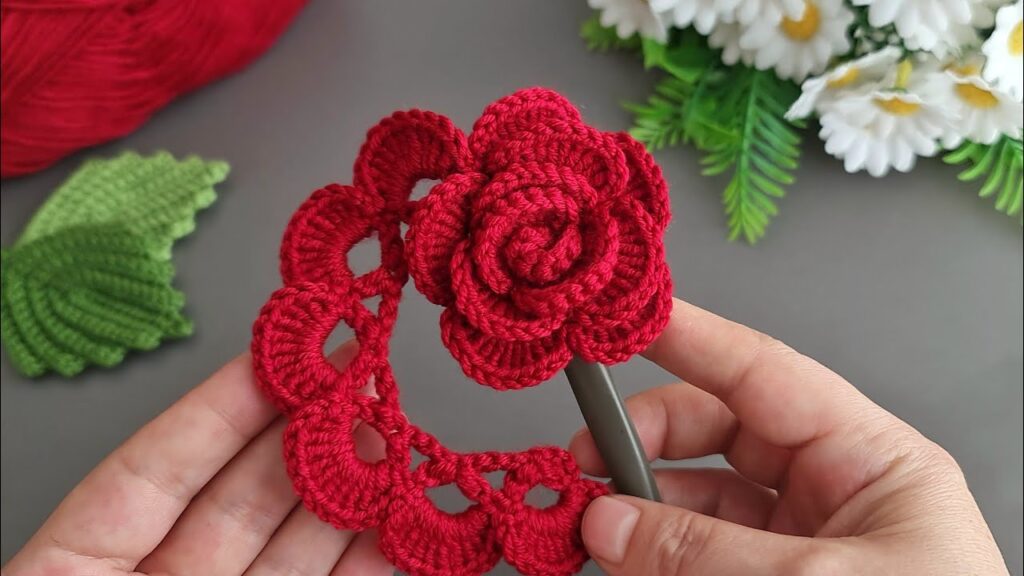
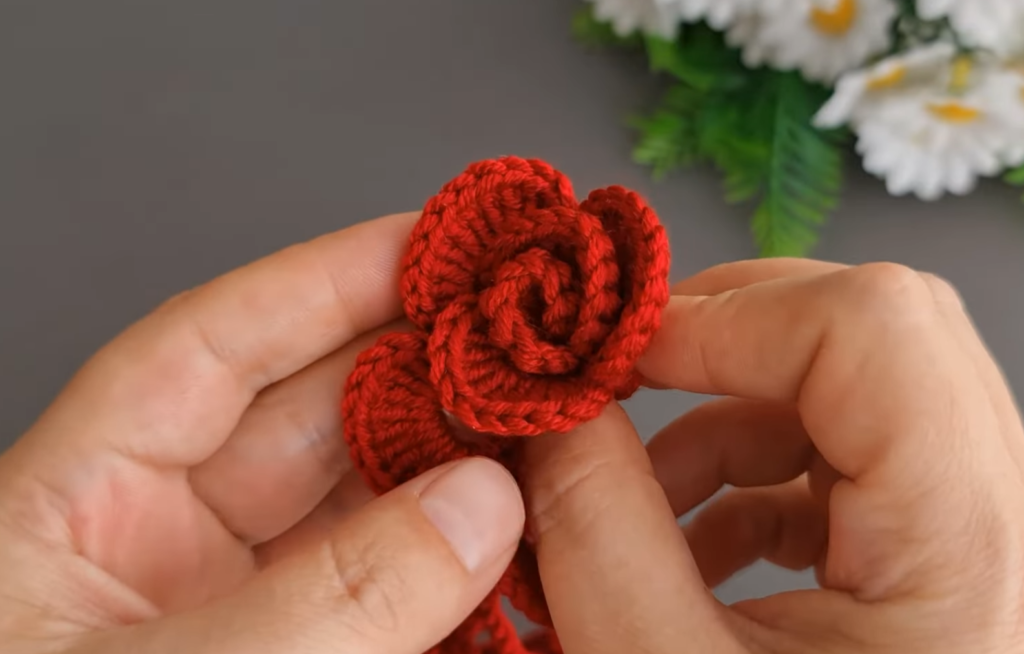
Step 6: Shaping and Assembling the Rose
- To give the rose a more natural, layered look, gently curl the petals inward using your fingers or a yarn needle. This will create a more realistic rose shape.
- You can even sew a few stitches between the layers of petals to help them curl naturally.
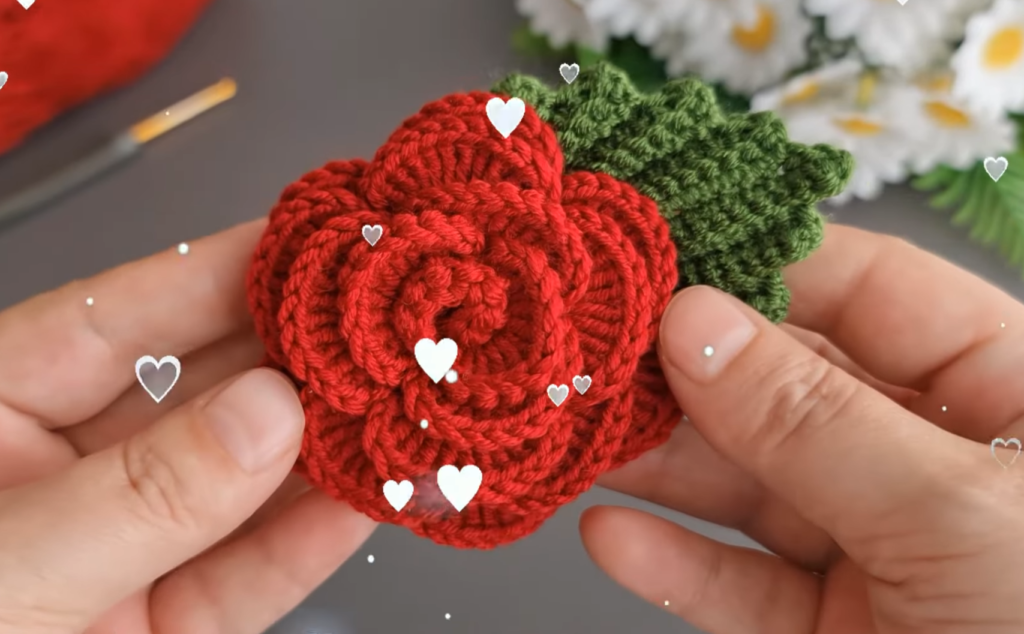
- If desired, add a green leaf or stem by attaching green yarn and crocheting small leaves or a simple stem.

Optional Embellishments:
- Create a Focal Point: You can add a small, contrasting-colored center to your rose. To do this, make a small circle with a few single crochets and sew it in the middle of your flower.
- Add Leaves: To make leaves, create a small leaf shape by chaining 7 and working a combination of single and double crochets. This will add a beautiful accent to your flower.
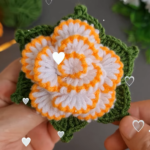
This advanced pattern creates a more dynamic, layered rose flower that can be used as a brooch, a hair accessory, or even a decorative piece. By using multiple layers of petals, you create depth and a more realistic appearance. Have fun experimenting with different colors and textures!
Video tutorial : Very easy crochet rose flower making for beginners

Beautiful Rose! I love Roses and have 4 Rose bushes!