Here is a clear step-by-step tutorial to make the Christmas swirl coaster you showed (white center + red/green twisted border).
You only need basic crochet stitches.
🎄 CHRISTMAS SWIRL COASTER — SUPER DETAILED TUTORIAL
⭐ Stitches you need
- ch – chain
- sl st – slip stitch
- dc – double crochet
- FPdc – front-post double crochet

🧵 PART 1 — MAKE THE WHITE CENTER
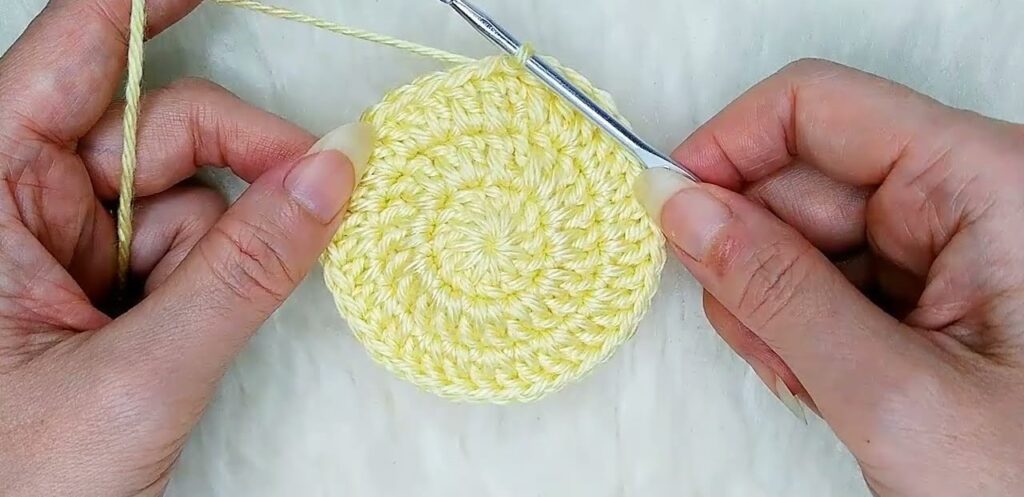
Round 1
- Make a magic ring.
- Chain 2 (counts as first dc).
- Work 12 dc into the ring.
- Pull ring tight.
- Slip stitch into top of chain-2 to close round.
✔ You should now have 12 stitches.
Round 2
- Chain 2.
- In every stitch around: make 2 dc in each.
✔ You now have 24 stitches. - Sl st to join.
Round 3
- Chain 2.
- Repeat this pattern:
- 1 dc in the next stitch
- 2 dc in the next stitch
- Continue around.
✔ You now have 36 stitches. - Sl st to join.
Round 4
- Chain 2.
- Repeat pattern:
- 1 dc in next 2 stitches
- 2 dc in next stitch
- Continue around.
✔ You now have 48 stitches. - Sl st to join.

✨ The White Circle Is Done
Now comes the swirl border, the part that creates the red-green twist.
🧶 PART 2 — MAKE THE RED + GREEN TWISTED BORDER
This part uses Front Post Double Crochet (FPdc).
FPdc goes around the post of the stitch, not in the top loops.
🔴 RED ROUND (first layer of twist)
- Attach red yarn to any stitch.
- Chain 2.
- In every stitch around, make:
✔ 1 FPdc around the post of the white dc below. - Do NOT join with slip stitch.
- Just pull the red yarn to the back and let it hang.
👉 This creates a full round of red FPdc stitches.
🟢 GREEN ROUND (second layer of twist)
- Attach green yarn to the same place where the red started.
- Chain 2.
- In every stitch around, make:
✔ 1 FPdc, but place the green stitch in front of the red one
(Push the red one backward as you work). - Work all the way around.
- Now slip stitch to the first green FPdc.
🎅 HOW THE TWIST APPEARS
- Because you make two FPdc rounds on the same white base,
- and you push one color in front of the other,
- the stitches naturally spiral and form a candy-cane twist.
No need to alternate colors—you simply stack red FPdc behind green FPdc.
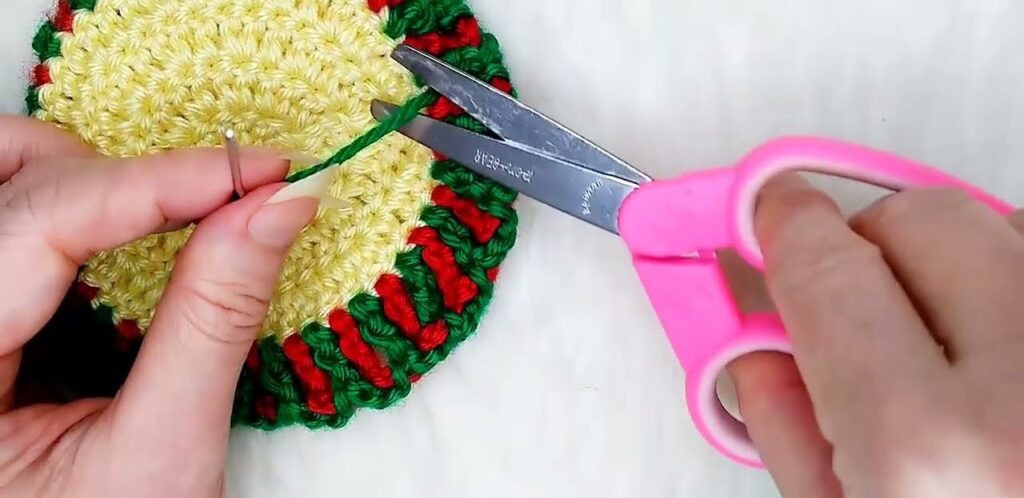
🧵 PART 3 — FINISHING
- Fasten off green.
- Tighten red yarn tail and weave it securely.
- Flatten your coaster with your hand (or block if needed).
RESULT
You now have the exact Christmas swirl motif like the picture—
a white center with twisted red + green spiral border.

