This beautiful crochet pattern is called a “Butterfly Stitch Blanket” or “Ribbon Stitch Crochet Pattern” — it’s made with textured clusters that are cinched in the middle with a ribbon to create a butterfly or bow-like effect. Here’s how to make it step-by-step:
🧶 Crochet Butterfly Stitch Blanket with Ribbon (Detailed Tutorial)
🌸 What You’ll Need
- Yarn: Medium weight acrylic yarn (color: cream or white)
- Hook: 4.0 mm (G-6) crochet hook
- Ribbon: 1–1.5 cm (½ inch) wide satin ribbon (purple in the image)
- Scissors
- Yarn needle

🪡 Stitches & Abbreviations (U.S. terms)
- ch – chain
- sc – single crochet
- dc – double crochet
- sk – skip
- sp – space
- st(s) – stitch(es)
- sl st – slip stitch
🧵 Step 1: Foundation Chain
- Chain a multiple of 8 + 3.
- Example: for a baby blanket, chain 83 (8×10 + 3).
- For a scarf, you can do around 35 or 43 chains.
- Turn your work.
🌼 Step 2: Row 1 — Double Crochet Base
- Dc into the 4th chain from the hook (the skipped 3 chains count as 1 dc).
- Continue making 1 dc in each chain across the row.
- Turn your work.
🧩 You now have a solid base row of double crochet stitches.
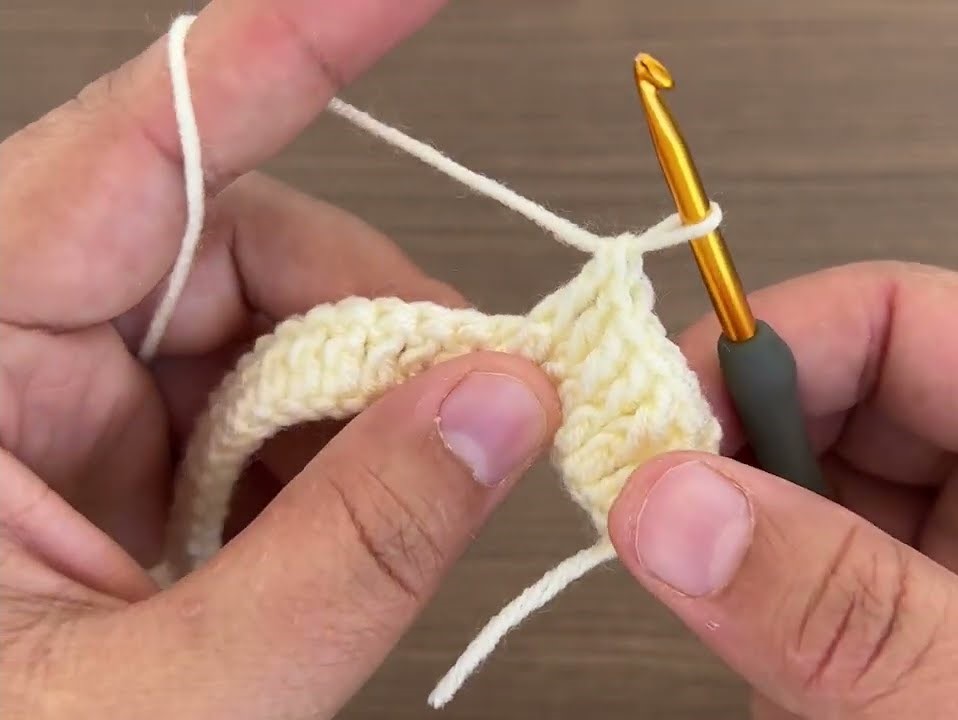
🌸 Step 3: Row 2 — First Fan Row
- Ch 3 (counts as your first dc).
- Sk 3 sts, make 7 dc in next st (this forms a fan).
- Sk 3 sts, 1 dc in next st.
- Repeat steps 2–3 across the row.
- End with 1 dc in the last st of the row.
- Turn your work.
💡 You’ll see groups of 7 dc (fans) separated by 1 dc posts.
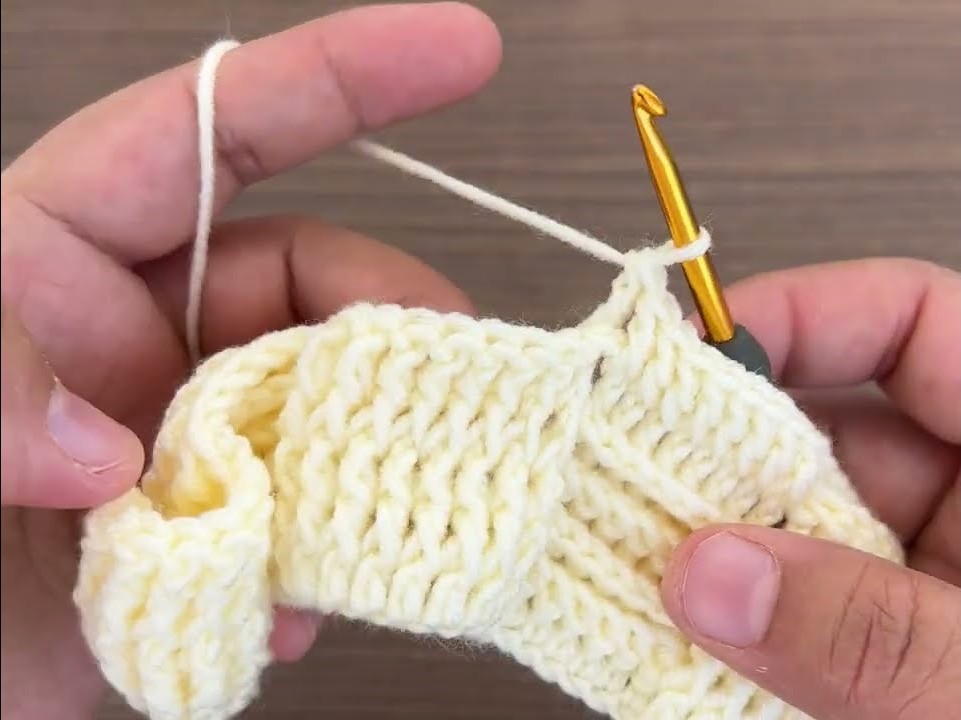
🌺 Step 4: Row 3 — Offset Fan Row
- Ch 3, dc 3 times in the space between the fan and dc below.
- Sk to the next dc (the one between two fans).
- 7 dc in that dc (making a new fan between two fans below).
- Sk to next space, dc 3 times.
- Repeat this pattern across the row.
- Turn your work.
🔹 This offset creates a textured, wavy diamond look.
🌼 Step 5: Repeat Pattern Rows
Continue alternating Row 2 and Row 3 until your piece reaches the desired length.
Each pair of rows makes a new layer of shells/fans.
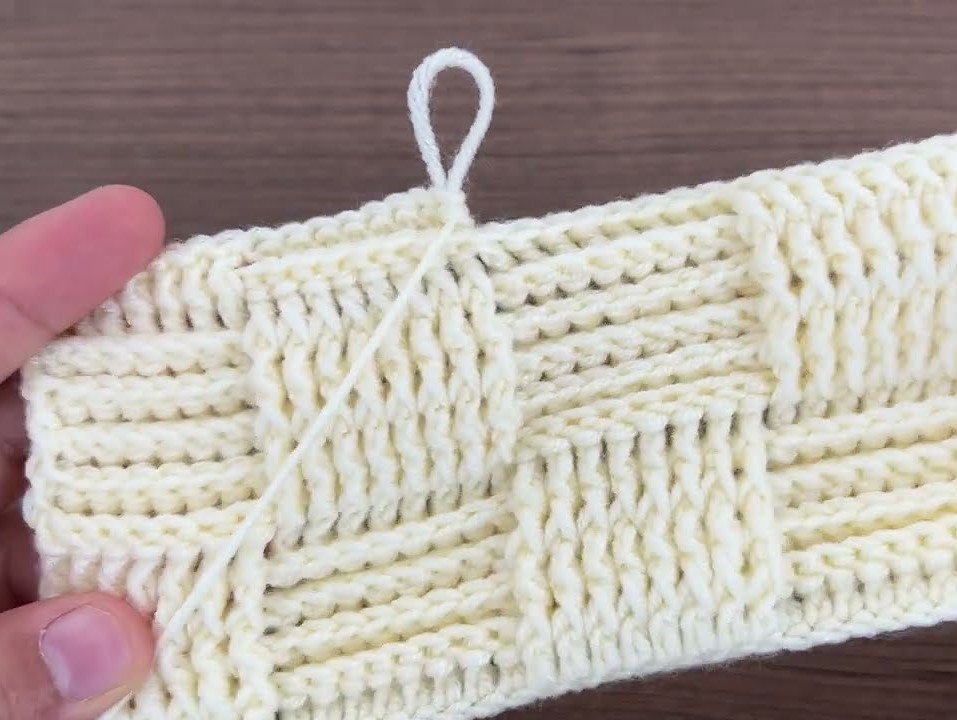
🦋 Step 6: Creating the Butterfly (Ribbon)
Once you’ve crocheted a few rows (about 8–10), you’ll create the butterfly effect:
- Cut pieces of ribbon about 5–6 cm (2 inches) long.
- Insert a piece of ribbon horizontally across the middle of each diamond or fan section.
- Pull the ribbon gently to gather the stitches in the center — it will form a “bow” or “butterfly” shape.
- Secure the ribbon at the back:
- Either stitch the ends to the back with needle and thread, or
- Use a tiny bit of hot glue (for non-washable decor).
- Repeat across every alternate row for an even pattern.
🌷 Step 7: Finishing the Edges
To give it a clean look:
- Work a border around your blanket:
- Round 1: sc evenly all around the edge.
- Round 2: dc in each sc for a thicker edge.
- Optional: add a picot or shell edge for decoration.
🧵 Example Pattern Repeat (summary)
Foundation: Chain multiple of 8 + 3
Row 1: Dc in 4th ch from hook, dc across. Turn.
Row 2: Ch 3, *sk 3, 7 dc in next st, sk 3, dc in next st*, repeat. Turn.
Row 3: Ch 3, 3 dc in space between fan and dc, *7 dc in next dc between fans, 3 dc in next space*, repeat. Turn.
Repeat Rows 2–3 for pattern length.
🎀 Optional Variation
- Instead of ribbon, you can wrap a yarn strand around the center of each fan for a fully crocheted version.
- For a multicolor design, alternate yarn colors every few rows before adding the ribbon.

