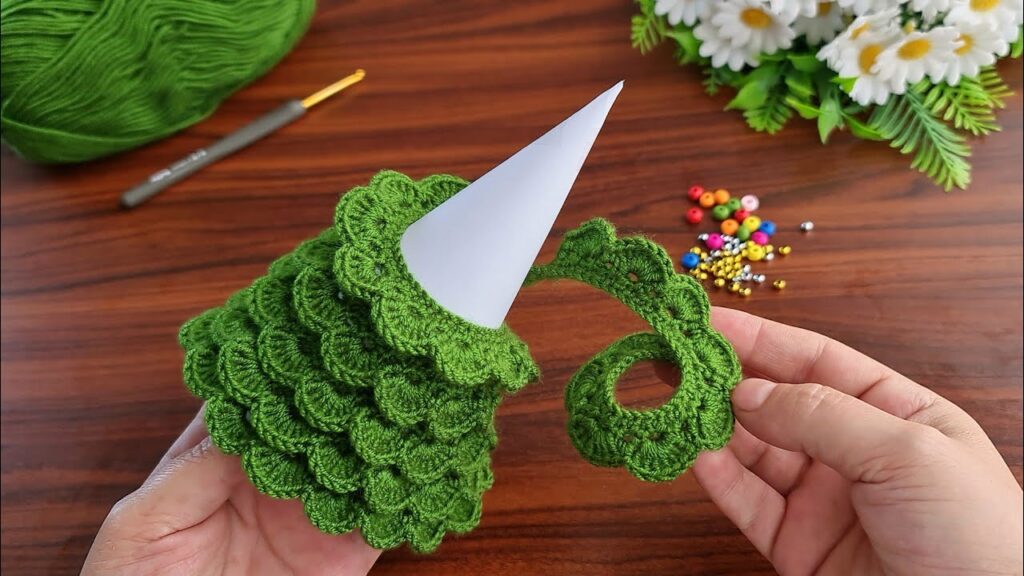
It looks like the image shows a crochet Christmas tree made with a crocodile stitch pattern. I’ll guide you step by step on how to make it like in your photo.
🧶 Materials You’ll Need
| Item | Description |
|---|---|
| 🧵 Yarn | Green acrylic or cotton yarn (Medium or DK weight) |
| 🪝 Crochet hook | Size 3.0 mm or 3.5 mm |
| ✂️ Scissors | For cutting yarn |
| 🧷 Yarn needle | For weaving in ends |
| 📄 Paper cone | For shaping the tree |
| 🎀 Optional | Beads, sequins, or bells for decoration |
🌲 Step-by-Step Crochet Instructions
Step 1: Start the Base Circle
- Make a magic ring (or chain 4 and slip stitch to form a ring).
- Chain 3 (counts as your first double crochet).
- Make 9 double crochets (dc) into the ring.
- You now have 10 dc total.
- Join with a slip stitch into the top of the beginning chain-3.
- Pull the center tight if using a magic ring.
🧩 This forms the foundation circle for your tree.
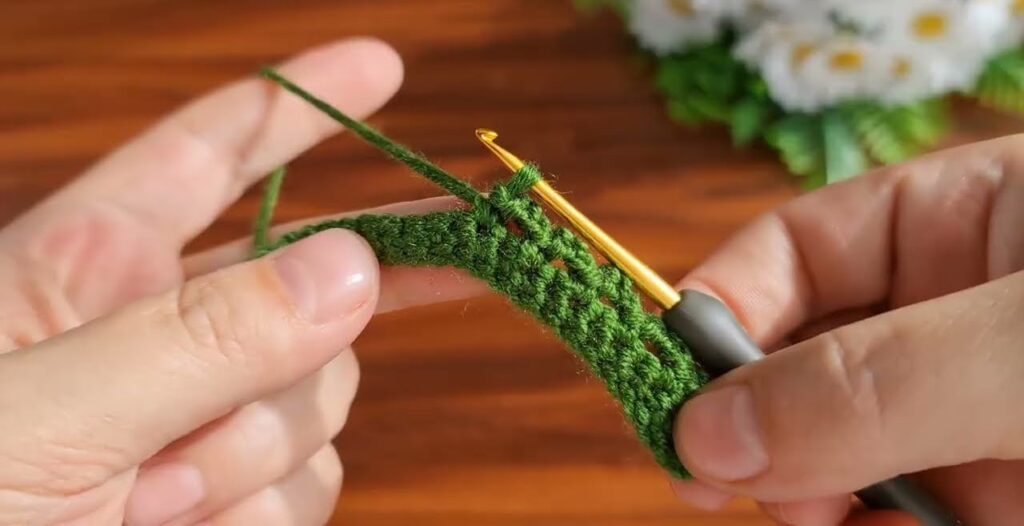
Step 2: Form the First Crocodile Stitch Base
- Chain 1, then make (2 dc in each stitch around).
→ This means in each of the 10 stitches, you will crochet 2 dc. - You’ll have 20 dc total.
- Join with a slip stitch to the top of the first dc.
🧩 Now you have 10 pairs of dc — each pair will hold 1 “scale.”
Step 3: Make the First Row of Scales (Crocodile Stitch)
This is the fun part — the “leaf” or “scale” effect 🌿
- Chain 3 (to start height).
- Skip the first dc pair.
- Work 5 dc down the first dc post (from top to bottom).
- Chain 1.
- Work 5 dc up the next dc post (from bottom to top).
- Skip to the next pair and repeat steps 3–5 around the circle.
- Join with a slip stitch.
Now you have a circle full of scales (crocodile stitches).
Step 4: Make the Second Row Base (for the next layer)
- Turn your work so the scales are facing outward.
- Chain 1.
- In the center of each scale (the small space between scales), make:
- (1 dc, ch 1, 1 dc).
- Join with a slip stitch.
🧩 This creates the foundation for the next round of scales.
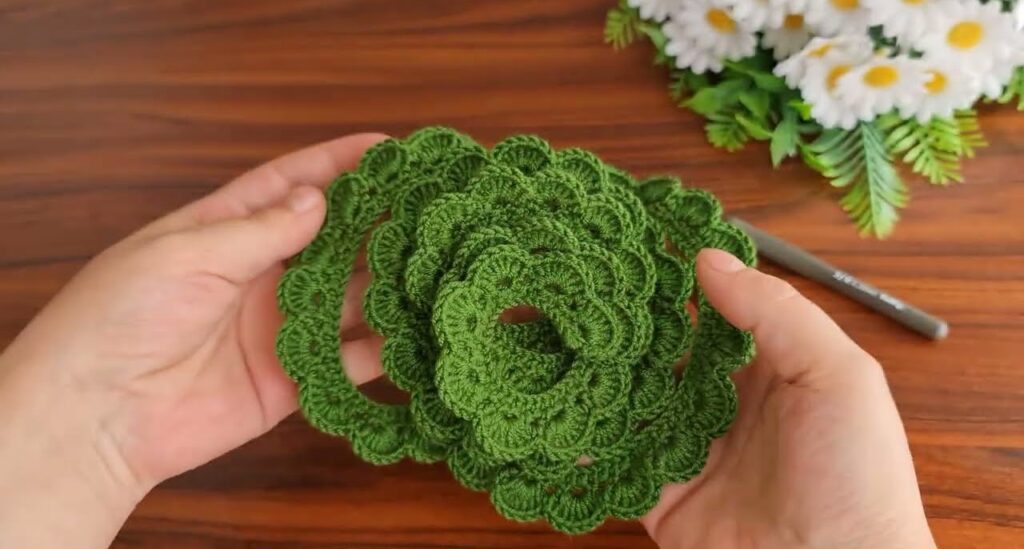
Step 5: Make the Second Row of Scales
Repeat the crocodile stitch again on these dc pairs:
- Work 5 dc down the first dc post.
- Chain 1.
- Work 5 dc up the next dc post.
- Continue around.
- Join with slip stitch.
✅ Each new row of scales will overlap slightly, forming the “tree leaf” pattern.
Step 6: Repeat for More Layers
Keep repeating Step 4 (new dc pair base) and Step 5 (scales) until your crochet piece is tall enough to cover your paper cone.
Usually:
- Small tree → 4–5 layers
- Medium tree → 6–7 layers
- Large tree → 8–9 layers
Step 7: Shape the Tree
- Roll a piece of paper into a cone shape and tape it.
- Place your crochet piece over the cone.
- Adjust to fit snugly.
- You can lightly stitch or glue it to hold shape.
Step 8: Decorate
Now it’s time to make it festive 🎄✨
You can:
- Sew or glue small beads as ornaments.
- Add a golden star on top.
- Use a tiny bell or ribbon for decoration.

💡 Tips for Success
- Keep your stitches even — crocodile stitch uses a lot of yarn.
- If the tree flares too wide, reduce the number of dc pairs in the next row.
- For a fuller look, use softer yarn (like acrylic).

