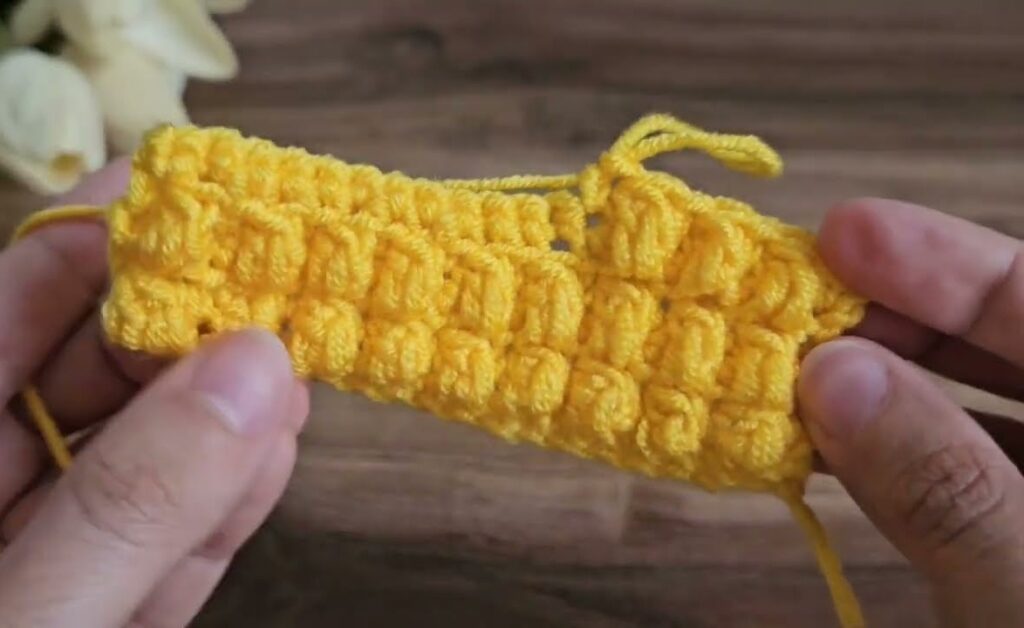
This looks like a crocheted waffle-stitch blanket (or baby blanket) made with thick yarn.
step by step 👇
Waffle Stitch Crochet Blanket – FULL DETAILED GUIDE
1️⃣ Materials (Very Important)
Choose the right materials to get the same look as the picture.
Yarn
- Type: Chunky / Bulky yarn (Category 5)
- Alternative: Medium yarn (Category 4) also works
- Texture: Soft acrylic, cotton, or chenille
- Color: Yellow (like the picture)
Hook
- Chunky yarn → 6–7 mm hook
- Medium yarn → 5–5.5 mm hook
Other Tools
- Scissors
- Yarn needle (for weaving ends)

2️⃣ Crochet Abbreviations (You Must Know)
| Term | Meaning |
|---|---|
| ch | chain |
| sc | single crochet |
| dc | double crochet |
| fpdc | front post double crochet |
| st | stitch |
| rep | repeat |
| sk | skip |
3️⃣ Understanding Waffle Stitch (Important)
- The waffle texture comes from front post double crochet (fpdc)
- FPDC stitches pop forward
- Normal DC stitches stay flat
- Alternating them creates the square waffle pattern

4️⃣ Step 1: Make Foundation Chain
Chain Formula
👉 Multiple of 3 + 2
Examples:
- Small baby blanket:
ch 92 - Medium blanket:
ch 122 - Large blanket:
ch 152
💡 Tip: Don’t chain too tight.
5️⃣ Step 2: Row 1 (Base Row)
- Dc in 3rd chain from hook
- Dc in every chain across
- Count stitches (very important!)
- Turn your work
➡ This row creates a strong base for the waffle stitch.

6️⃣ Step 3: Row 2 (First Waffle Row)
- Ch 2 (counts as first dc)
- Fpdc around the next stitch
- Insert hook around the post, not into the top loops
- Dc in the next 2 stitches
- Repeat this pattern across the row:
👉fpdc, dc, dc - Dc in the last stitch
- Turn
7️⃣ Step 4: Row 3 (Second Waffle Row)
- Ch 2
- Dc in the next 2 stitches
- Fpdc around the next stitch
- Repeat across the row:
👉dc, dc, fpdc - Dc in last stitch
- Turn
8️⃣ Step 5: Repeat the Pattern
Repeat:
- Row 2
- Row 3
Keep repeating until your blanket is the length you want.
📏 Common lengths:
- Baby blanket: 70–90 cm
- Throw blanket: 120–150 cm
- Bed blanket: 180+ cm
9️⃣ Step 6: Border (Clean & Beautiful Edge)
Simple Border (Recommended)
- Attach yarn at any corner
- Sc evenly around the blanket
- In each corner → 3 sc
- Join with slip stitch
Optional:
- Add 2–3 rounds of sc
- Or do a dc border for thicker edges
🔟 Step 7: Finish
- Cut yarn (leave tail)
- Pull through and tighten
- Use yarn needle to weave in all ends
- Stretch gently and flatten
🔥 Tips for Perfect Waffle Stitch
✔ Use stitch markers for corners
✔ Count stitches every row
✔ FPDC must always be around the post, not the top
✔ Waffle stitch uses more yarn, buy extra
🎁 Extra (Like the Picture)
- Roll the blanket
- Tie with ribbon
- Perfect for Christmas or baby gift

