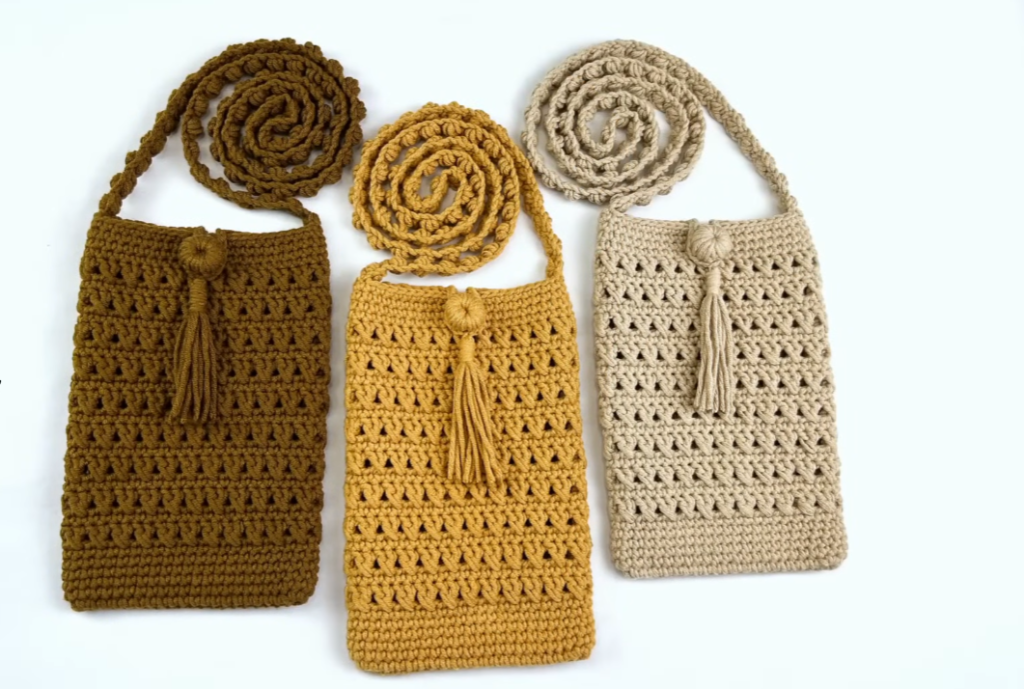
Learn to make this fancy crochet phone case that I made using a simple and beautiful stitch. The crochet pattern and a video tutorial will help you with them.

WHY MAKING A CROCHET PHONE CASE
I wanted something cool and fancy to cover my lovely iPhone. I hate these plastic covers that not only are pretty ugly for my taste but also don’t really protect my phone. So, I started creating this fancy and cozy crochet phone case, and it came out better than I thought. I love making crochet projects that are really useful in my daily life, and these phone cases fully meet my needs. They are very safe and can fit with any outfit you wear.
Absolutely! Here’s a simple and stylish crochet phone case pattern—perfect for beginners and fully customizable to fit your phone.
📱 Crochet Phone Case – Free Pattern
Materials Needed:
- Worsted weight yarn (cotton or acrylic)
- 4mm or 4.5mm crochet hook
- Button (optional for closure)
- Yarn needle
- Scissors
Abbreviations (US Terms):
- Ch = Chain
- Sc = Single crochet
- Hdc = Half double crochet
- Sl st = Slip stitch
- St(s) = Stitch(es)
🔹 Step-by-Step Instructions
1. Measure Your Phone
- Measure the width of your phone.
- Chain enough stitches to match the width × 2 (because you’ll be folding the fabric in half). Add 2 chains for turning.
Example: If your phone is 3 inches wide and your gauge is 4 stitches per inch, chain about 26 (3 inches × 2 × 4 = 24 + 2 for turning).
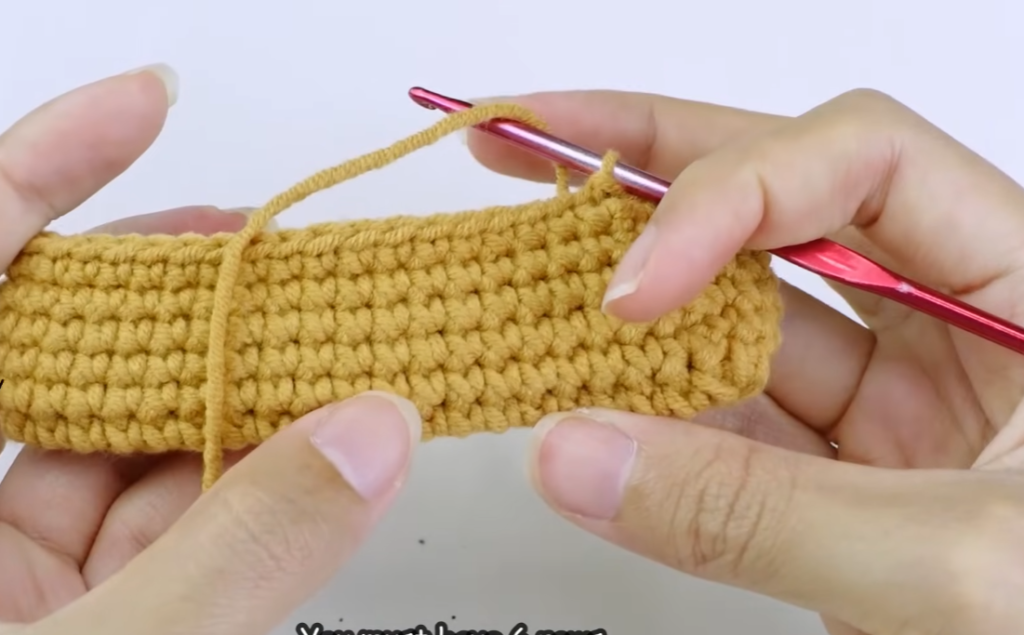
2. Create the Body
- Row 1: Sc in 2nd ch from hook and across. Ch 1, turn.
- Row 2—until length matches phone height + a little extra (~1/2 inch): Sc in each stitch across, ch 1, turn.
- Once it reaches the desired height, fasten it off.
3. Fold and Seam
- Fold the rectangle in half.
- Use a whip stitch or slip stitch along both sides to seam it up, forming a pocket. Leave the top open.
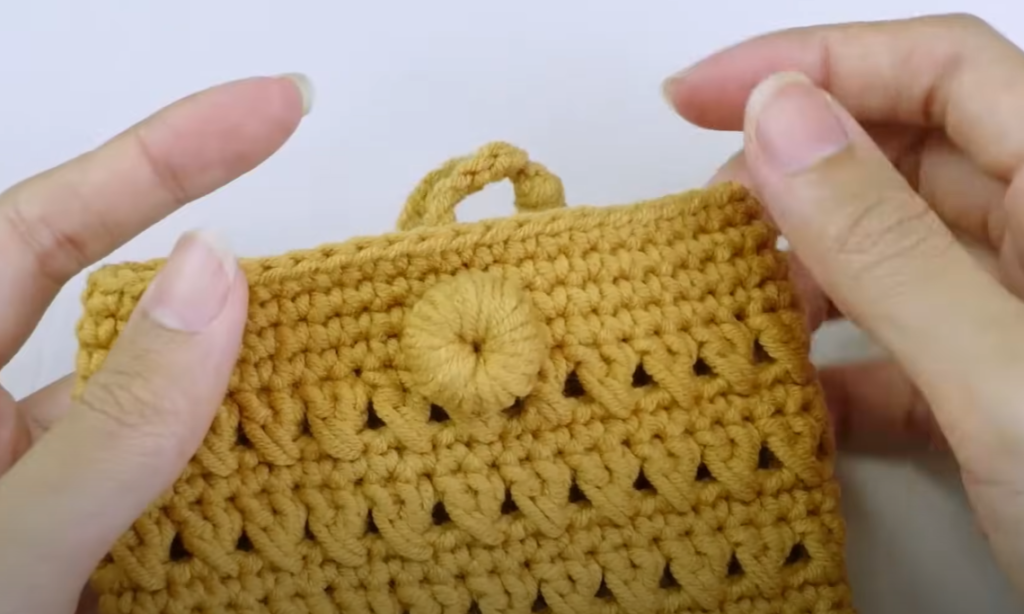
4. Optional: Add a Button Loop
- Attach yarn to the center of the back top edge.
- Ch 10–15 (depending on button size), sl st to the same spot.
- Fasten off and weave in ends.
- Sew a button to the front to match the loop.
🧶 Optional Variations:
- Textured version: Use hdc or alternate sc and dc for a nice texture.
- Color blocks or stripes for fun flair.
- Granny square front for a retro look.

Video tutorial: How to Crochet Phone Bag Pattern