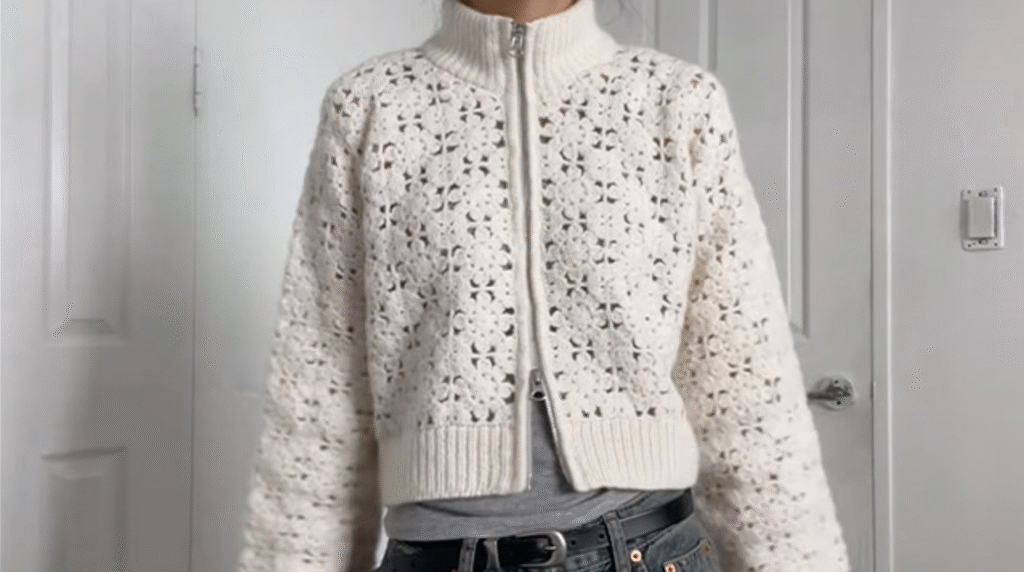
If you’re looking to add a stylish and elegant handmade garment to your wardrobe, look no further than the crochet fleur cardigan.
The Charm of Crochet Fleur Cardigan
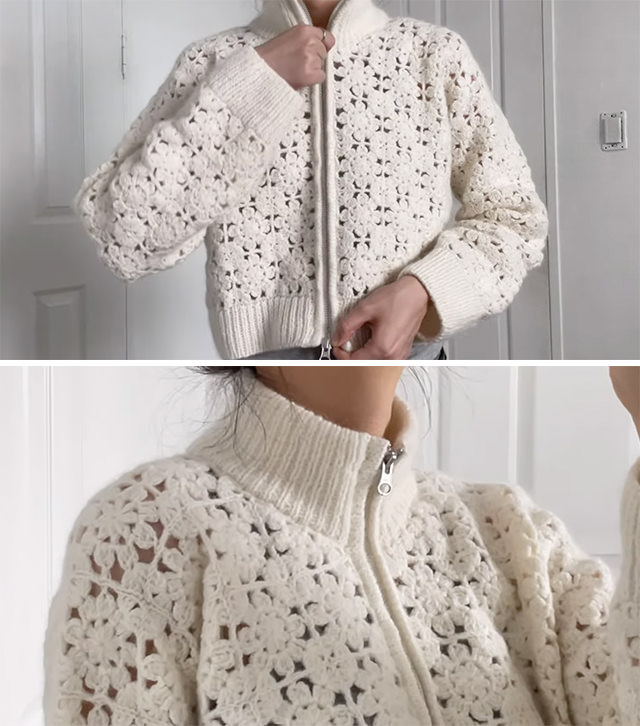
The crochet fleur cardigan stands out with its delicate, flower-like motifs woven seamlessly throughout the fabric. These intricate designs resemble small blooms, which is where the cardigan gets its “fleur” name — French for flower. Each stitch is carefully crafted, resulting in a texture that feels both light and luxurious. The openwork design not only adds visual interest but also makes the cardigan breathable, perfect for layering in spring or fall.
🧶 Fleur Cardigan Crochet Pattern (Inspired DIY)
💡 Skill Level: Intermediate
Requires experience with motif joining and some garment shaping.
🔧 Materials:
- Sport or DK weight yarn (cotton or wool blend recommended)
- 3.5 mm crochet hook (adjust for gauge)
- Zipper (same length as cardigan front)
- Yarn needle, scissors, stitch markers
- Optional: fabric lining (for inside if desired)
🪡 Part 1: Crochet the Flower Motif
Each square is worked separately, then joined.
🌸 Basic Flower Motif (Granny Style):
- Round 1: Magic ring, ch 3 (counts as dc), 11 dc in ring. Join. (12 dc)
- Round 2: Ch 2, skip 1 st, dc in next repeat around. (Creates “petal” spacing)
- Round 3: In each ch-2 space: (sc, hdc, 2 dc, hdc, sc) — creates a petal. Repeat for each space.
- Round 4: Square off: Work (sc, ch 2, sc) in corners, and sc along sides to form a square.
Repeat and block each square. You’ll need:
- ~40–48 motifs for a small/medium size
- Join-as-you-go (JAYG) method or whipstitch to assemble
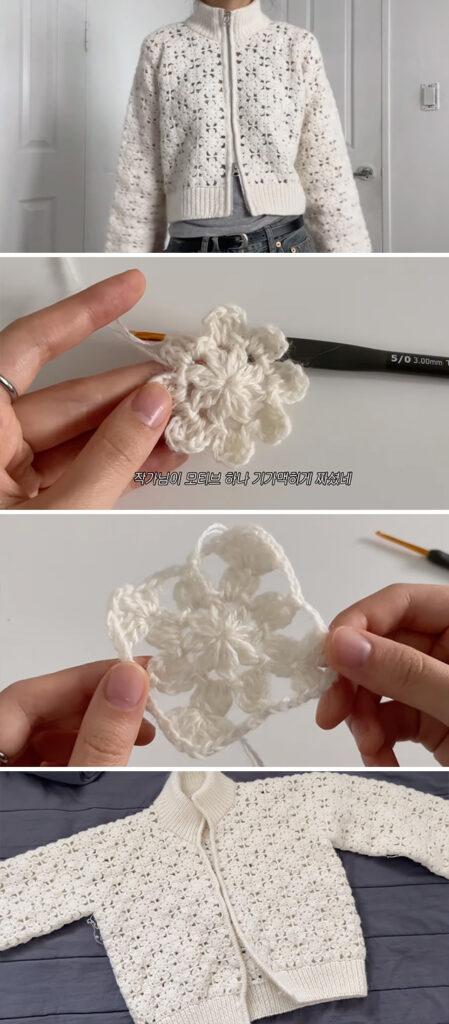
🧥 Part 2: Join Motifs to Form Cardigan
🧩 Assembly Layout:
- Front panels: ~2×4 squares each
- Back panel: ~4×4 squares
- Sleeves: ~2×6 squares folded and sewn
- Shoulder seams: Join top squares of front to back
- Underarm and side seams: Connect sleeve sides and body sides
🧶 Part 3: Ribbing (Collar, Hem, Cuffs)
Use a separate ribbing technique:
🧵 Ribbing Pattern:
- Ch 9, turn.
- Row 1: sc in 2nd ch from hook and each ch across (8 sc). Turn.
- Row 2: ch 1, sc in BLO across. Turn.
- Repeat Row 2 to length needed.
- Sew/Slip Stitch the ribbing to:
- Bottom hem
- Sleeves
- Neckline (standing collar style, fold for thickness)
🔄 Part 4: Add the Zipper
- Block the cardigan to shape before adding zipper.
- Pin the zipper evenly along both front edges.
- Using matching thread or yarn, hand sew the zipper in place.
🧺 Final Steps:
- Weave in all ends
- Lightly steam block for smooth finish
- Optionally add a soft lining for comfort
✅ Tips:
- Use stitch markers to align squares properly during assembly.
- Customize sleeve or body length by adjusting the number of motifs.
- Crochet a gauge swatch before starting to ensure proper sizing.
Video tutorial : How to Crochet Fleur Cardigan