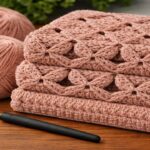
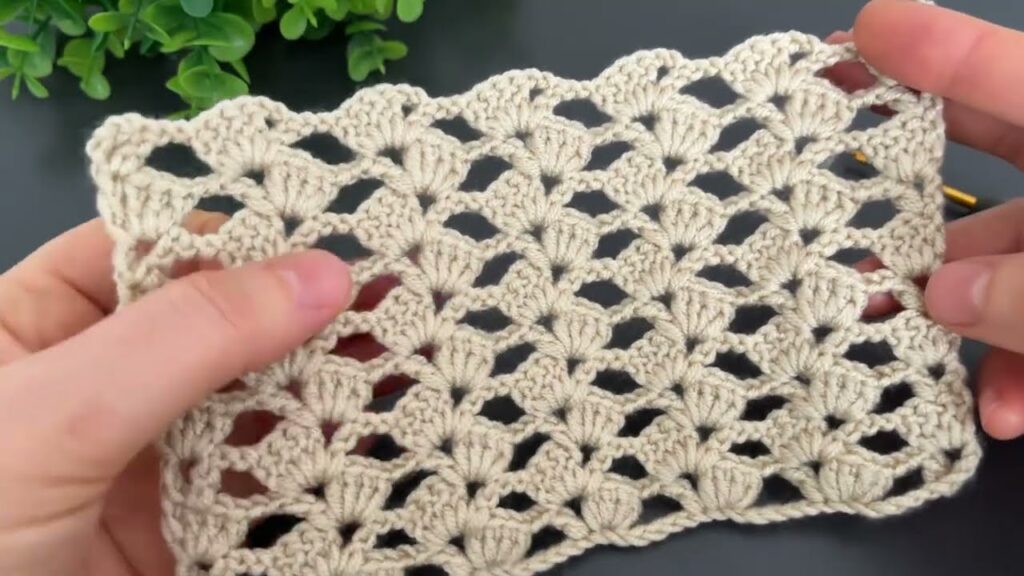
This is a crochet shell lattice stitch (open fan pattern). I’ll explain step-by-step so you can make it exactly like the picture.
🧶 BEFORE YOU START
✔ Use US terms:
- ch = chain
- sc = single crochet
- dc = double crochet
- sk = skip
✔ Pattern Multiple
Work in multiples of 6 + 2
Example sizes:
- Small sample → ch 20 (18 + 2)
- Medium sample → ch 26 (24 + 2)
- Larger → keep adding 6 chains
For this tutorial example:
👉 Chain 26

🔹 ROW 1 – Create the Chain Loops
- Sc in 2nd chain from hook.
- Ch 5.
- Skip 3 chains.
- Sc in next chain.
Repeat:
- ch 5
- skip 3
- sc in next
Continue across the row.
You will now see:
Small arches (loops) across the row.
Turn your work.
🔹 ROW 2 – Make the First Shells
You will now work inside the chain loops.
- Ch 3 (this counts as your first dc)
- Into the FIRST ch-5 space:
- Make 4 more dc
You now have 5 dc in the same space → This is your shell.
- Go to the next ch-5 space:
- Make 1 sc
- Go to next ch-5 space:
- Make 5 dc (shell)
Repeat:
- sc in next space
- 5 dc in next space
Continue across.
You should finish with a sc in the last space.
Turn.
You now see fans forming.
🔹 IMPORTANT – Finding the Center of the Shell
Each shell has 5 dc.
Count them:
1 – 2 – 3 – 4 – 5
The 3rd dc is the center.
This is where the next row will attach.
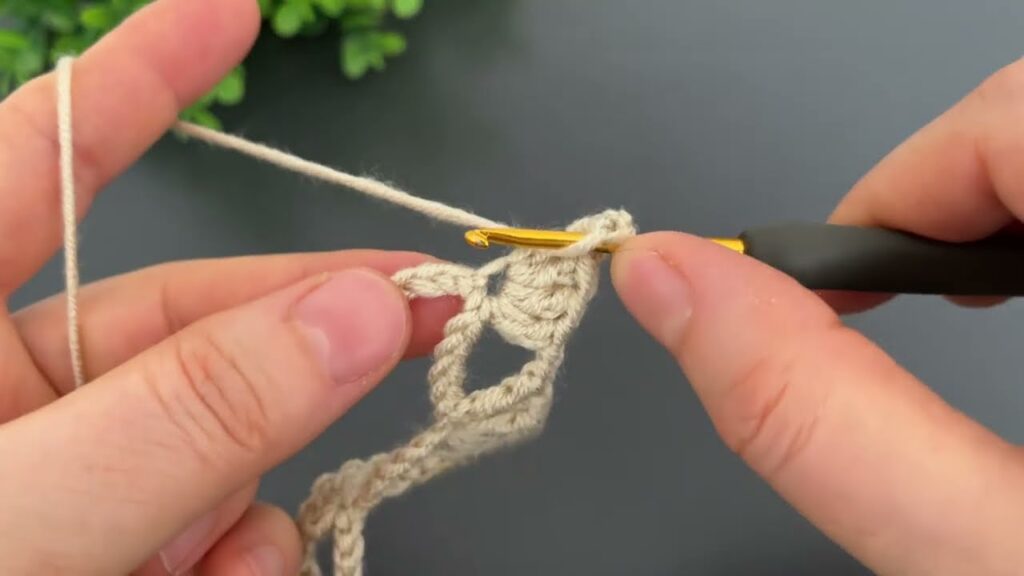
🔹 ROW 3 – Mesh / Chain Row
This row creates the open lattice.
- Ch 5.
- Insert hook into the CENTER dc (3rd dc) of next shell.
- Make 1 sc.
Repeat:
- ch 5
- sc in center dc of next shell
Continue across.
At the end:
After last sc, turn.
Now you see chain loops sitting on top of shells.
🔹 ROW 4 – Shells Again
Now we repeat the shell row.
- Ch 3.
- In first ch-5 space → make 4 more dc (total 5 dc).
- Sc in next ch-5 space.
- 5 dc in next ch-5 space.
Repeat across.
Turn.
🔁 REPEAT
From now on repeat:
Row 3 → chain loops
Row 4 → shells
That’s it!
The pattern builds like this:
Row 1 – loops
Row 2 – shells
Row 3 – loops
Row 4 – shells
Row 5 – loops
Row 6 – shells
And so on.
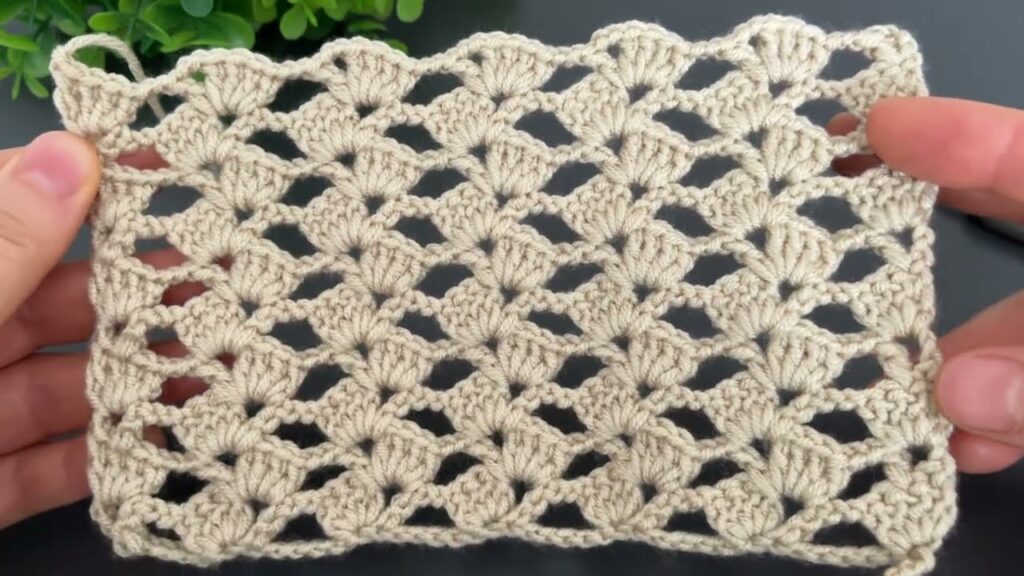
🌟 WHY THE DIAMOND SHAPE APPEARS
The effect happens because:
- Loops attach to center of shell
- Shells sit between loops
- Everything shifts slightly each row
This creates the soft diamond/lattice pattern.
📏 How To Keep Edges Straight
Very important:
- Always start shell rows with ch 3.
- Always end shell rows with sc.
- Do not add extra stitches.
- Count shells every row.
If edges are shrinking → you skipped a space.
If edges are widening → you added an extra shell.
✨ Optional Clean Top Edge (Like Photo)
After your last shell row:
Option 1 – Simple Edge:
- Ch 1
- Sc in each dc
- 2 sc in each ch-5 space
Option 2 – Scallop Edge:
- Skip 1 stitch, 5 dc in next stitch, skip 1, sc in next
- Repeat across
🧵 Common Beginner Mistakes
❌ Putting sc between dc instead of center dc
❌ Forgetting last sc
❌ Making 6 dc instead of 5 in shell
❌ Pulling chains too tight
Keep chains slightly loose so pattern opens nicely.