Crochet enthusiasts and beginners alike will find joy in crafting a chic and functional accessory: the crochet easy headband.
THE CROCHET EASY HEADBAND
Creating a crochet easy headband is a fulfilling project that combines creativity and practicality. Whether you’re new to crochet or a seasoned pro, this accessory is a must-try. With its stylish appearance and practical uses, it’s perfect for all seasons, whether keeping your ears warm in winter or simply elevating your look year-round. Follow along to discover everything you need to create your very own crochet easy headband, along with expert tips and tricks for a professional finish.
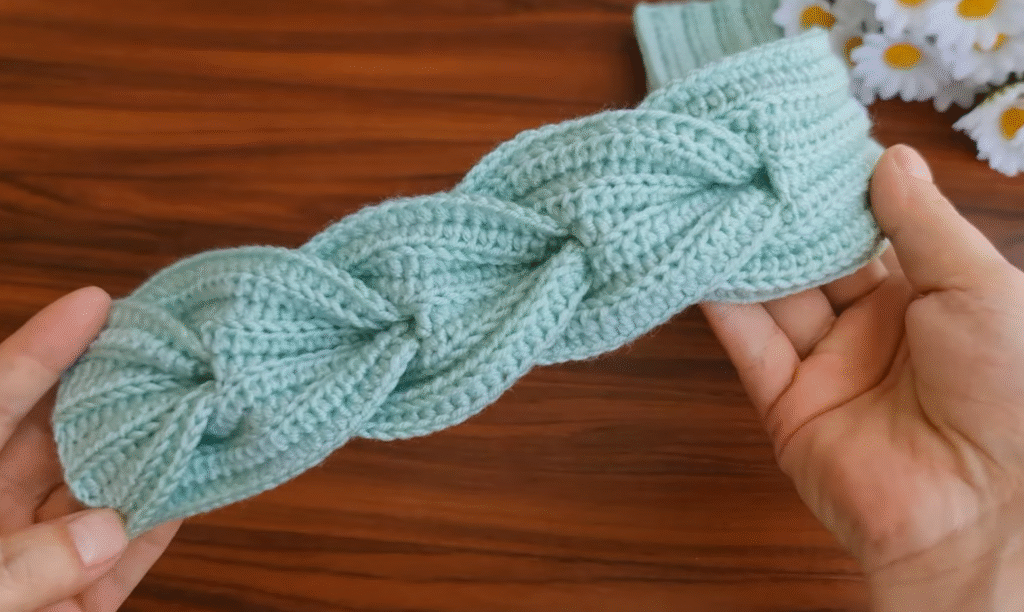
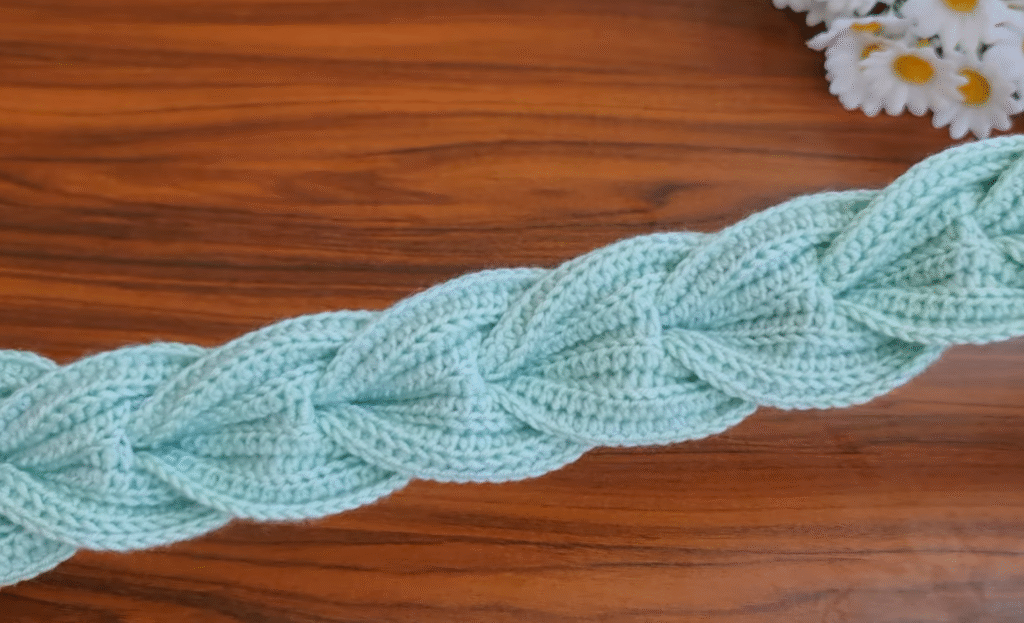
🧶 Braided Crochet Headband
✨ Supplies Needed:
- Worsted weight yarn (size 4) – about 50g
- Crochet hook – 5.0 mm (H-8) or size suitable for your yarn
- Yarn needle
- Scissors
- Measuring tape
🪡 Step-by-Step Instructions:
Step 1: Make the Crochet Strips (3 pieces)
You will crochet three identical strips. Each strip will later be braided together.
✅ Strip Pattern:
- Chain 61
(Adjust this for size. This makes a ~20″ strip. Make it longer if your yarn is less stretchy or for a larger head.) - Row 1:
HDC in the 2nd chain from the hook and in each chain across. (You will have 60 stitches)
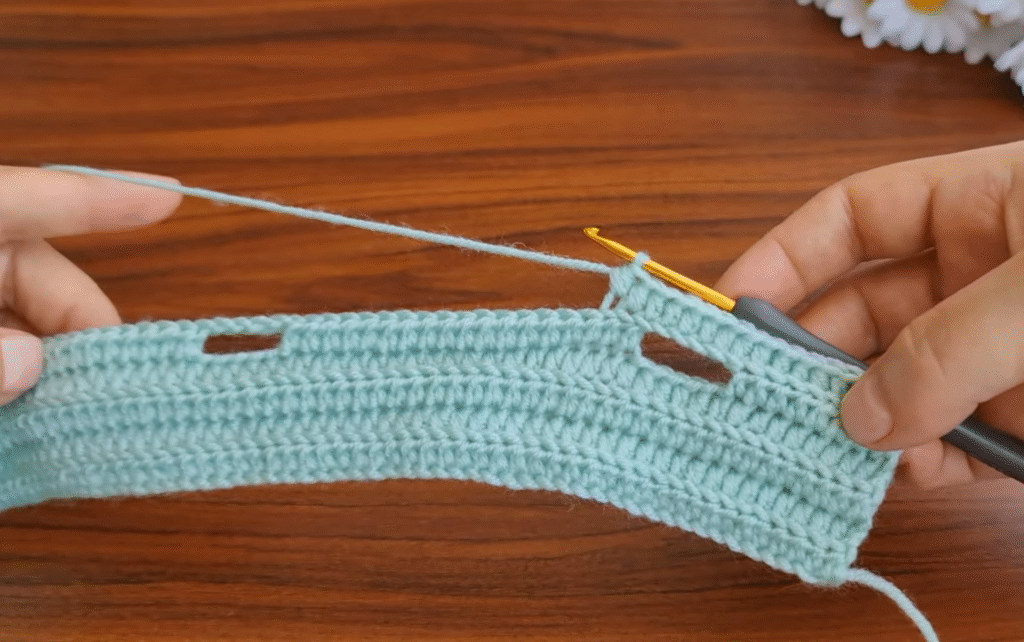
→ [HDC = Yarn over, insert hook, yarn over, pull up loop, yarn over, pull through all three loops] - Row 2:
CH 1, turn. HDC in back loops only across. (This creates the ribbed effect like in your photo.) - Rows 3–6:
Repeat Row 2 until your strip is about 1.5–2 inches wide. (You can adjust the number of rows for your preferred width.) - Fasten off and leave a long tail on the last strip for sewing later.
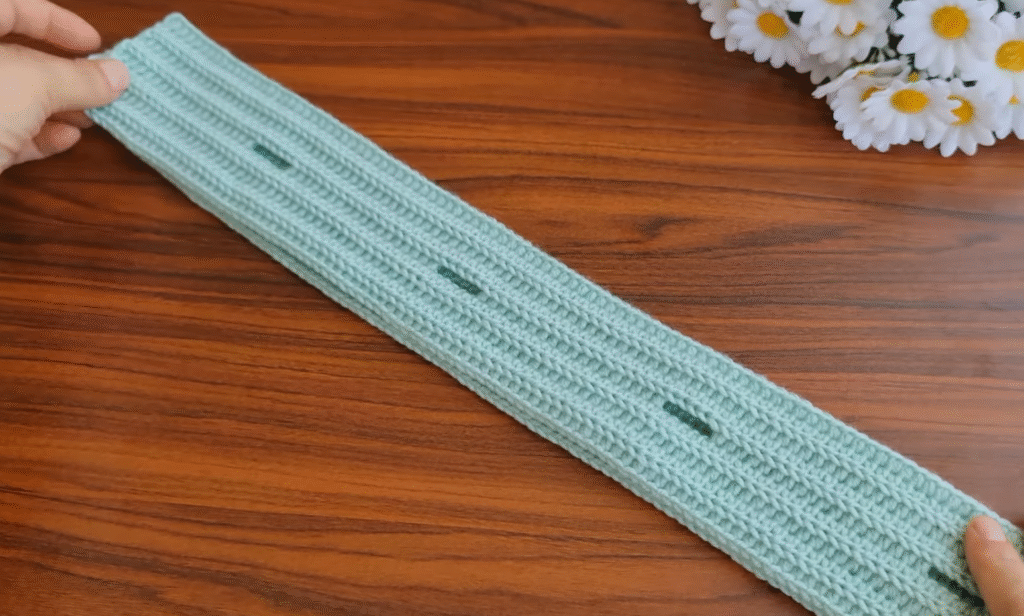
✅ Repeat this 3 times to make 3 identical ribbed strips.
Step 2: Sew One End of the Strips Together
- Place the three strips side by side.
- Use your yarn needle and a yarn tail to sew one short end of all three strips together.
- Secure tightly – this will be the starting point for braiding.
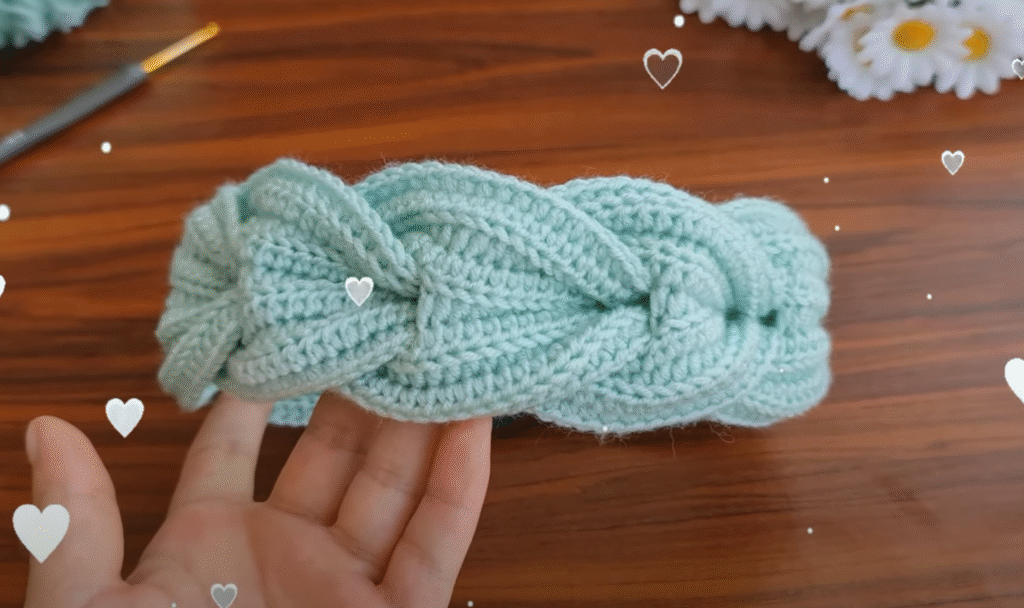
Step 3: Braid the Strips
- Braid the three strips just like you would braid hair.
- Keep the tension even but not tight, so the braid lays flat and isn’t too short.
- Once done, pin or clip the braid in place temporarily.
Step 4: Sew the Other Ends Together
- Line up the ends of the braid.
- Even out any bunching from the braid by gently pulling or loosening.
- Sew the three ends together tightly.
Step 5: Join the Headband Into a Circle
- Fold the braided piece so the two sewn ends meet.
- Use the yarn tail to sew the ends together securely.
- Fasten off and weave in all ends.
🔄 Optional Step: Add a Cover Band
To make the join cleaner and decorative, crochet a small rectangle (like a “belt”) to wrap around the seam.
Cover Band:
- CH 9
- HDC in 2nd CH and across (8 stitches)
- Repeat for 4–6 rows (depending on how thick you want the band)
- Wrap it around the join and sew the short edges together on the inside.
Video tutorial : Easy crochet headband tutorial