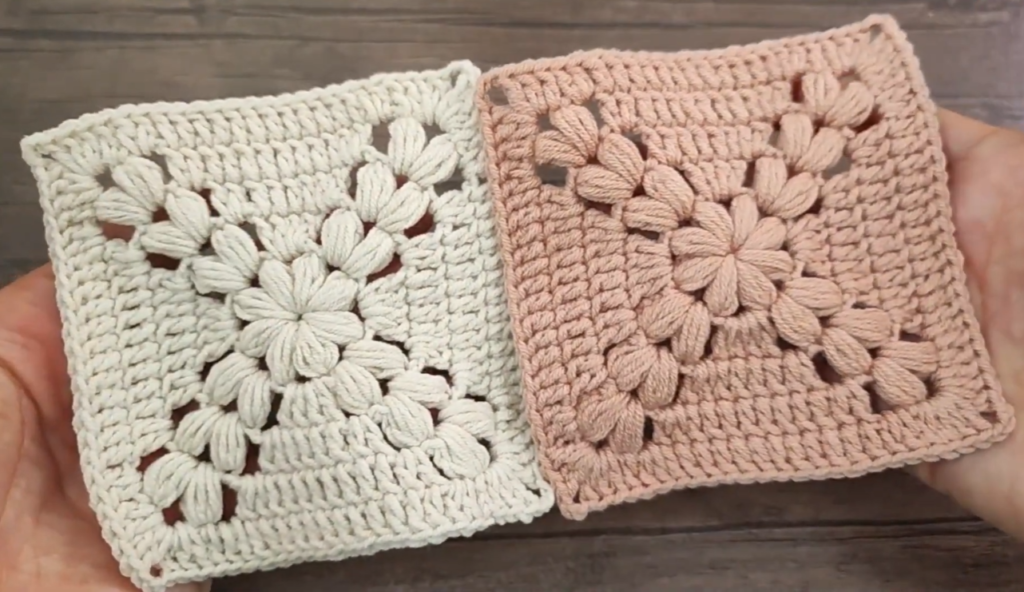
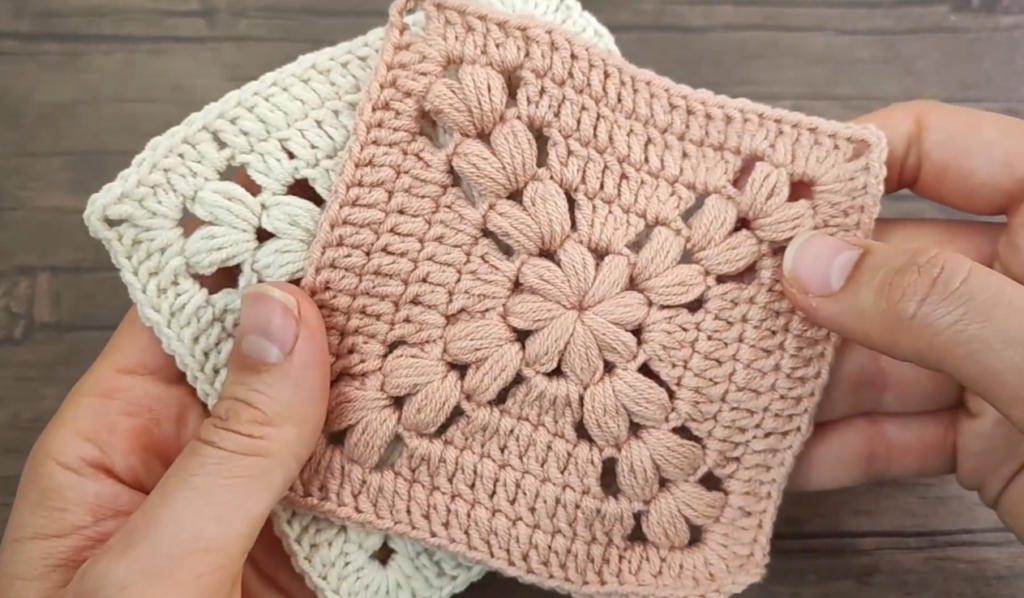
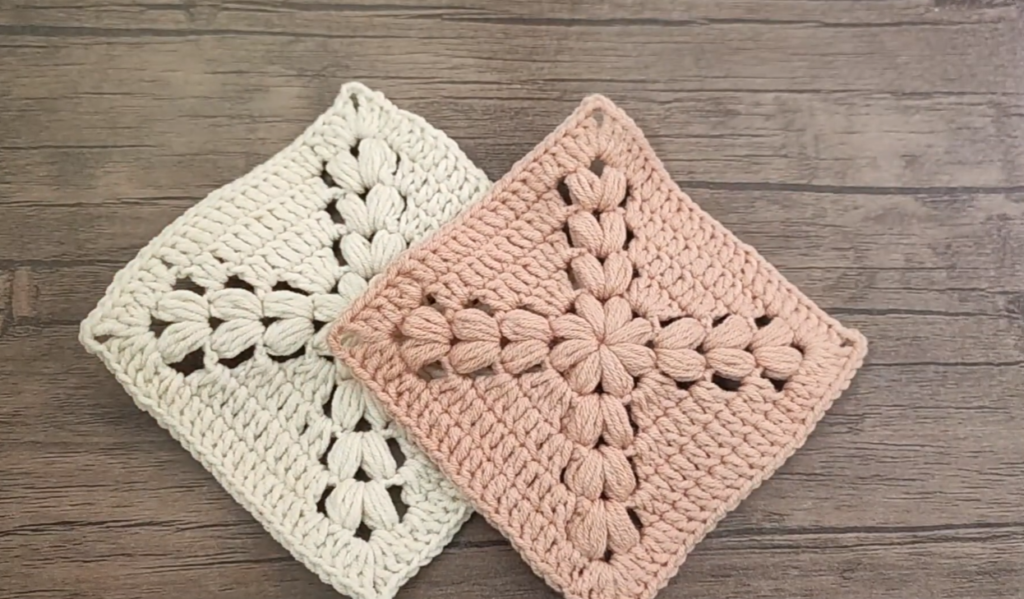
Today I wanted to share a tutorial of this quick and easy crochet granny square flower pattern. I have used this very square in several patterns, so it was high time for me to make a video and picture tutorial!
This square is so simple, and you can easily change the size of it by simply changing your yarn and hook size. If you’ve been following my blog, you know that I find this to be the easiest and quickest flower granny square out there.
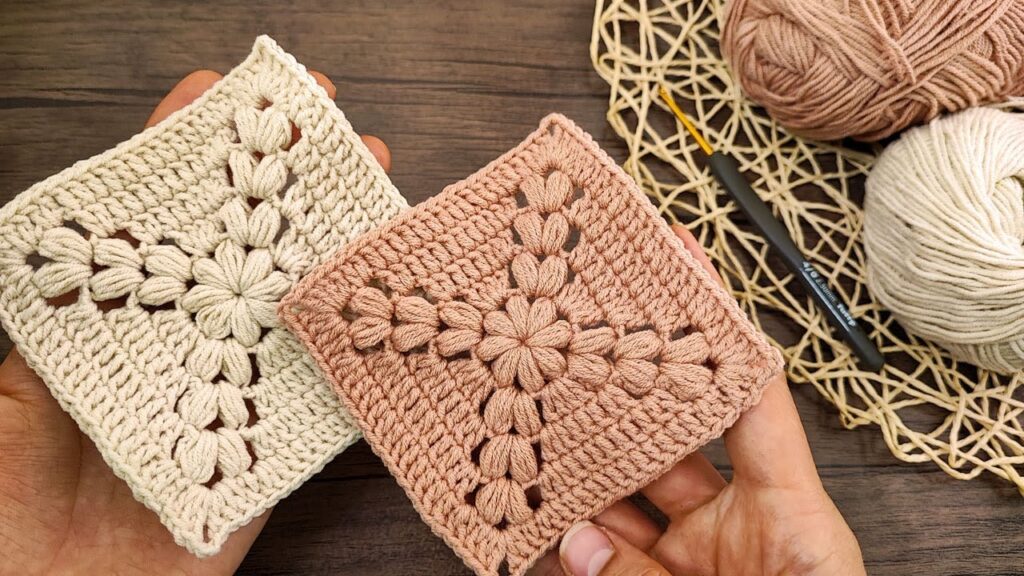
🌸 Crochet Granny Square Flower Pattern
Materials:
- Yarn: Worsted weight in two colors (e.g., a bright color for the petals and a contrasting color for the center)
- Hook: 4.0 mm (G) crochet hook (or size that gives you a similar gauge)
- Notions: Scissors, yarn needle
Abbreviations:
- ch = chain
- sl st = slip stitch
- sc = single crochet
- dc = double crochet
- tr = treble crochet
- st(s) = stitch(es)
- sp = space
Pattern Instructions:
Step 1: Create the Flower Center
- Magic Ring: With your contrasting center color (e.g., yellow), form a magic ring.
- Round 1: Ch 1 (this doesn’t count as a stitch) and work 12 sc into the ring.
- Join: Slip stitch into the first sc to close the ring. Fasten it off, leaving a long tail for sewing later.
Step 2: Make the Petals
- Attach Petal Color: Join your petal color yarn (e.g., white or any bright hue) into any stitch on the center.
- Petal Cluster: In that same stitch, work the following:
- Ch 3 (counts as your first DC).
- Work 2 tr into the same stitch, ch 3, then sl st back into the same stitch.
- This creates a petal cluster with an open center.
- Repeat: Skip the next center sc and attach another petal in the following sc. Continue around until you have 6 evenly spaced petals.
- Finish Petals: Join with a sl st at the base of the first petal. Fasten off if desired, or leave a tail for further seaming.
Step 3: Form the Granny Square
- Corner Clusters: Position your flower center in the middle of a working surface.
- First Corner: Using the petal bases as guides, begin at one of the petal spaces. Ch 3 (counts as 1 dc), work 2 dc into the same petal base, ch 2, then work 3 dc into that space. This creates a rounded corner.
- Edge Work: In the next petal space (or edge), ch 1, then work 3 dc evenly into the space.
- Repeat: Continue alternating between corner clusters (ch 3, 2 dc, ch 2, 3 dc) and straight edge sections (ch 1, 3 dc) around the square.
- Join: After you complete the round, join with a sl st into the first ch-3 of your round. Fasten off and weave in all ends.
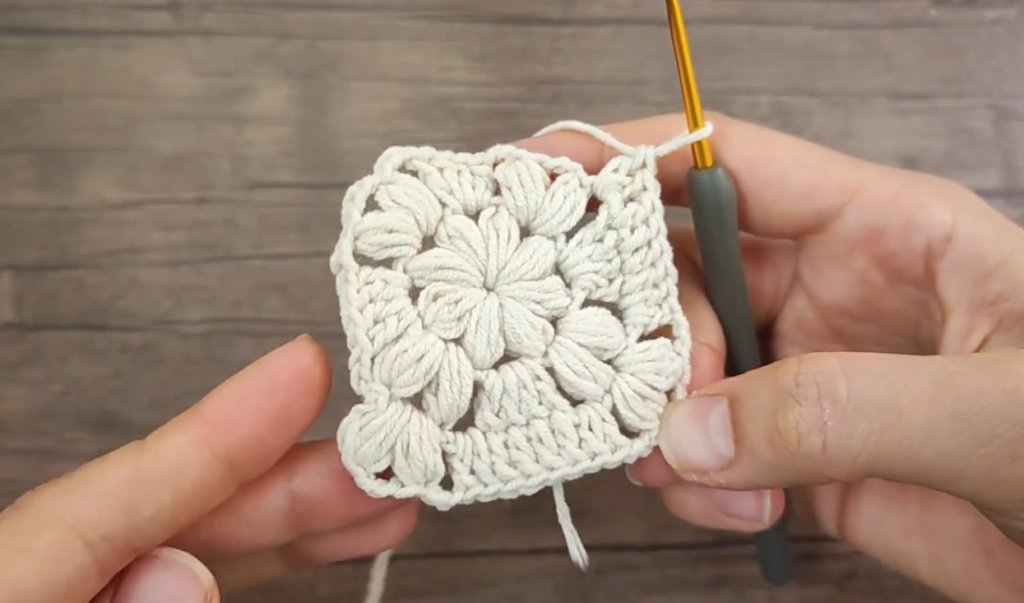
Step 4: Optional Edging Round
- If you’d like a polished finish, add one more round around the entire square.
- Edging: Sl st into the next stitch and work a round of sc (or picot edging for extra flair) evenly around the square.
- Finish: Join the round with a sl st, fasten off, and weave in any remaining tails.
Tips & Variations:
- Customize Colors: Mix and match colors to create a unique design.
- Yarn Choices: Worsted weight is great for a bold look, but you can experiment with DK weight for a lighter square.
- Scaling Up: To make a larger square, simply add additional rounds following the established increase pattern.
Enjoy incorporating this Flower Granny Square into your next crochet project! Happy crocheting!
Video Tutorial: Crochet Granny Square Flower Pattern Can You Make