The crochet technique shown in your image is the Tunisian Simple Stitch (TSS) — a classic Tunisian crochet method that creates a neat, woven-looking texture. Here’s how to make it step by step 👇
🧶 Materials You’ll Need
- Tunisian crochet hook (a long hook, or one with a cable—size suited for your yarn, usually one size larger than normal crochet)
- Yarn (medium-weight or any you like; smooth yarn helps you see the stitches)
- Scissors & yarn needle for finishing
🌼 Step 1: Make the Foundation Chain
- Make a slip knot and place it on your hook.
- Chain the number of stitches you want (for practice, chain 10–12). ➤ Example:
ch 12 - This chain forms the base of your work.
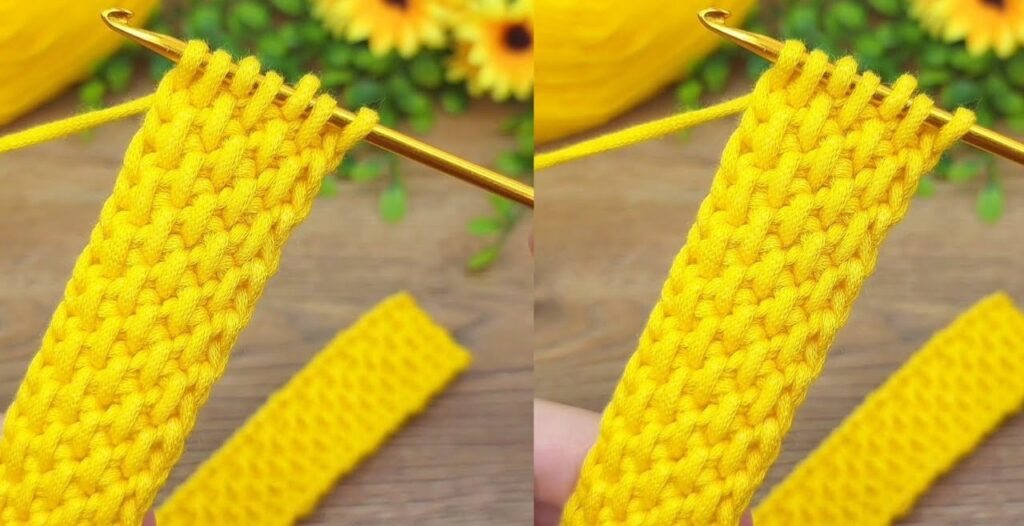
🌼 Step 2: Forward Pass (Picking up loops)
This is how you start forming the Tunisian stitches.
- Do NOT turn your work like in normal crochet. Keep the front facing you.
- Insert your hook into the second chain from the hook.
- Yarn over (yo) and pull up a loop — leave it on the hook.
- Insert your hook into the next chain, yarn over, pull up a loop, and keep it on the hook.
- Repeat across the row until you have one loop for each chain on your hook. ➤ Your hook will now hold several loops (as in the image).
Tip: Keep your loops even and not too tight — they should slide easily along the hook.
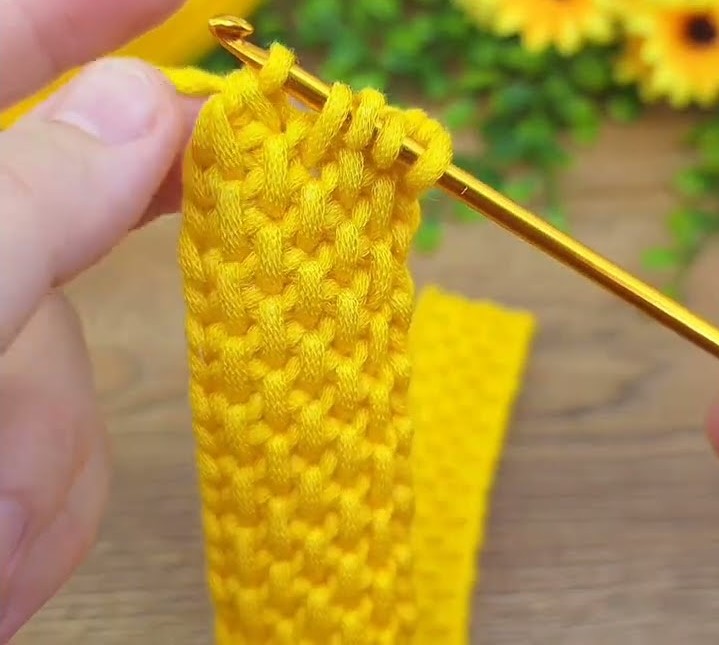
🌼 Step 3: Return Pass (Working back)
Now we’ll remove loops to complete the row.
- Yarn over and pull through 1 loop only.
(This creates the edge stitch.) - Then yarn over and pull through 2 loops on the hook.
- Repeat this — yarn over, pull through 2 loops — until just one loop remains on your hook.
This completes your first Tunisian crochet row.
🌼 Step 4: Tunisian Simple Stitch (TSS) Row
Now for the main pattern stitch.
Forward Pass:
- Look closely — you’ll see vertical bars across your row.
- Insert your hook under the front vertical bar of the next stitch (not under both sides, just the front).
- Yarn over, pull up a loop, and leave it on the hook.
- Continue across the row: insert hook under each front vertical bar, yarn over, pull up a loop. ➤ When finished, your hook will again hold one loop for each stitch.
Return Pass:
- Yarn over, pull through 1 loop (edge stitch).
- Yarn over, pull through 2 loops repeatedly until one loop remains.
That’s one full row of Tunisian Simple Stitch!

🌼 Step 5: Repeat Rows
Keep repeating:
- Forward Pass: pick up loops under front bars
- Return Pass: yarn over, pull through 1, then 2 loops across
Continue until your work reaches the desired length.
🌼 Step 6: Bind Off (Finish Neatly)
To finish the edge smoothly:
- Insert your hook under the next front vertical bar.
- Yarn over and pull through both loops on the hook (like a slip stitch).
- Repeat this across the row.
- Cut the yarn and pull it through the last loop to fasten off.
- Weave in your ends.
🌸 Optional: Prevent Curling
Tunisian crochet tends to curl at the bottom. You can:
- Use a larger hook size
- Add a border (like single crochet around)
- Block the piece gently with steam or a damp towel
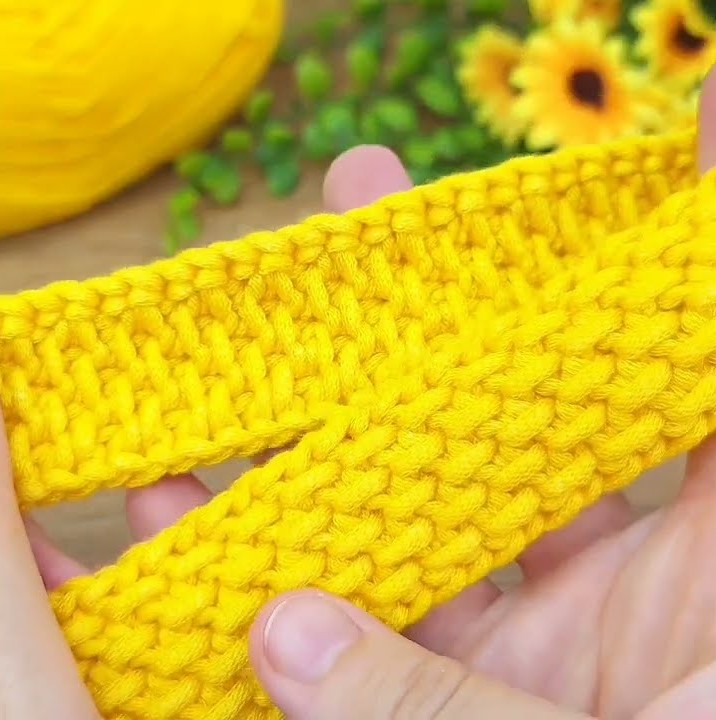
🪡 Texture Notes
- The front side looks like tiny “V” shapes (like knitting).
- The back side shows horizontal bars.
- This stitch is thick and firm — great for straps, belts, bags, or headbands.