Absolutely — here is an even step-by-step Jasmine Stitch tutorial, explained clearly so you can follow every movement.
🌸 JASMINE STITCH – SUPER DETAILED ENGLISH INSTRUCTIONS
This version includes:
✔ How to hold yarn
✔ How tall the loops should be
✔ Exactly where to insert the hook
✔ Every pull-up loop explained
✔ How to keep stars aligned

🔹 BEFORE YOU START
- Jasmine Stitch is made of puff petals.
- Each petal is made by pulling up 3 tall loops (so it looks fluffy).
- Each star = 3 petals joined together.
⭐ STEP 1 — FOUNDATION CHAIN
- Make a slip knot.
- Chain (ch) an even number (example: 20)
- A longer chain = a wider project.
👉 You will not use one stitch per chain — Jasmine stitch spreads out.
⭐ STEP 2 — FIRST PETAL (VERY DETAILED)
Insert location:
You will insert into the 2nd chain from the hook.
How to make the first petal:
- YO (yarn over)
- Insert hook into 2nd chain
- Pull up a very tall loop
- Loop height should be about 1.5 cm (same height every time).
- You now have 3 loops on your hook.
- YO
- Insert hook into the same chain
- Pull up another tall loop
- Now you have 5 loops.
- YO
- Insert hook into the same chain
- Pull up another tall loop
- Now you have 7 loops.
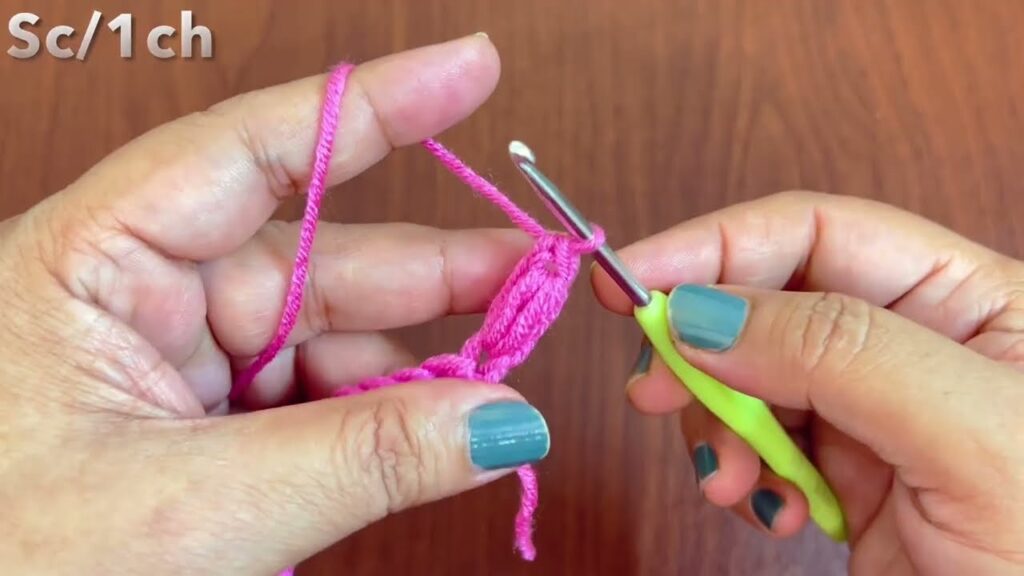
Closing the petal:
- YO
- Pull yarn through all 7 loops at once
- Chain 1 (this “locks” the petal)
✔ You just made Petal 1.
⭐ STEP 3 — SECOND PETAL (Attached to the first one)
This petal uses:
- 1 loop from same stitch
- 1 loop from next chain
- 1 loop from next chain again
Start:
- YO
- Insert hook into the same chain where the first petal was made
- Pull up a tall loop (3 loops on hook)
Second loop:
- YO
- Insert into the next chain
- Pull up a tall loop (5 loops on hook)
Third loop:
- YO
- Insert into the next chain
- Pull up a tall loop (7 loops)
Close:
- YO → pull through all 7 loops
- ch 1 to lock
✔ Petal 2 complete.
⭐ STEP 4 — THIRD PETAL (Completing Your First Star)
- YO
- Insert into the same chain where petal 2 ended
- Pull up tall loop (3 loops)
- YO → insert into next chain
- Pull up tall loop (5 loops)
- YO → insert into next chain
- Pull up tall loop (7 loops)
- YO → pull through all
- ch 1 to lock
✔ Petal 3 complete
✔ Now you have one full star.
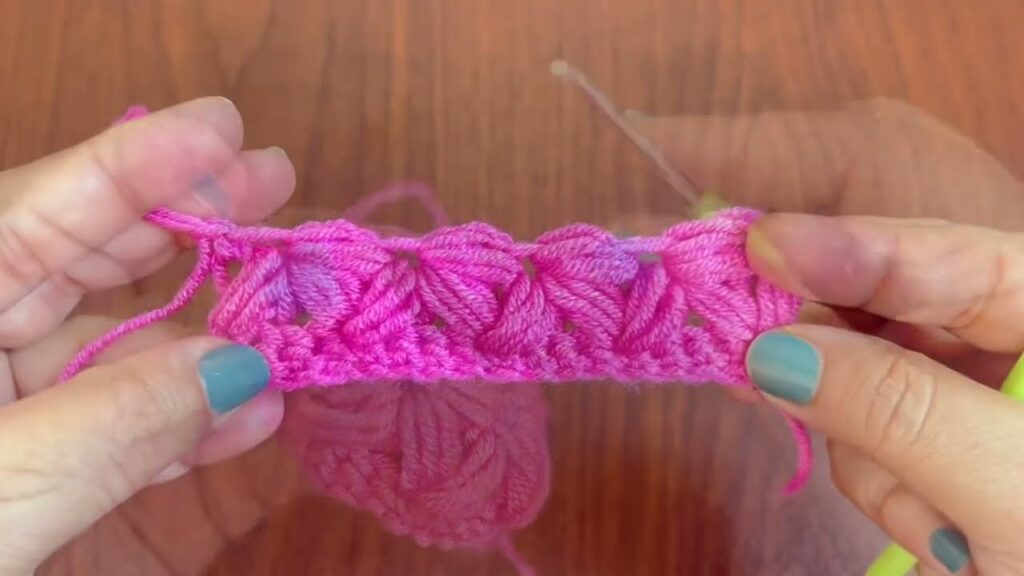
⭐ STEP 5 — CONTINUE ACROSS THE ROW
Repeat Step 4 (three half-petals to form a star) until you reach the end of your chain.
Your first row now looks like a row of flowers.
⭐ STEP 6 — START ROW 2 (Turning Row)
This row is worked between petals, not into stitches.
Turn your work.
First petal of Row 2:
- Insert hook into the space between 2 petals from Row 1
- YO → pull up tall loop (3 loops)
- YO → insert again into same space → pull up loop (5 loops)
- YO → insert again into same space → pull up loop (7 loops)
- YO → pull through all
- ch 1
✔ First petal for Row 2 made.
⭐ STEP 7 — SECOND PETAL OF ROW 2
- YO
- Insert into same space
- Pull up loop (3 loops)
- YO → insert into next space
- Pull up loop (5 loops)
- YO → insert into next space
- Pull up loop (7 loops)
- YO → pull through all
- ch 1
✔ Second petal for the row made.
⭐ STEP 8 — THIRD PETAL OF ROW 2 (Completing second-row star)
Repeat the same process:
- 1 loop in same space
- 1 loop in next space
- 1 loop in next space
- Pull through all → ch 1
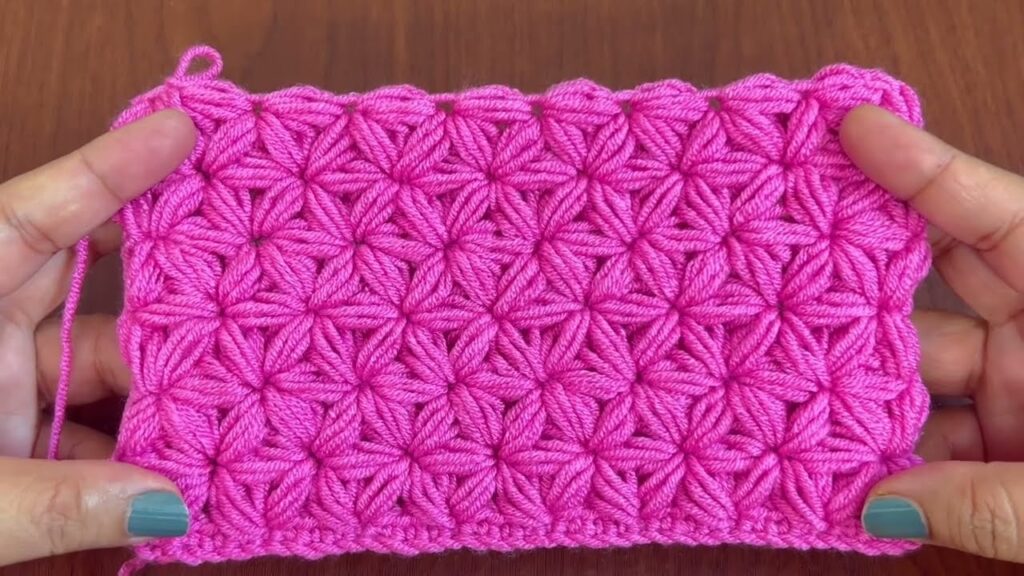
✔ One star of Row 2 completed.
Continue across the row.
⭐ IMPORTANT TIPS FOR BEAUTIFUL RESULT
✔ Keep all loops the same height
This is the most important part of Jasmine Stitch.
Uneven loops = uneven petals.
✔ Keep tension loose
If you crochet tightly, it becomes very hard to pull the hook through 7 loops.
✔ Use a slightly larger hook
It helps the loops puff out nicely.

