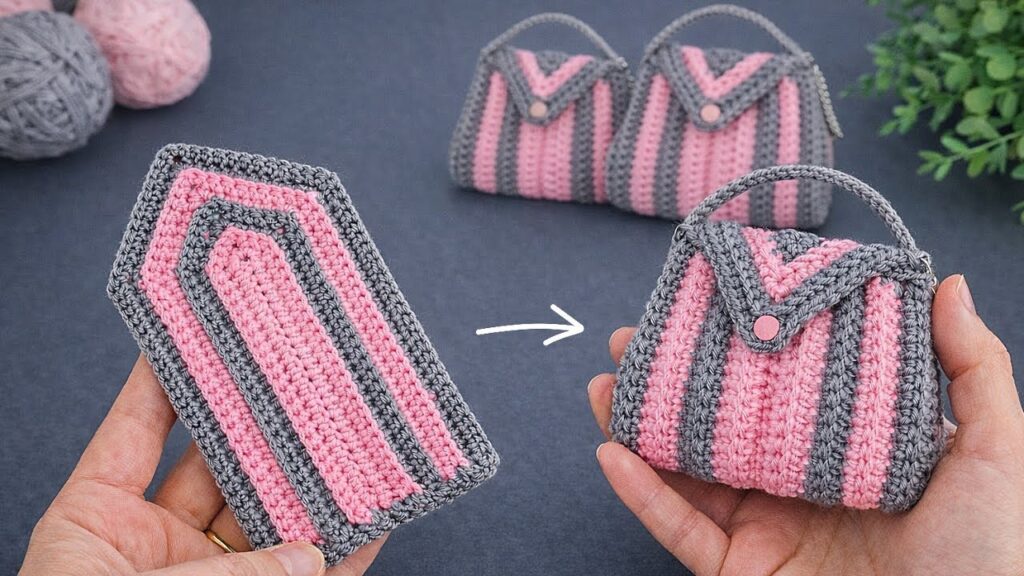
Here is a step-by-step tutorial to make this crochet mini purse from one long piece (like in your picture).
🧶 Crochet Mini Purse — Full Detailed Pattern
✅ Finished Size
- Width: about 12–14 cm
- Height: about 9–10 cm
- Made from one long crochet piece, then folded.
🪡 Materials
- Cotton yarn (Color A = pink, Color B = gray)
- Hook: 3.0–3.5 mm
- Needle
- Button or magnetic snap
- Scissors
- Stitch marker
📚 Stitches (US Terms)
- ch = chain
- sc = single crochet
- inc = 2 sc in same stitch
- sl st = slip stitch
- BLO = back loop only
- sc2tog = single crochet decrease
⭐ PART 1 — MAKE THE LONG BODY PANEL
This is the most important part.
Row 1 (Foundation Oval)
- Chain 21.
- Start in 2nd chain from hook.
- Make 19 sc.
- In last chain make 3 sc (turning corner).
- Work along opposite side of chain:
- 19 sc
- In last stitch make 3 sc.
✅ Stitch count = 44 stitches
Place marker — you will now work in rounds.
Round 2
- 1 sc in each stitch around.
- In the 3 corner stitches:
- middle stitch → make 2 sc.
(Helps oval grow smoothly.)
Round 3–6
- sc in each stitch around.
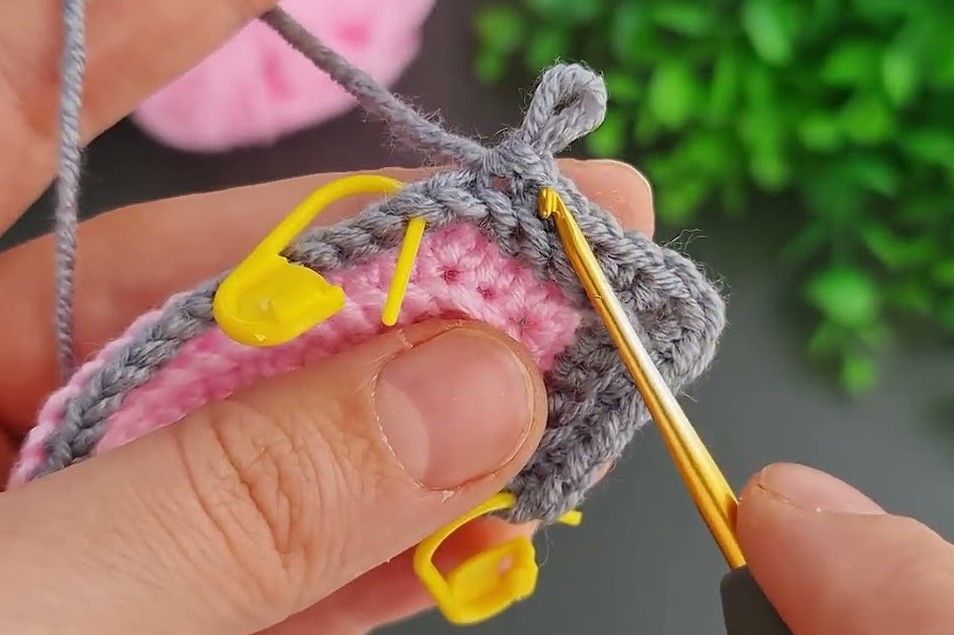
- Change to Color B at Round 4.
- Work BLO to create ridge texture.
You now see stripe lines forming.
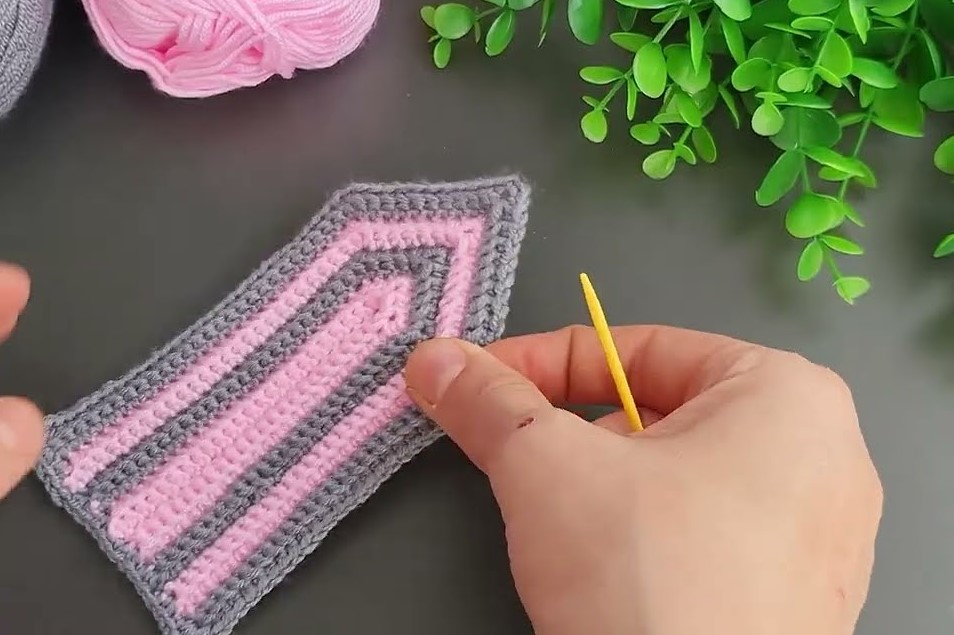
Color Pattern (example)
You can follow this to match photo:
- 3 rounds pink
- 2 rounds gray
- 3 rounds pink
- 2 rounds gray
- repeat
Always change color on last yarn-over of previous stitch.
Continue Length
Keep crocheting rounds until piece measures:
👉 24–26 cm long
It must look like a long rounded rectangle.
Usually about 26–30 rounds total.
⭐ PART 2 — SHAPE THE PURSE
Lay piece flat on table.
You will notice:
- One end = rounded
- Other end = rounded
Folding
- Place piece vertically.
- Fold bottom upward.
Measurements:
- Bottom section (bag body): 9–10 cm
- Middle section: inside space
- Top section left = flap
The flap should be slightly shorter than body.
Adjust fold until shape looks like purse.
⭐ PART 3 — CLOSE SIDES
Method 1 (Crochet Join — Stronger)
- Insert hook through both layers.
- Make sc evenly down the side.
- Work slowly so edges align.
Repeat on other side.
Important Tip
Do NOT crochet too tight or bag will wrinkle.
⭐ PART 4 — CREATE THE FLAP SHAPE
Now shape the pointed top.
Attach yarn at flap edge.
Row 1:
- sc evenly across flap edge.
Row 2:
- sc until 2 stitches before center
- sc2tog
- sc center stitch
- sc2tog
- sc to end
Row 3–5:
Repeat decreases each row.
You will see a V / triangle flap forming.
Stop when point looks nice.
⭐ PART 5 — BORDER (VERY IMPORTANT)
Crochet 1 round sc around entire flap and bag opening.
At corners:
- make 2 sc in one stitch.
This makes edges clean and firm.
⭐ PART 6 — HANDLE
Attach yarn at side top.
- ch 30
- Turn.
- sl st or sc back across chain.
- Sew firmly to opposite side.
⭐ PART 7 — BUTTON STRAP
- ch 7
- Turn, 6 sc back.
- sl st around edges.
- Sew one end under flap center.
Sew button onto bag front.
⭐ PART 8 — FINAL SHAPING
- Hide yarn ends inside.
- Steam lightly or shape by hand.
- Optional: add fabric lining.
💡 PRO SECRET (Why this bag looks neat)
✔ Tight stitches
✔ Cotton yarn
✔ BLO rows create vertical texture
✔ Oval start prevents bulky corners