That’s a crochet mitered granny square pattern, sometimes called a “corner-to-corner granny square.” It creates a modern diagonal design by combining solid and open granny stitches. Here’s how to make it step-by-step 👇
🧶 Crochet Mitered Granny Square (Detailed Tutorial)
🪡 What You Need
- Yarn: 2 colors (Color A = White, Color B = Beige or Taupe)
- Hook: 4.0 mm (or size suitable for your yarn)
- Other: Scissors, yarn needle

🌸 Pattern Overview
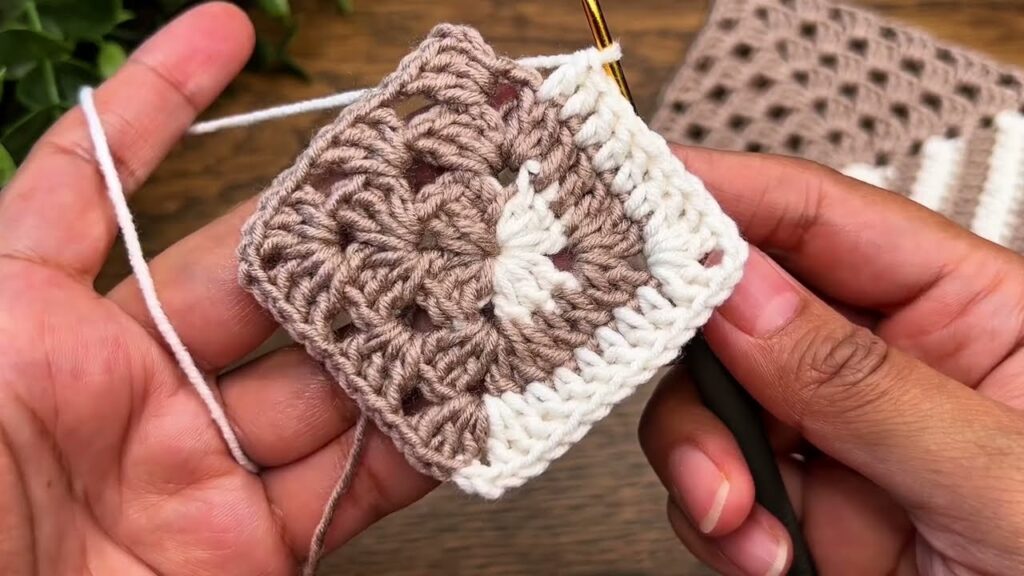
This square starts like a regular granny square but is worked half-and-half in alternating colors to form a “mitered” or “corner” effect. Each color covers two sides of the square, creating the diagonal look when joined together.
🔹 Step 1: Magic Ring & First Round
- With Color A, make a magic ring (or ch 4 and join to form a loop).
- Ch 3 (counts as first dc).
- Work into ring:
- 2 dc, ch 2
- 3 dc, ch 2
- 3 dc, ch 2
- 3 dc, ch 2
- Join with sl st to top of ch 3.
- Pull ring closed tightly.
👉 You now have 4 clusters (3 dc each) and 4 ch-2 corners. - Fasten off Color A.
🔹 Step 2: Second Round (Base Round)
- Attach Color B in any ch-2 corner space.
- Ch 3 (counts as dc), 2 dc, ch 2, 3 dc (corner made).
- Ch 1, 3 dc in next space between clusters, ch 1, (3 dc, ch 2, 3 dc) in next corner.
- Repeat from * to * around until you have 4 corners.
- Join with sl st to top of ch 3.
- Fasten off.
You now have a normal 2-round granny square base.
🔹 Step 3: Starting the Mitered Design
Now you’ll start building the diagonal color effect.
- Attach Color A to one of the corners.
- Ch 3 (counts as dc), 2 dc, ch 2, 3 dc (corner made).
- Ch 1, (3 dc, ch 1) in next space, continue across two sides of the square only.
- When you reach the second corner, complete (3 dc, ch 2, 3 dc).
- Stop there — do not go around all four sides.
- Fasten off Color A.
👉 You’ve worked a triangle across half the square.
🔹 Step 4: Add the Second Color Triangle
- Attach Color B at the corner opposite where you started Color A.
- Repeat the same process:
- (3 dc, ch 2, 3 dc) in corner,
- (ch 1, 3 dc) across two sides until you reach the first color section.
- Fasten off Color B.
Now you have two triangles, each in a different color, forming a diagonal split.
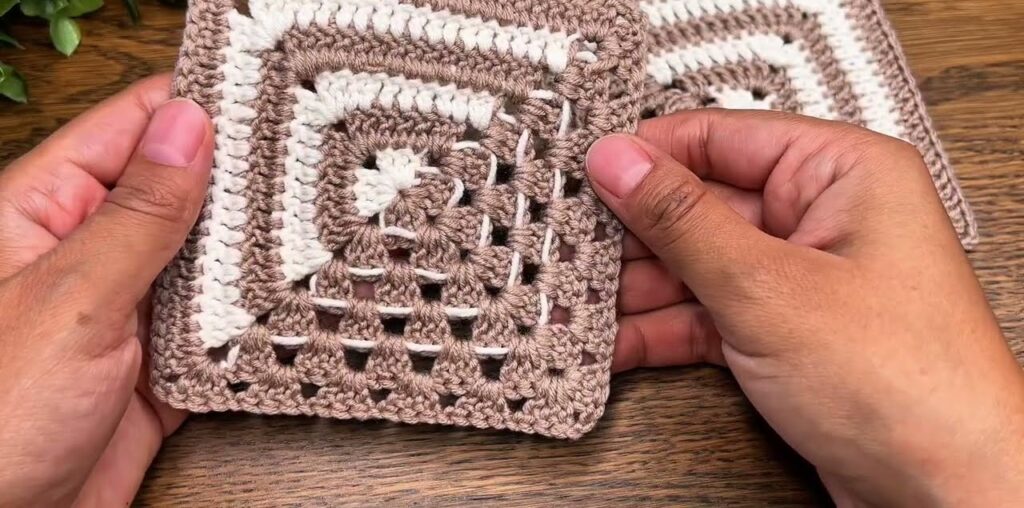
🔹 Step 5: Continue Growing the Square
Repeat alternating colors:
Round 5 (Color A):
- Attach Color A where the previous Color A ended.
- Work (3 dc, ch 2, 3 dc) in corner, (ch 1, 3 dc) across the edges you previously made with Color A.
- Stop when you meet the other color.
- Fasten off.
Round 6 (Color B):
Repeat the same steps on the other side with Color B.
Each round will add one new row of granny clusters along each side, building a bigger mitered square with alternating diagonal stripes.

🔹 Step 6: Continue Until Desired Size
You can keep going until your square reaches the size you want (e.g., 10 cm, 15 cm, etc.).
🔹 Step 7: Finishing
- Weave in all yarn tails with a yarn needle.
- Block the square gently (spray with water and pin to shape).
🔹 Step 8: Joining the Squares
When you join several squares together:
- Rotate every other square 180°, so the colors form diamond shapes, as seen in your image.
- Join with slip stitch, whip stitch, or join-as-you-go method.
💡 Optional Variation
If you want a solid mitered look (without holes):
- Replace (3 dc, ch 1) with (3 dc) only — no spaces.
- This creates a denser, warmer fabric (good for blankets or cushions).

