Here is a step-by-step crochet tutorial to make this 3D floral granny square like in your image 🌼🧶
(I’ll explain clearly so you can follow even without a written pattern.)
🌼 3D FLOWER GRANNY SQUARE – VERY DETAILED TUTORIAL
Yarn Colors (4 colors)
- Color A – Yellow (center + highlights)
- Color B – Dark brown (3D petals)
- Color C – Light gray (square base)
- Color D – Dark brown (final border)
- Small amount of white for decorative ties
Hook: 4.0 mm (adjust to yarn)

STITCHES USED (IMPORTANT)
- ch = chain
- sl st = slip stitch
- sc = single crochet
- dc = double crochet
- tr = treble crochet
- puff = puff stitch
- FPdc = front post double crochet
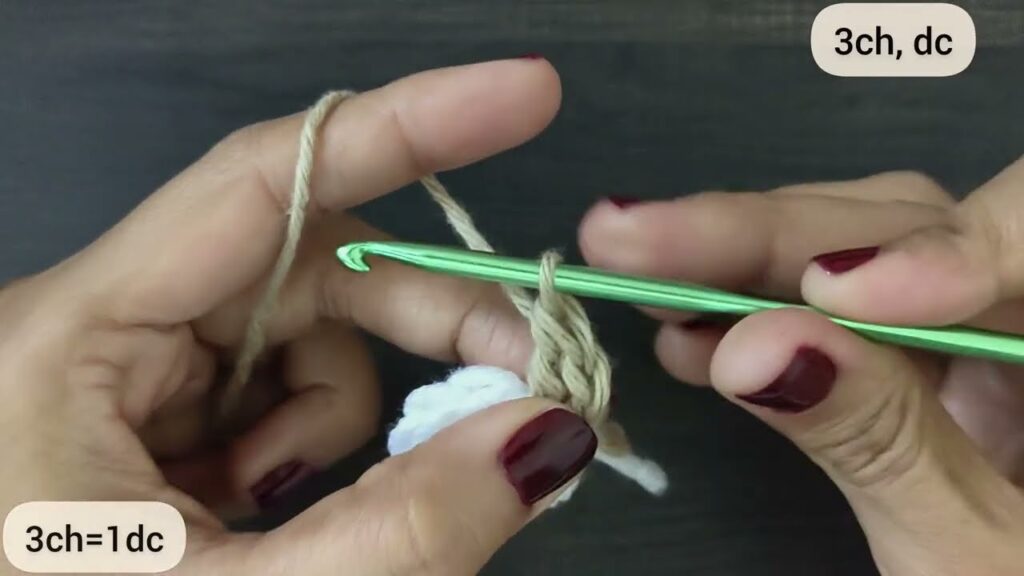
🔹 ROUND 1 – CENTER CIRCLE (Yellow)
- Make magic ring
- Ch 3 (counts as first dc)
- Crochet 11 dc into the ring
👉 total = 12 dc - Pull ring tight
- Sl st into top of ch-3
- Do NOT fasten off
📌 You now have a flat yellow circle
🔹 ROUND 2 – PUFF PETALS (Dark Brown)
👉 These are the big raised petals
- Change to dark brown
- Ch 2
- Puff stitch in same stitch
- Yarn over, insert hook
- Pull up loop (repeat 5 times)
- Yarn over, pull through all loops
- Ch 2 to close puff
- Skip 1 stitch
- Puff stitch in next stitch
- Repeat around
✔ You should have 6 puff petals
7. Sl st to first puff
8. Fasten off
📌 Push petals forward with fingers
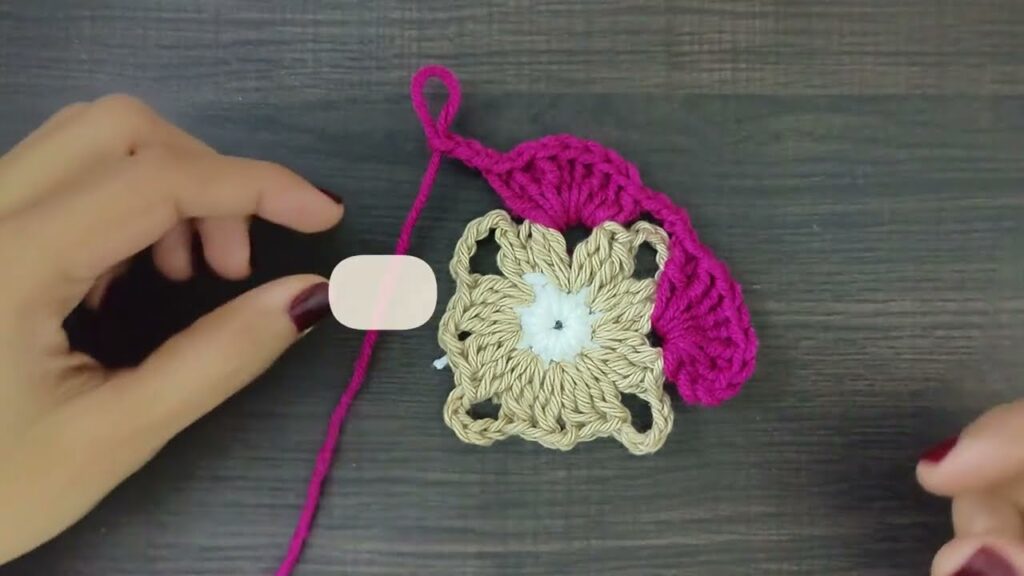
🔹 ROUND 3 – YELLOW PETAL FRAMES
👉 This creates the flower shape
- Attach yellow in space between two puff stitches
- In same space:
- Ch 3
- 2 tr
- Ch 3
- Sl st
➡️ This forms one pointed petal
- Repeat in every space between puffs
- Sl st to first petal
- Fasten off
📌 You now see a 3D flower
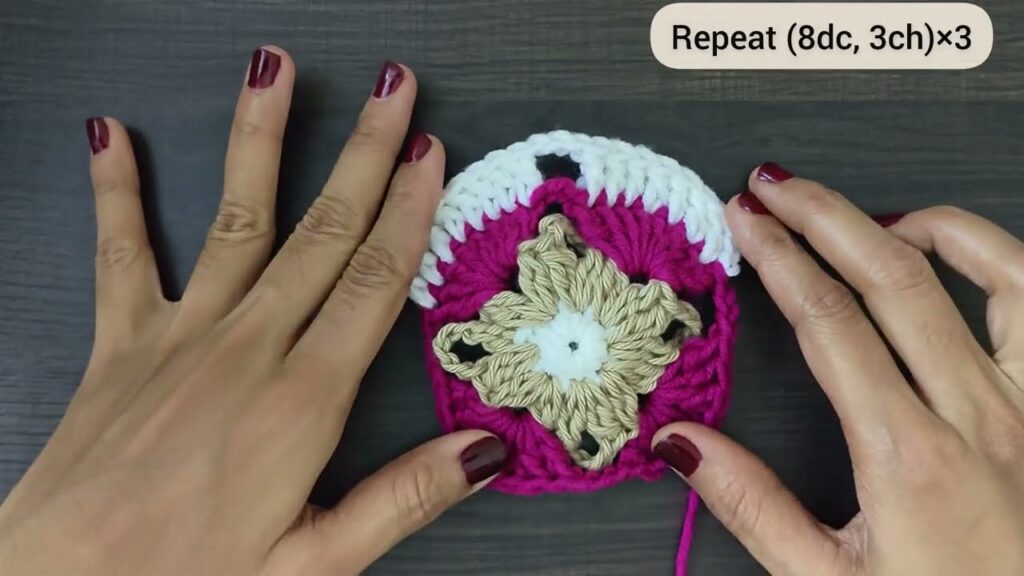
🔹 ROUND 4 – SQUARE BASE (Light Gray)
👉 This turns the flower into a square
- Attach light gray in any petal space
- Ch 3 (first dc)
SIDE STITCHES
- Work 3 dc into each petal space
CORNERS (VERY IMPORTANT)
In every 4th space, make:
- (3 dc, ch 2, 3 dc)
- Continue all around
- Sl st to close
- Do NOT fasten off
📌 You now have a square shape
🔹 ROUND 5 – WHITE DECORATIVE TIES
👉 These are the little white knots you see
- Attach white yarn
- (Ch 5, sl st) into next stitch
- Repeat in every stitch around
CORNERS
- Ch 5, sl st, ch 5 in corner space
- Sl st to finish
- Fasten off
📌 Do not pull tight — loops should be loose
🔹 ROUND 6 – TEXTURE POP (Yellow)
👉 Makes the square look thick & layered
- Attach yellow
- Work FPdc around each dc from Round 4
Corners
- (FPdc, ch 2, FPdc)
- Sl st to close
- Fasten off
📌 This round gives the raised frame look
🔹 ROUND 7 – FINAL BORDER (Dark Brown)
- Attach dark brown
- Sc evenly around
Corners
- (Sc, ch 2, sc)
- Sl st
- Fasten off
- Weave in all ends
🧩 JOINING THE SQUARES (Like Photo)
Make 9 squares
Best Joining Method:
- Place squares right side facing
- Join with single crochet join OR slip stitch join
- Match corner to corner carefully
💡 PRO TIPS
✔ Puff stitches = keep loops loose
✔ Block squares for perfect shape
✔ Use same yarn weight for clean look
✔ Push petals forward after Round 2

