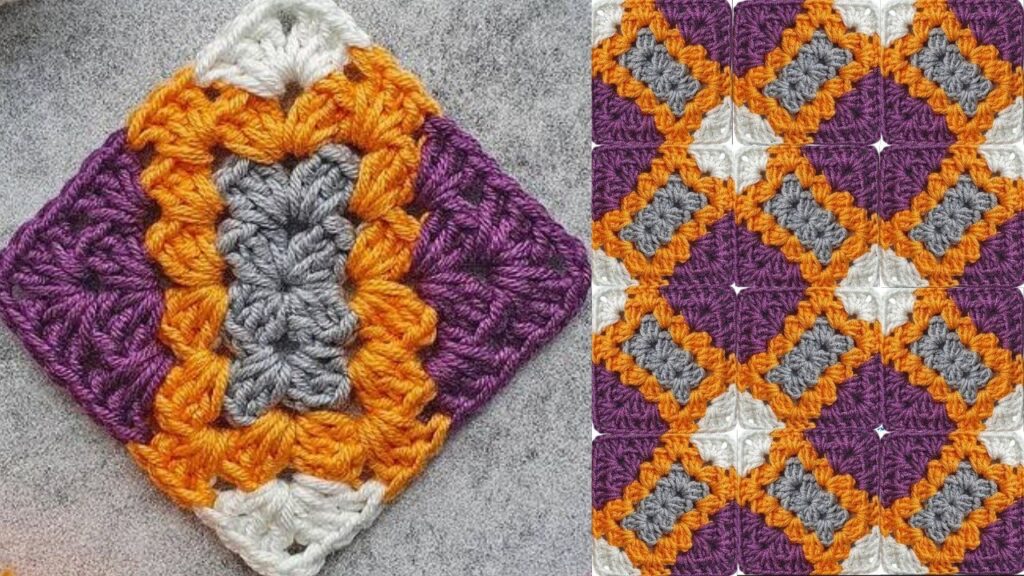
Perfect 😊 step-by-step instructions so you can follow easily — especially if you want your crochet square to look exactly like the one in the picture (gray center → orange → purple → white corners).
🧶 Crochet Pattern: Diamond Granny Square
✨ Finished look:
- Center: gray
- Middle frame: orange
- Side triangles: purple
- Corners: white
When joined together, the diamonds interlock beautifully.
🧰 You will need:
- 4 colors of medium weight yarn (Gray, Orange, Purple, White)
- 4 mm crochet hook (or size suitable for your yarn)
- Scissors
- Yarn needle
🔸 Step-by-Step Crochet Instructions
Round 1 — Center Rectangle (Gray)
- Make a slip knot, chain 9.
- Row 1:
- Work 1 dc in 4th chain from hook (2 dc so far counting the chain as 1).
- Make 1 dc in each of next 5 chains → total 8 dc.
- Chain 2, turn.
- Row 2:
- 1 dc in each dc across (8 dc total).
- Chain 2, turn.
- Row 3:
- 1 dc in each dc across again (8 dc).
- Fasten off and weave ends.
👉 You now have a small rectangle (gray center).
Round 2 — Orange Border
- Join orange yarn in any corner stitch.
- Along the short sides:
- Work (3 dc, ch 1, 3 dc) in each corner stitch.
- Along the long sides:
- Work (3 dc) evenly spaced along the edges.
- When you come back to the start, join with sl st to first dc.
- You should see a frame shape of orange around the gray rectangle.
👉 Corners are forming now — the orange round gives the diamond’s first outline.

Round 3 — Purple Corners
- Join purple yarn in one of the orange ch-1 corner spaces.
- (3 dc, ch 1, 3 dc) in that space → corner made.
- On each side, make 3 dc in the space between orange groups.
- Continue all around the square.
- Join with sl st. Fasten off.
👉 Now the purple fills in the diagonal corners and gives the square a diamond tilt.
Round 4 — White Corners
- Join white yarn in any corner ch-1 space (between purple stitches).
- (3 dc, ch 1, 3 dc) in that corner.
- (3 dc) in each side space between clusters.
- Continue around. Join with sl st and fasten off.
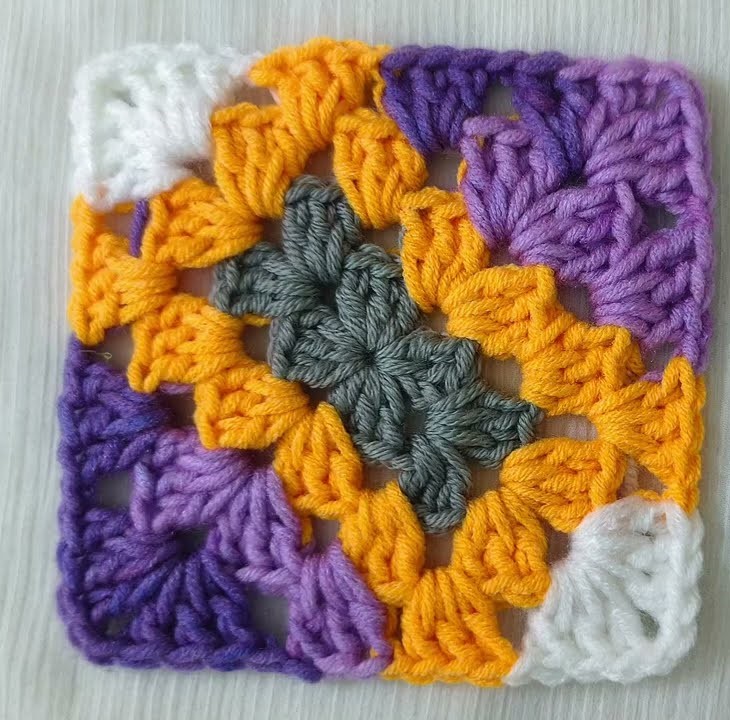
👉 You now have a finished diamond square motif.

🔹 Joining the Squares
To make the pattern seen in the photo:
- Rotate each motif so that the gray rectangle stands vertically.
- Arrange them so the white corners touch each other (forming little stars).
- Join with a whip stitch, slip stitch, or join-as-you-go method in white.
💡 Tips:
- Block your squares after finishing to make them flat and even.
- Use the same yarn thickness for all colors.
- Keep your tension even for clean diamond lines.
- To make a blanket: crochet many of these motifs and join as you go.

