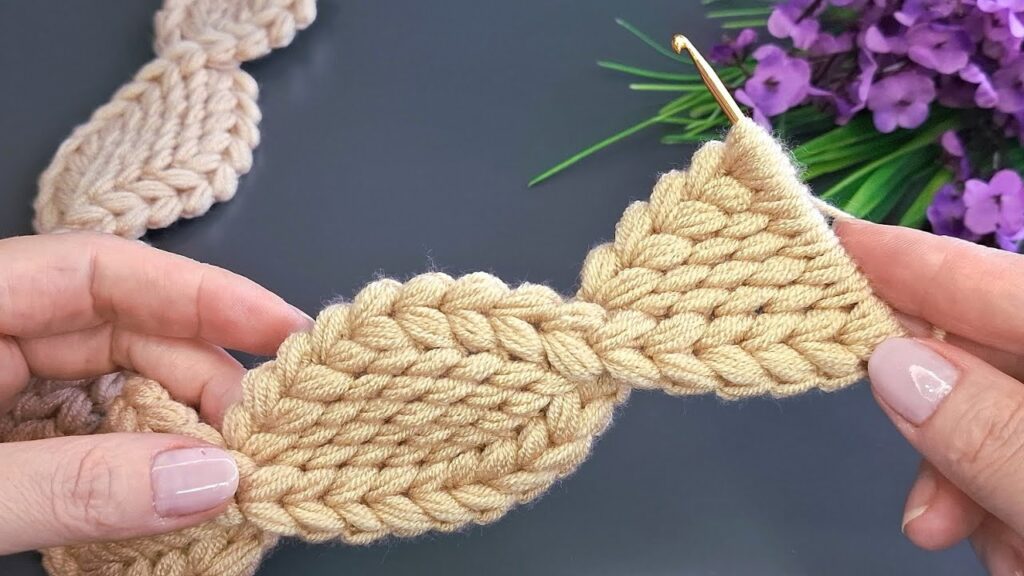
The crochet in your image is called a crochet leaf braid or twisted leaf stitch — it looks like interlocking leaves or twists, and it’s often used for scarves, headbands, belts, or decorative edges. 🌿
Here’s how to make it step-by-step:
🧶 Materials
- Yarn: Medium (Category 4) or light (Category 3) yarn.
- Hook: Size suitable for your yarn (4.0 mm – 5.0 mm works great).
- Scissors and tapestry needle for finishing.
🌿 Crochet Leaf Braid Step-by-Step Instructions
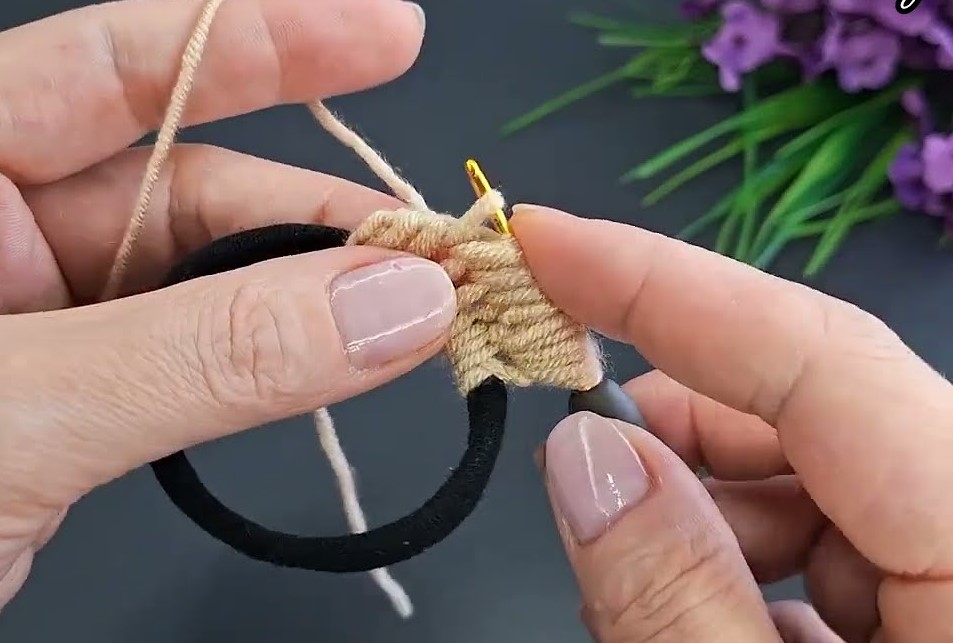
Step 1: Start the Foundation Chain
- Make a slip knot and chain 13 chains (this makes one full leaf).
- For more leaves, repeat in multiples of 13.
- Example: 13 = 1 leaf, 26 = 2 leaves, 39 = 3 leaves, etc.
Step 2: Form the First Half of the Leaf
We’ll crochet around the chain (both sides) to make an oval leaf shape.
- Yarn over, insert your hook into the 3rd chain from the hook.
- Make 1 half double crochet (hdc).
- Continue making 1 hdc in each chain until you reach the last chain.
→ You will have 11 hdc total (including the turning chain).
Now you’re at the tip of the leaf.
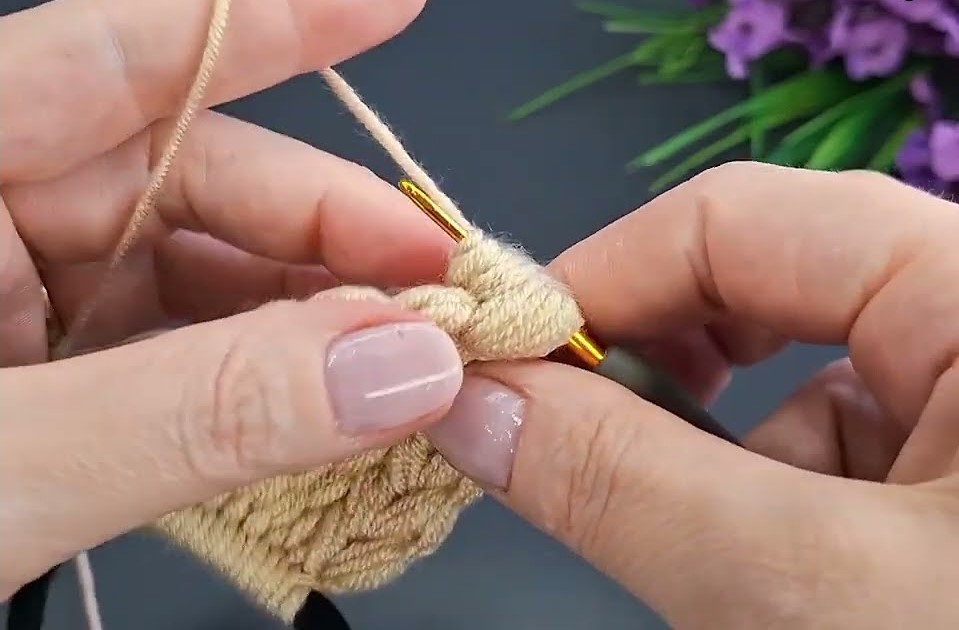
Step 3: Curve Around the Tip
- In the last chain, make 5 hdc in the same stitch — this forms the rounded tip of the leaf.
- Do not turn your work. Rotate your piece so you can work on the bottom loops of the foundation chain.
Step 4: Crochet Along the Other Side
- Work 1 hdc into each chain along the opposite side until you reach the beginning again.
- When you reach the start, make 1 slip stitch into the starting chain to close the leaf shape.
Step 5: Create the Twist and Start the Next Leaf
Now we connect and twist the leaves.
- Chain 13 again for the next leaf.
- Before starting to crochet into this new chain, slip stitch into the center or edge of the previous leaf to connect them.
This makes the “braid” or “twist” pattern. - Repeat Steps 2–4 to make the next leaf.
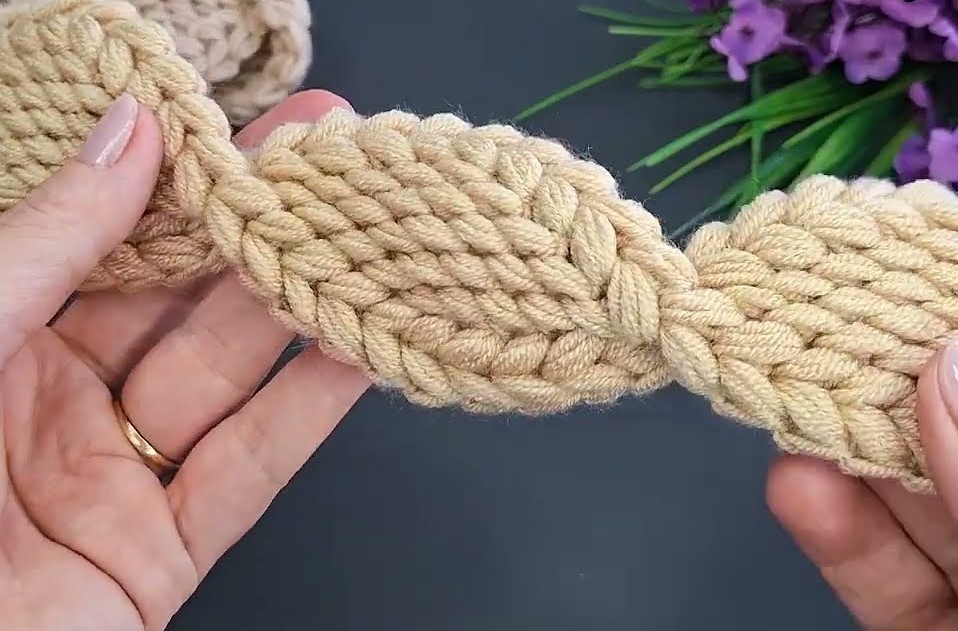
Each time, twist the new leaf slightly before connecting to the previous one — this creates the interlocking braid look you see in the image.
Step 6: Continue the Sequence
Keep repeating the process:
- Chain 13
- Crochet hdc along one side
- 5 hdc in tip
- hdc along other side
- Slip stitch to connect and twist
Step 7: Finishing
- When your leaf braid reaches the desired length, finish with a slip stitch at the last leaf’s base.
- Cut the yarn and pull through the loop.
- Weave in all ends with your tapestry needle.
🌼 Tips
- Use soft yarn with good stitch definition.
- You can block (steam or lightly iron with a cloth) the finished braid to make it flatter and more leaf-like.
- You can join multiple leaf braids side-by-side for scarves or belts.

