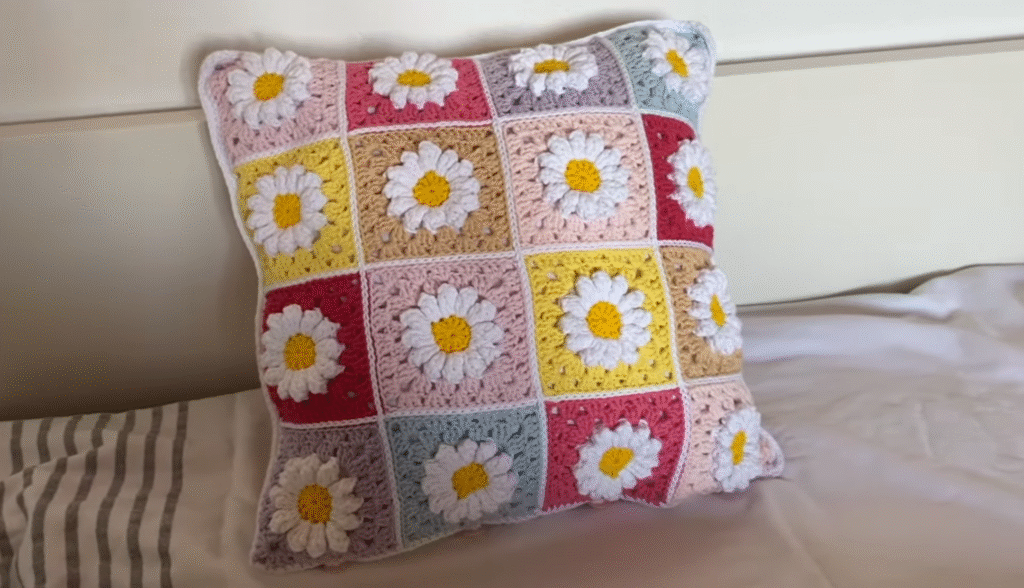
Crocheting a daisy pillow cover like the one in this image is a beautiful and cozy project! Here’s a complete guide to help you recreate it:

🌼 Daisy Granny Square Pillow Cover – Full Crochet Pattern
🧶 Supplies:
- Yarn: Cotton or acrylic (DK or worsted weight)
- Yellow (center)
- White (petals)
- Assorted pastel colors (backgrounds)
- White or matching yarn for joining
- Crochet hook: 4 mm (G-6) or suitable for your yarn
- Yarn needle, scissors
- Pillow insert (approx. 16×16” or 40×40 cm)
🧵 PART 1: Crochet One Daisy Granny Square
✅ Round 1: Flower Center (Yellow)
- Magic ring, ch 1.
- Work 12 sc into the ring.
- Pull the ring tight and sl st to the first sc.
- Fasten off yellow.
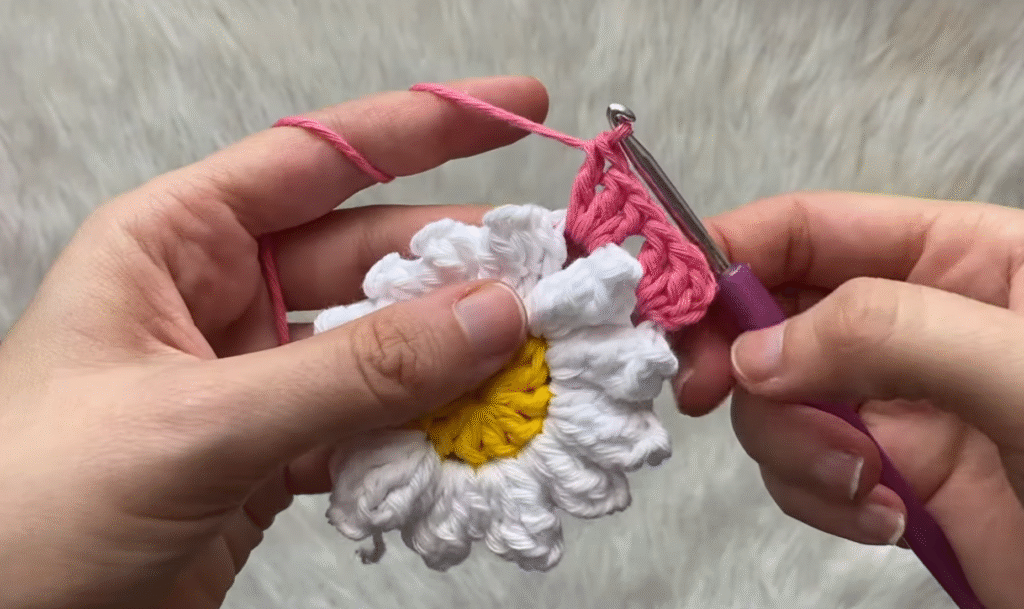
✅ Round 2: Petals (White)
- Join white in any stitch.
- [Ch 2, 3 dc in same stitch, ch 2, sl st in next stitch] – repeat around (you’ll get 6–8 petals).
- Sl st to base and fasten off.
📌 Tip: Petals are puffed or ruffled if you use 3 dc per petal stitch.
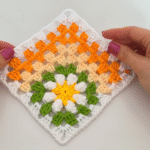
✅ Round 3: Join Background Color
- Join pastel background color in space between petals.
- In each space between petals: 3 dc
- In 4 corners: [3 dc, ch 2, 3 dc] (to form square corners)
- Complete the round with granny-style 3-dc clusters on each side.
- Sl st to close, fasten off.

🧶 Optional: Add one more granny round if you want bigger squares.
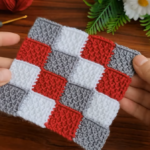
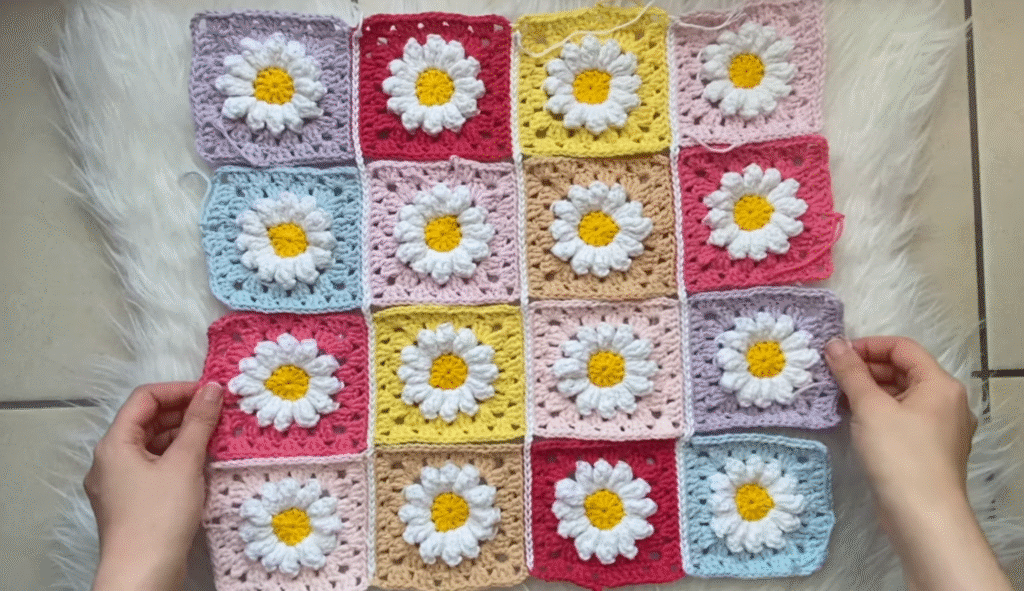
🧩 PART 2: Make Multiple Squares
- Create 25 squares (5×5 layout) or as many as needed for your pillow size.
- Mix and match background pastel shades for a patchwork look.
🔗 PART 3: Join the Squares
📌 Option 1: Join-As-You-Go (JAYGO)
- Work last round of granny square and connect with sl st or sc as you crochet the final round.
📌 Option 2: Seam Afterward
- Lay out squares.
- Use a whip stitch or sl st through back loops to join sides together neatly.
🧵 PART 4: Assemble the Pillow
✂️ Option A: Crochet Front & Back
- Make another panel of 25 daisy squares for the back.
- Place both panels together (WS touching).
- Sc or sl st around the edges, inserting pillow before sealing the final side.
✂️ Option B: Use Fabric Backing
- Sew fabric to the back panel using a yarn needle or sew by machine.
- Add a zipper or buttons if making a removable cover.
🎀 Final Touches
- Block your work if needed to square off.
- Add a decorative border (optional): try picot, scallop, or shell edging.
- Weave in all loose ends.
Video tutorial : Beautiful Crochet a Daisy Pillow Pattern