This is a simple yarn butterfly made with a comb (no crochet or knitting). Here’s a clear step-by-step tutorial 👇
MATERIALS (IMPORTANT DETAILS)
- Yarn weight: Medium / Worsted (not too thin)
- Comb: Plastic comb with wide teeth (about 1–1.5 cm apart)
- Scissors: Sharp (for clean wing edges)
- Body yarn: Strong yarn or embroidery thread
- Antenna yarn: Thin yarn (contrasting color)
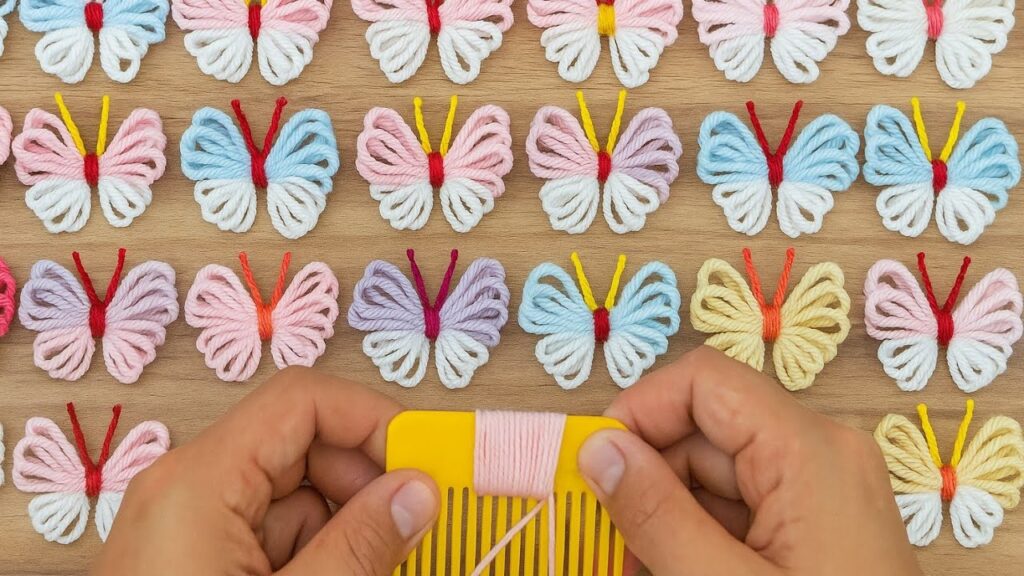
STEP 1: PREPARE THE COMB
- Hold the comb horizontally
- The teeth should point downward
- Leave 2–3 cm free at one side (this helps sliding yarn off later)
STEP 2: WRAP THE YARN (WINGS)
- Attach yarn end behind the comb (hold with thumb)
- Wrap yarn around the teeth and back, not just the teeth
- Keep wraps even and tight but not squeezing
- Count wraps carefully:
| Butterfly Size | Wrap Count |
|---|---|
| Small | 16–20 |
| Medium (photo) | 22–26 |
| Large | 28–32 |
- Stop wrapping with yarn at the back
- Cut yarn, leave a 5 cm tail

STEP 3: SLIDE OFF THE YARN
- Carefully pull the whole bundle off the comb
- Keep the loops aligned
- Lay it flat on the table
➡️ You should see a figure-8 shape
STEP 4: CREATE THE BODY (MOST IMPORTANT STEP)
- Cut 20 cm body yarn
- Slide it under the center of the yarn bundle
- Pull tight so it pinches the middle
- Wrap around 3–4 times
- Tie a double knot at the back
- Do NOT cut the body tails yet
This step forms:
- 2 upper wings
- 2 lower wings

STEP 5: CUT THE WING LOOPS
- Hold one side firmly
- Cut the folded loops straight across
- Repeat on all 4 wing sections
Now it will look fluffy and messy — this is normal 👍
STEP 6: SHAPE THE WINGS (KEY FOR A NICE LOOK)
- Trim top wings slightly bigger
- Trim bottom wings slightly smaller
- Round the edges gently
- Turn butterfly over and check symmetry
✂️ Trim slowly — little by little
STEP 7: MAKE THE ANTENNAE
- Cut 2 thin yarn pieces (6–7 cm)
- Fold each in half
- Insert under the body knot
- Pull tight
- Trim ends evenly
Optional:
- Add tiny knots at antenna tips

STEP 8: FINAL TOUCH
- Tighten body knot again
- Trim any stray yarn
- Fluff wings with fingers
COLOR TECHNIQUES (LIKE THE PHOTO)
Two-color wings
- Wrap first color 10–12 times
- Switch yarn
- Wrap second color 10–12 times
Multi-color wings
- Change color every 6–8 wraps
Gradient look
- Overlap two yarns while wrapping
COMMON MISTAKES
❌ Wrapping too loose → flat wings
❌ Cutting too early → uneven shape
❌ Tying center weak → butterfly falls apart

