Great! Here is a step-by-step tutorial to make the exact lace + puff-flower fabric from your picture.
I will break it into 3 parts:
1️⃣ Make the puff flowers
2️⃣ Make the lace mesh
3️⃣ Join the flowers into the mesh exactly like the sample
Everything is explained very clearly and slowly.

🌼 PART 1 — Making the Puff Flowers (very detailed)
These flowers have 5 very puffy petals.
Step 1 — Start the center
- Make a magic ring.
- Pull up ch 1.
- Crochet 6 single crochet (sc) inside the ring.
- Pull ring tight.
- Slip stitch into the first sc to close.
You now have a small round center.

🌼 Step 2 — Make the puff petals
Each petal is a 4-yarn-over puff stitch, closed with chain 2.
One petal:
In the next stitch:
- Yarn over (yo), insert hook into the stitch, pull up a long loop
- Repeat this 3 more times
→ TOTAL: you have 5 loops on the hook - Yarn over and pull through all loops to close the puff
- Chain 2 to finish the petal
Repeat this in each of the 6 stitches, but only 5 petals will be visible (because they overlap slightly).
Your flower should look round and fluffy, just like the photo.
👉 Make many flowers before starting the mesh.
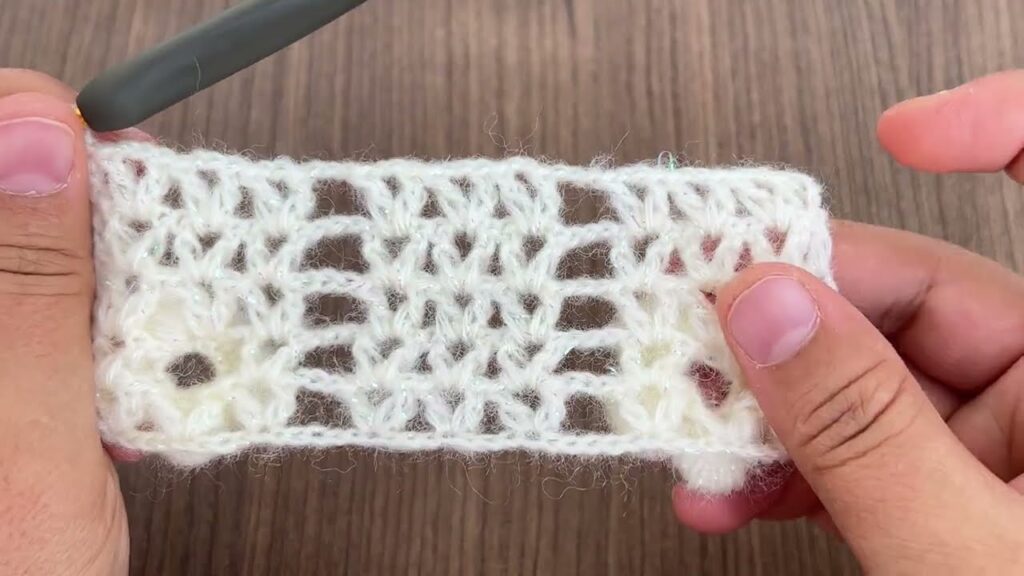
🧵 PART 2 — Making the Lace Mesh (detailed)
The mesh is made with chain-3 spaces and single crochet columns.
Foundation chain
Make a chain in multiples of 6 + 1.
Example: 6 × 10 + 1 = 61 chains.
Row 1: Mesh setup
- Sc into the 2nd ch from hook
- Ch 3, skip 2 ch, sc in the next ch
- Repeat to the end of the row
This creates the first horizontal row of squares.

Row 2: More mesh
- Ch 4 (counts as sc + ch 3)
- Sc into next sc from previous row
Ch 3 - Repeat to end
Now you have even mesh rows.
🌼 PART 3 — Joining the Flowers into the Mesh (very detailed)
This is the part that makes the fabric look exactly like your picture.
Flowers are attached on every other row, in a checkerboard pattern.
⭐ Row 3 — First flower attachment row
Crochet normally until you reach the square where you want the flower.
How to attach:
- Hold one flower behind your mesh.
- Find a petal (any).
- Insert your hook through the top of the puff petal, from front to back.
- Make 1 single crochet into the petal instead of the normal sc into the row below.
- Chain 3.
- Continue with normal mesh until next flower position.
Now that flower is attached by one petal only —
this keeps it puffy and standing forward.
Repeat attaching for each flower on this row.
⭐ Row 4 — Plain mesh
Do not attach any flowers on this row.
Work:
- Ch 4
- Sc in next sc, ch 3 across
This row spaces the flowers vertically.
⭐ Row 5 — Second flower attachment row (offset)
This row’s flowers should be between the flowers of Row 3 (a staggered pattern).
Example:
Flower   —   —   Flower   —   —
—   Flower   —   —   Flower
Flower   —   —   Flower   —   —
Attach flowers the same way:
- Insert hook through a petal
- Make 1 sc
- Ch 3, continue
⭐ Repeat Rows 4–5
- Row 4 = plain mesh
- Row 5 = attach flowers
- Row 6 = plain
- Row 7 = attach flowers (offset again)
…continue this as long as you want.
🌼 FINISHED FABRIC LOOK
✔ Puffy flowers sit on top of the lace
✔ Mesh is airy and soft
✔ Flowers are evenly spaced (checkerboard)
✔ Fabric looks exactly like the sample photo

