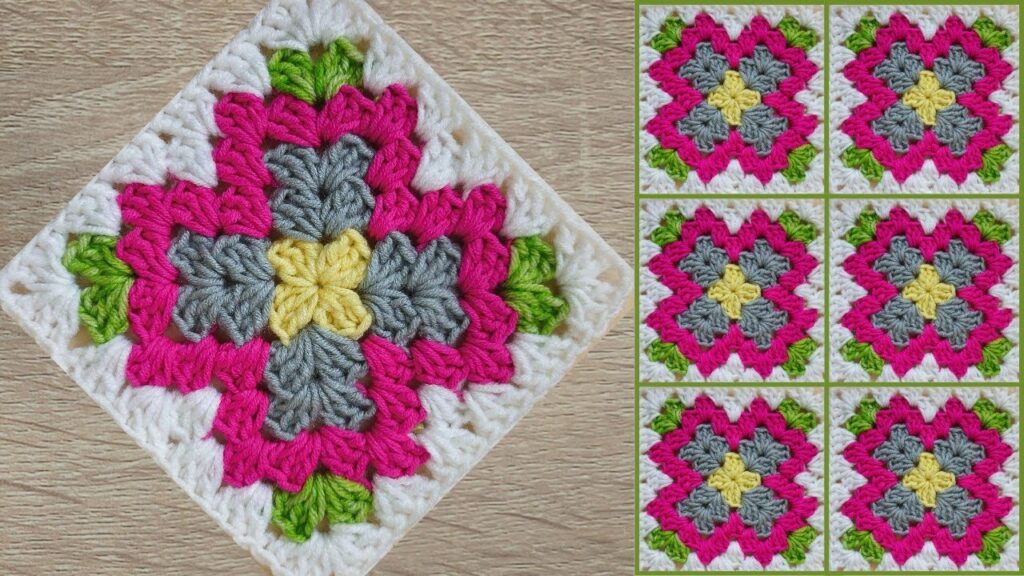
That’s a flower-style crochet granny square with a layered petal pattern — perfect for blankets, bags, or cushion covers. Here’s a step-by-step tutorial to make it like the one in your image:
🌼 Crochet Flower Granny Square (Detailed Tutorial)
🧶 Materials
- Yarn: 5 colors (Yellow, Gray, Pink, Green, White)
- Hook: 3.0–4.0 mm
- Tools: Scissors, yarn needle
🪡 ABBREVIATIONS (US terms)
| Abbreviation | Meaning |
|---|---|
| MR | Magic ring |
| ch | Chain |
| sl st | Slip stitch |
| dc | Double crochet |
| sp | Space |
| st | Stitch |
🧩 STRUCTURE OVERVIEW
This square has 5 rounds:
- Yellow flower center
- Gray petals
- Pink petals
- Green leaf accents
- White border
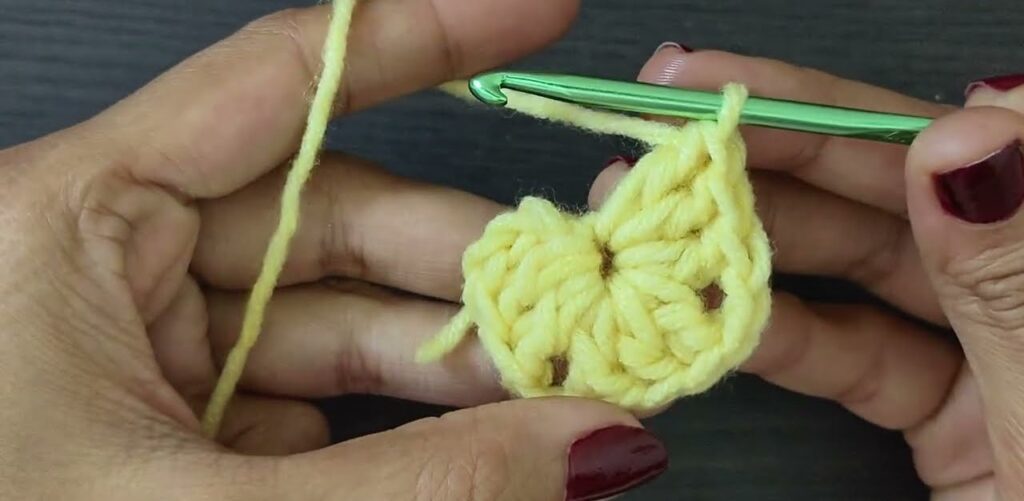
🌸 STEP 1: Yellow Center
- Start with a magic ring (MR).
- Ch 3 (counts as first dc).
- Work 2 dc, ch 2.
- (3 dc, ch 2) repeat 3 more times (you’ll have 4 groups of 3 dc).
- Pull MR tight.
- Join with sl st to the top of ch-3.
- Fasten off yellow.
👉 You now have a small square with 4 corner spaces.
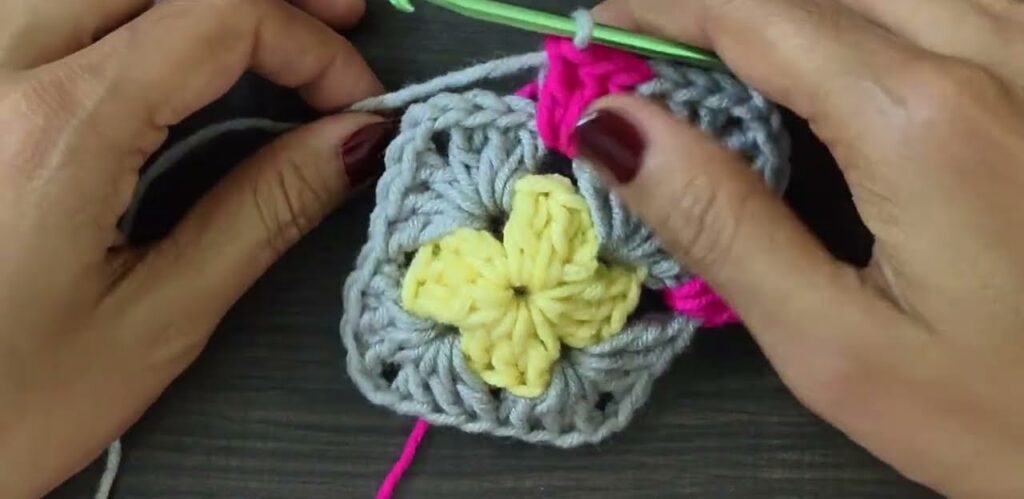
🌺 STEP 2: Gray Petals
- Attach gray yarn in any corner ch-2 sp.
- Ch 3, make 2 dc, ch 2, and 3 dc in the same corner (this makes one full corner).
- In next ch-2 sp: (3 dc, ch 2, 3 dc).
- Repeat around all 4 corners.
- Join with sl st to top of ch-3.
- Fasten off gray.
🩶 Now you have a larger square with visible gray petals.
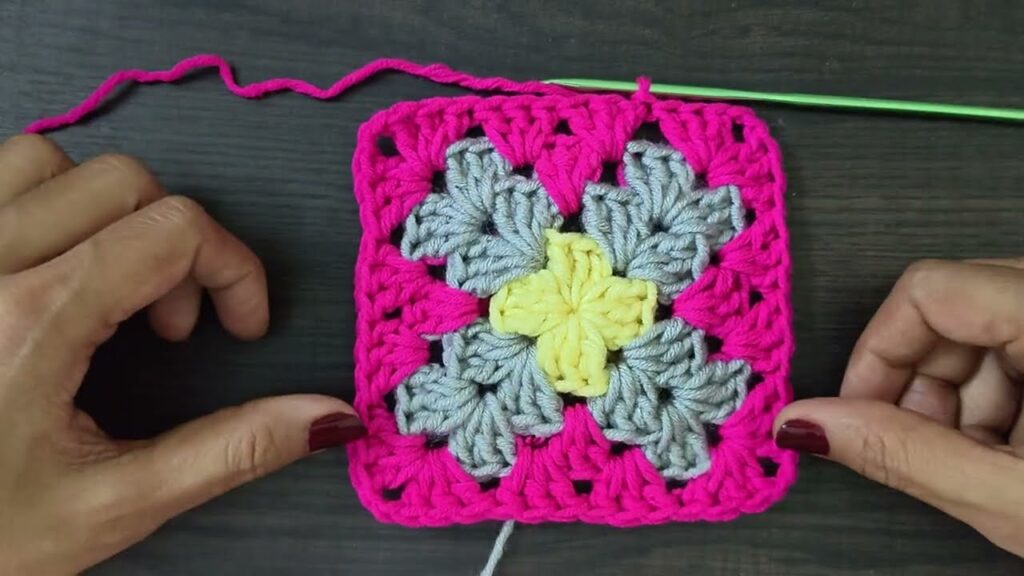
🌺 STEP 3: Pink Petal Round
- Attach pink yarn to any corner ch-2 sp.
- (Ch 3, 2 dc, ch 2, 3 dc) in same corner.
- (3 dc) in the space between corners (side space).
- Repeat (corner, side) pattern around:
- Corners = (3 dc, ch 2, 3 dc)
- Sides = (3 dc)
- Join with sl st to top of ch-3.
- Fasten off pink.
🌸 The pink creates the flower’s outer layer.
🍃 STEP 4: Green Leaves
- Attach green yarn in a side space (between pink clusters).
- (Ch 3, 2 dc) in same space.
- Skip next cluster, and in next side sp, make (3 dc).
- Continue this pattern around — place green clusters evenly between pink petals.
- Join with sl st.
- Fasten off green.
🍃 These little green groups create a leafy effect around the flower.
⚪ STEP 5: White Border
- Attach white yarn in any corner ch-2 sp.
- (Ch 3, 2 dc, ch 2, 3 dc) in corner.
- (3 dc) in each side space.
- Around all sides, continue (corner, side) pattern.
- Join with sl st to top of ch-3.
- Fasten off and weave in ends.
Now you have one finished granny square 🌼
🧵 STEP 6: Joining Multiple Squares
You can join many squares (like the right side of your image) using one of these methods:
Option 1: Join-as-you-go
- On your final white round, connect corners/sides to the next square with sl st instead of ch 2.
Option 2: Whip Stitch
- Place squares right sides together, and sew edges with yarn needle.
Option 3: Slip Stitch Join
- Align squares and slip stitch through back loops only along edges.
💡 OPTIONAL
- Add an extra round of white if you want a bigger block.
- Use a blocking board to shape the squares evenly before joining.

