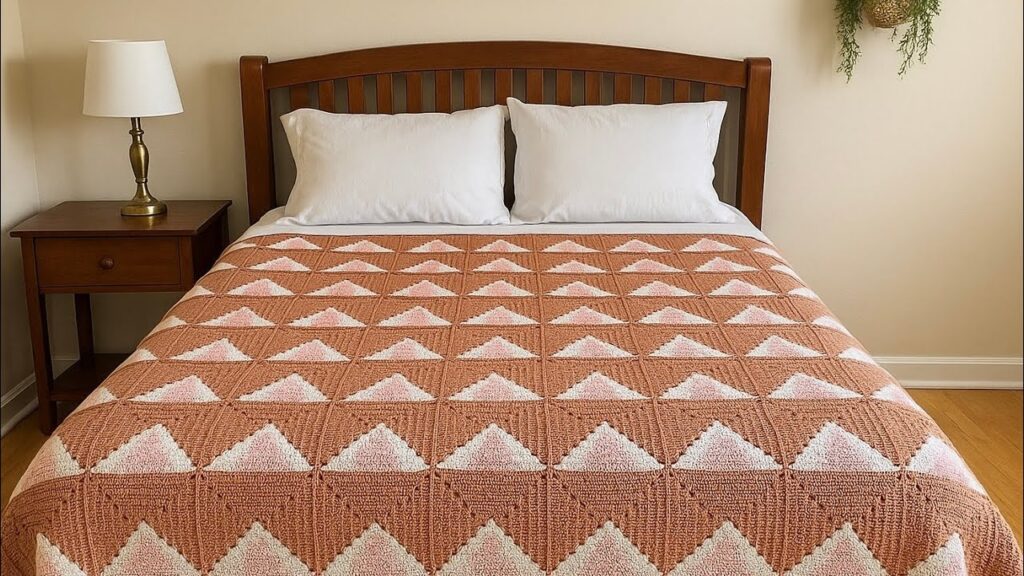
That’s a beautiful crochet blanket made from triangle-patterned granny squares! 💛
It looks like it’s made of individual squares that form a geometric mountain or pyramid design when joined together. Here’s how you can make a similar blanket:
🧶 CROCHET TRIANGLE GRANNY SQUARE BLANKET
Skill level: Easy to intermediate
Style: Modern geometric design using triangle motifs
🪡 SUPPLIES
| Item | Description |
|---|---|
| Yarn | 2–3 colors of worsted weight (4) yarn (example: cream + terracotta + blush) |
| Hook | 4.0–5.0 mm crochet hook |
| Other tools | Yarn needle, scissors, measuring tape |
| Gauge (optional) | Each finished square about 5×5 inches (adjust hook/yarn for your preference) |
🔷 STEP 1: MAKE THE TRIANGLE HALF
We’ll start by making the lighter-colored triangle portion first.
With Color A (light color):
- Magic Ring, or ch 4 and sl st to form a ring.
- Row 1:
- Ch 3 (counts as dc), work 2 dc into the ring, turn.
- (You’ll have 3 dc total.)
- Row 2:
- Ch 3 (counts as dc), dc in same st, dc in next dc, 2 dc in top of turning ch, turn.
- (5 dc total.)
- Row 3:
- Ch 3, dc in same st, dc in each dc across until last st, 2 dc in top of turning ch, turn.
- (7 dc total.)
- Continue increasing by 2 dc each row (one at each end) until your triangle side measures about half the size of your desired square.
- Fasten off.
🧭 Tip: For most 5-inch squares, you’ll make about 8–10 rows of increases.
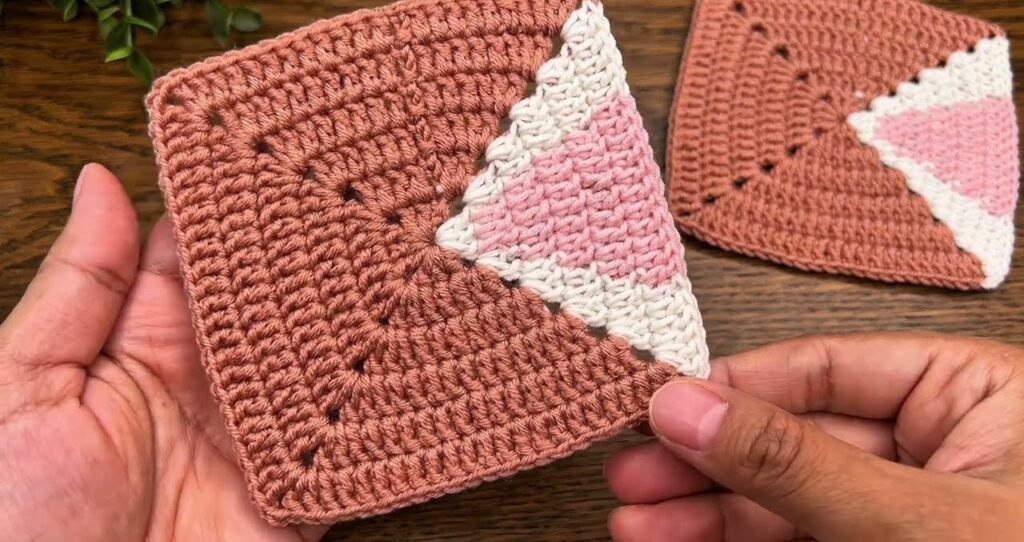
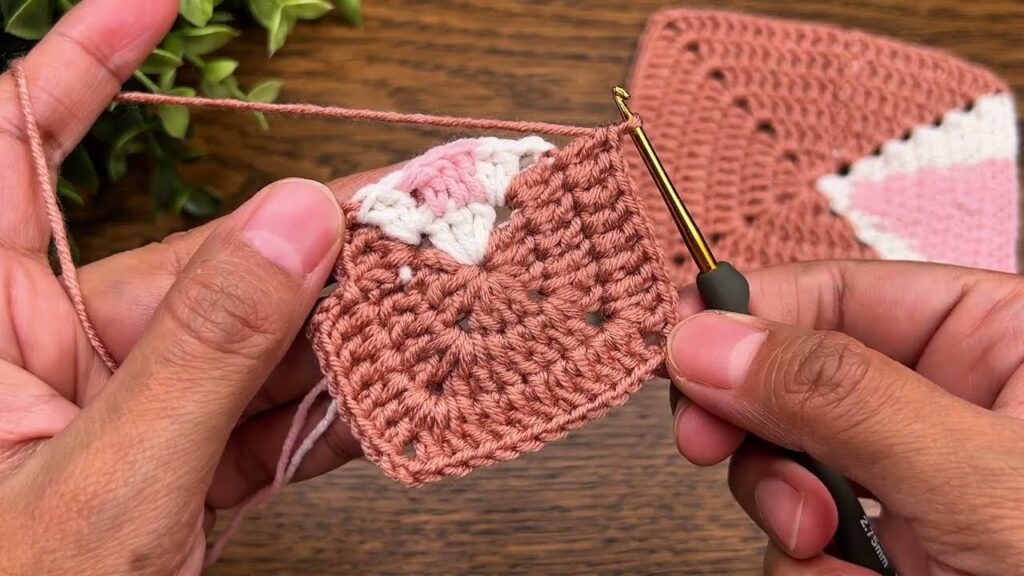
🟤 STEP 2: ADD BACKGROUND COLOR
Now we’ll fill in the other half of the square using the darker color.
With Color B (terracotta):
- Attach yarn to one side edge of the triangle (bottom right corner).
- Row 1: Ch 3, work 1 dc in each dc along the triangle side.
- Row 2:
- Ch 3, dc in same st, dc across to last st, 2 dc in top of ch 3. (Increase both ends.)
- Continue increasing each row at both ends until your square is complete — the sides should be equal length.
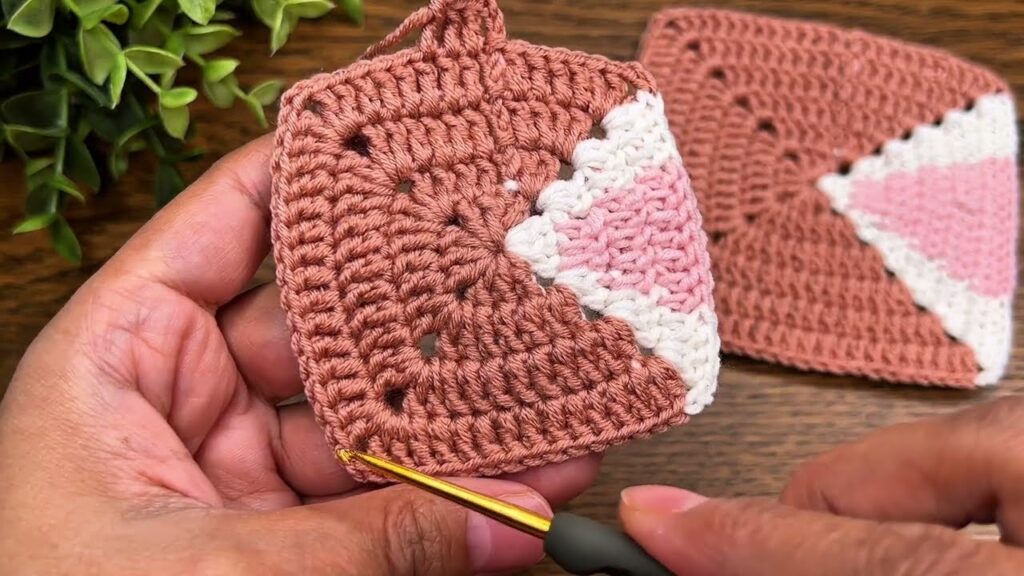
- Fasten off and weave in ends.
🧭 Check shape: You can fold diagonally to check if it forms a square. Adjust rows if needed.
🧩 STEP 3: MAKE MULTIPLE SQUARES
Repeat Steps 1–2 to make many squares — you’ll need enough to cover your bed.
Example for Queen Size Blanket (approx. 80″ × 90″)
- Each square = 5″ × 5″
- You’ll need 16 squares across × 18 down = 288 squares total
You can adjust based on your bed or yarn weight.
🪡 STEP 4: JOIN THE SQUARES
There are several joining methods — here are two easy ones:
Option 1: Slip Stitch Join (flat & neat)
- Place two squares right sides together.
- With matching yarn, slip stitch through the back loops only along the edges.
- Continue row by row until all are connected.
Option 2: Whip Stitch Join (sewn)
- Place two squares side by side, right sides up.
- Using a yarn needle, whip stitch through both loops on the edge.
- Keep your tension even.
🧭 Tip: Lay out all squares first to plan your color pattern (like in the photo — all triangles pointing the same direction).
🌸 STEP 5: ADD BORDER (optional but recommended)
To give your blanket a clean edge:
Round 1:
- Join yarn anywhere, ch 1, sc evenly around the entire blanket, working 3 sc in each corner.
Round 2–3:
- Continue with dc or sc rounds, or add a decorative shell or crab stitch border.
🧺 STEP 6: FINISHING
- Weave in all yarn ends securely with a yarn needle.
- Block your blanket lightly (wet or steam block) to even out the squares.
✨ COLOR IDEAS
- Terracotta + Cream (as in the photo)
- Mustard + White
- Teal + Grey
- Blush + Ivory

