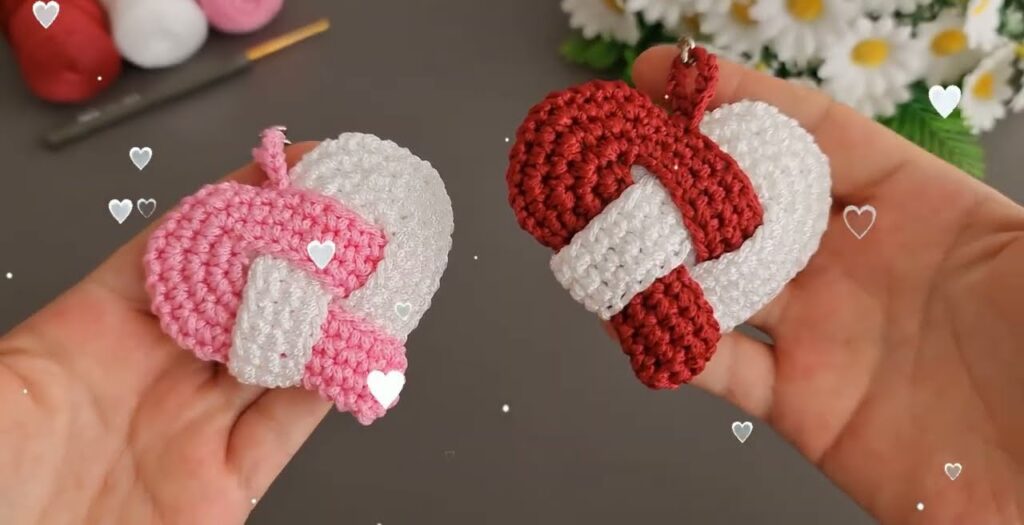
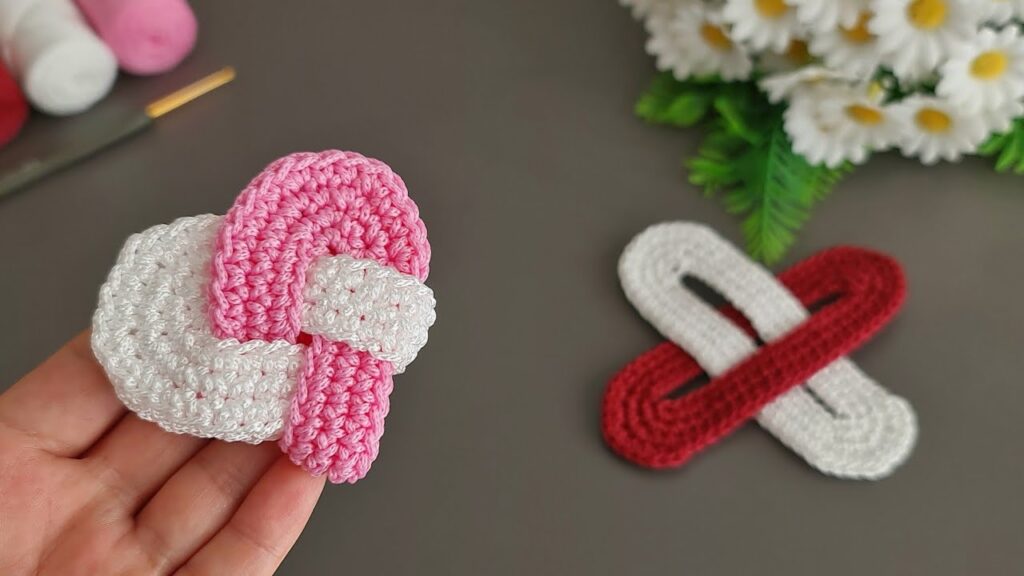
That image shows a crocheted Celtic knot motif, often used in decor, brooches, or as appliqués on scarves and bags. You can make it quite easily with basic crochet skills.
🧶 Materials
- Yarn: Two contrasting colors (e.g. pink + white, or red + white). Use cotton or acrylic in DK or sport weight.
- Hook: 3.0–3.5 mm crochet hook (adjust to your yarn weight).
- Tools: Yarn needle, scissors, pins for shaping.
📏 Finished Size
Approx. 8–10 cm wide, depending on your yarn and tension.
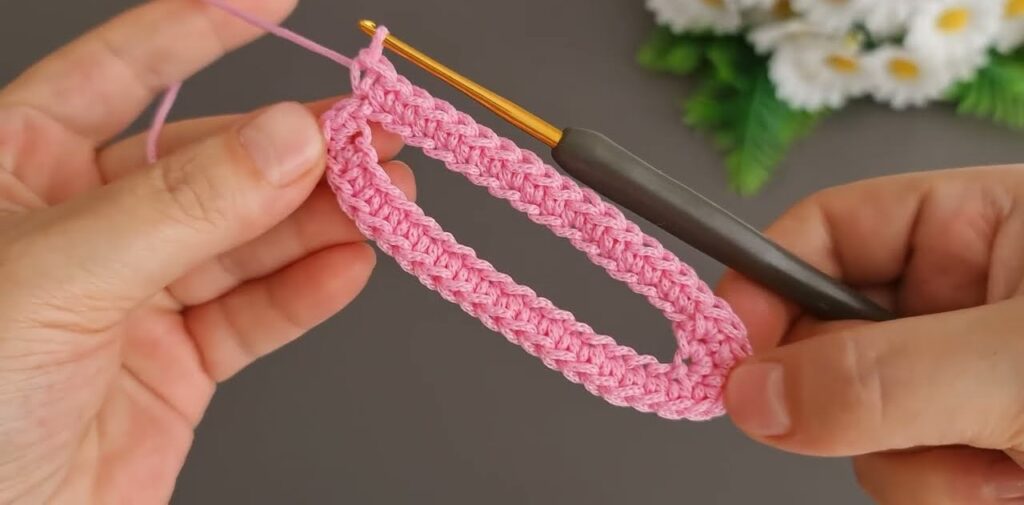
🔹 Step 1: Make the First Strip (Color A)
This will form half of the knot.
Pattern:
- Foundation Chain:
Chain 43. (You can adjust the length — longer chain = bigger knot.) - Row 1:
Starting in the 2nd chain from hook, make 1 single crochet (sc) in each chain across. (Total 42 sc)
→ Chain 1, turn. - Row 2:
Make 1 sc in each stitch across. Chain 1, turn. - Rows 3–5:
Repeat Row 2 (so you have 5 rows total). - Round the ends (optional for smooth curves):
At the end of Row 5, work single crochets around the strip — along the short side, long bottom edge, and other short side — to give it a clean border. - Finish off and weave in ends neatly.
🔹 Step 2: Make the Second Strip (Color B)
Repeat the exact same steps (Rows 1–5, etc.) in your second color.
You should now have two flat, rectangular crochet strips about 1.5 cm wide and 12–13 cm long.
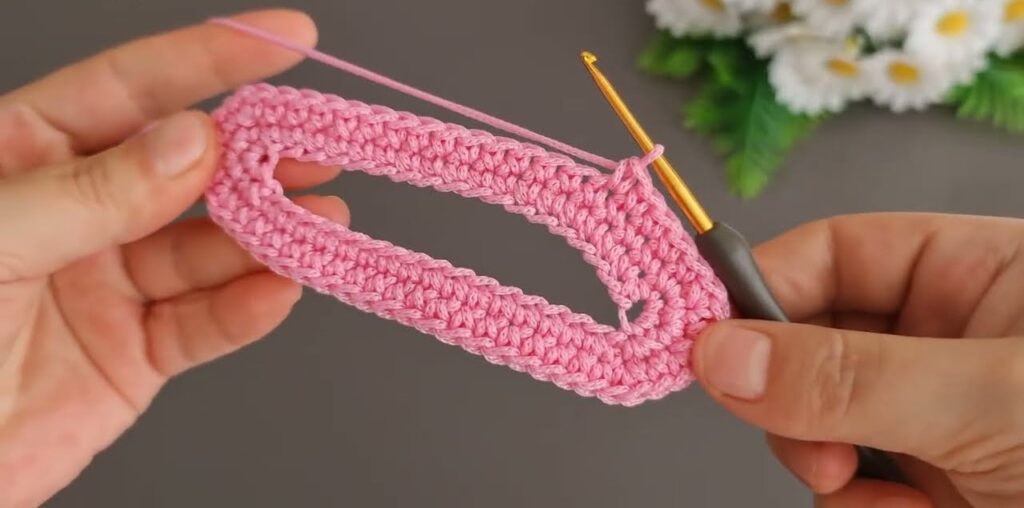
🔹 Step 3: Shape the Celtic Knot
This is the magic part ✨ — assembling the two strips into the interlocking knot pattern.
Follow this slowly:
- Lay Strip A (Color A) on a flat surface horizontally in an oval shape — like a loose loop with ends overlapping slightly at the center.
- Weave Strip B (Color B) through it:
- Pass one end under one side of Strip A.
- Bring it over the center overlap.
- Then under the opposite side — alternating over-under-over-under to form the woven “infinity” pattern.
Essentially, each strip crosses the other alternately so it forms a balanced knot where both colors loop and interlock.
If you look closely at your image:
- The pink loop passes over the white at the top,
- then under at the bottom,
- and the white does the reverse.
🔹 Step 4: Adjust and Secure
- Once you’re happy with the shape, pin the knot flat (to a blocking board, corkboard, or towel).
- Adjust the strips so they are even and symmetrical.
- Using the yarn needle and matching yarn, make a few small invisible stitches where the strips cross — just enough to hold the shape.
- Weave in all loose ends.
Optional: Lightly steam block or press with a warm iron through a cloth to flatten it nicely.
🔹 Step 5: Optional Uses
- Add a brooch pin on the back.
- Use as an appliqué on scarves, hats, or bags.
- Make smaller versions for earrings or hair clips by chaining fewer stitches (e.g. 30 instead of 43).