how to make the crochet pattern shown in the image — it’s a crochet puff braid stitch (loop stitch border), often used for scarves, blankets, or decorative edges. Here’s how you can make it in English step-by-step 🧶👇
🧶 What You’ll Need
- Yarn: Medium-weight yarn (like size 4 cotton or acrylic)
- Hook: About 3.5mm–4.0mm (depending on your yarn)
- Scissors
- Tapestry needle (for weaving in ends)
🌸 Step 1: Make the Base Chain
- Start with a slip knot.
- Make a foundation chain — you’ll need a multiple of 6 chains + 1. Example: 6 × 5 = 30, + 1 = 31 chains total.
- This base will determine how long your braid will be.
🌸 Step 2: First Row (Base for Loops)
- Insert hook into the 4th chain from hook (the loop on your hook doesn’t count).
- Make 1 double crochet (dc).
- Chain 1, skip 1 chain, then 1 double crochet (dc) in the next chain.
- Continue across the row like this:
👉 1 dc, ch 1, skip 1, 1 dc
until you reach the end. - Turn your work.
🔹 You should have a row of small “V” shapes with spaces in between.
These spaces are where your loops will go.
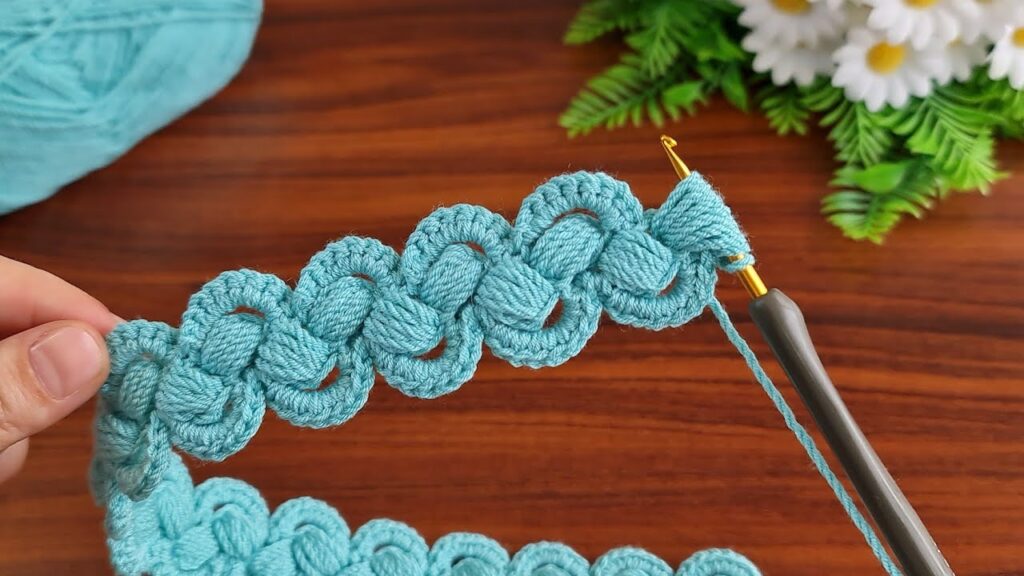
🌸 Step 3: Second Row (Forming the Loops)
- Chain 1 (this counts as turning chain).
- In the first space between two dc stitches, insert your hook.
- Yarn over, pull up a long loop (about 2 cm long).
- Yarn over again, pull through both loops on the hook — this is a long single crochet or loop stitch.
- Now, chain 3.
- In the same space, make 5 double crochets (dc).
- Skip the next dc stitch, and make 1 single crochet (sc) in the next space.
✅ That forms one loop cluster (petal shape).
- Repeat across the row:
- In each space: (1 sc, ch 3, 5 dc), skip next dc, make 1 sc in next space.
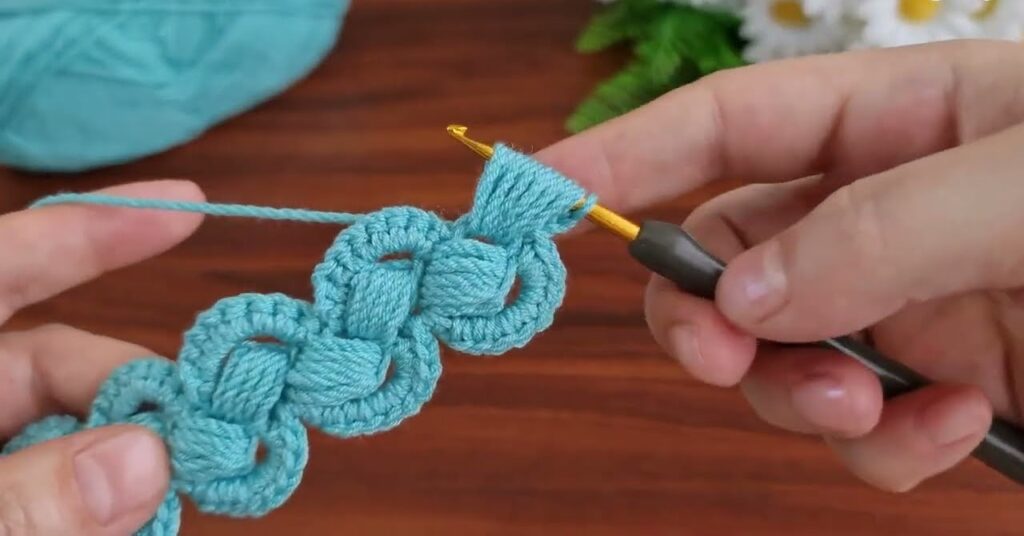
🌸 Step 4: Third Row (Building the Braid)
Now you’ll create the interlocking effect.
- Turn your work.
- Chain 3, skip the first sc, and make 1 double crochet (dc) in the next sc.
- Chain 1, skip 1 stitch, 1 dc in next stitch — repeat across the row.
- This recreates the base with spaces for the next row of loops.
- Turn your work.
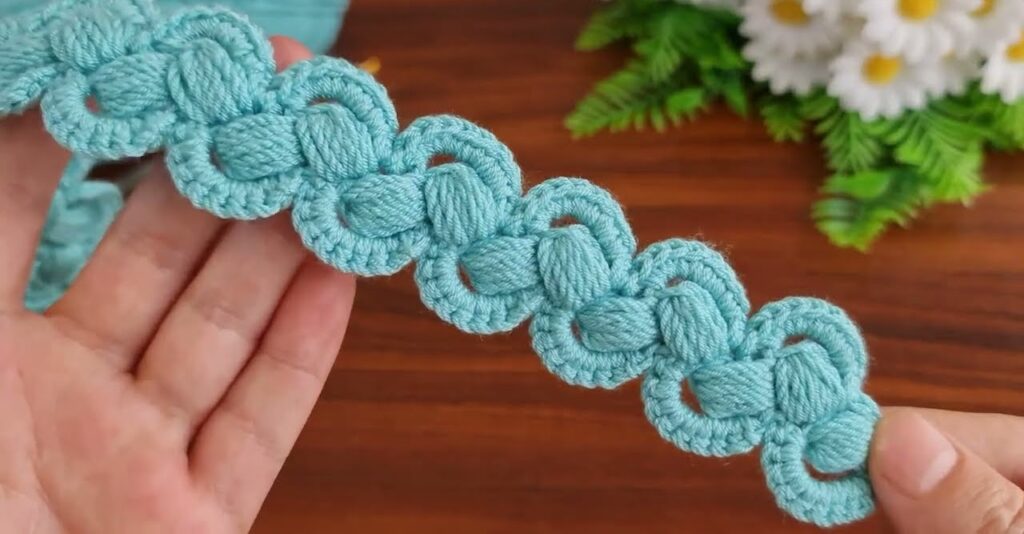
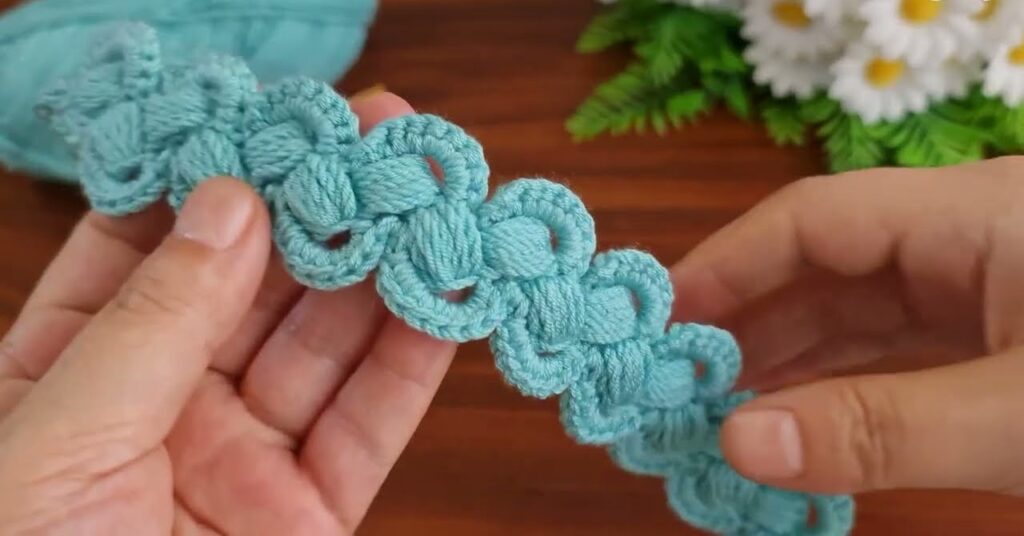
🌸 Step 5: Repeat the Loop Row
Repeat Step 3 (the loop row) again and again.
As you continue:
- The loops from one row will sit between the loops from the previous row, creating that braided, puffed effect shown in your image.
- Adjust your tension so all loops are equal in size.
🌸 Step 6: Finish Off
When your piece is the length you want:
- Cut your yarn (leave a 6-inch tail).
- Pull the yarn through your last loop to secure it.
- Use a tapestry needle to weave in the yarn ends on the back side.
✨ Extra Tips
- For thicker, fuller loops, pull the loops longer (3 cm instead of 2 cm).
- For tight braids, make the loops smaller.
- You can use two colors — one for the base, one for the loops — for a pretty contrast.
- Block your finished work (lightly steam or pin flat) to keep the loops even.

