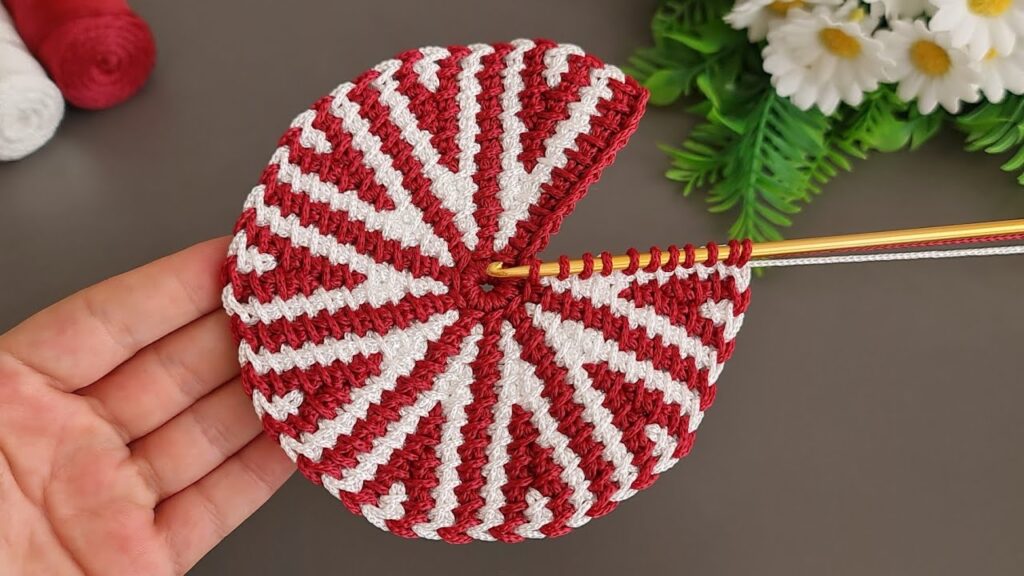
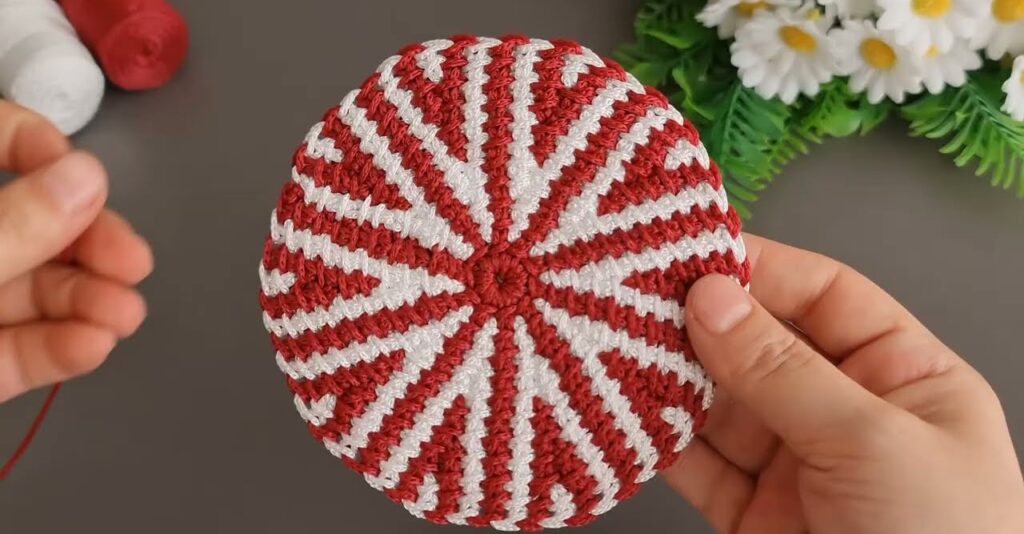
This crochet (or knit) piece looks like a round spiral coaster or flower motif made with two colors (red and white). Here’s how to make it step-by-step
🧶 Materials
- Yarn: Two colors (A = red, B = white) — use cotton yarn for best shape.
- Hook: 2.5–3 mm crochet hook
- Scissors
- Yarn needle for sewing in ends
🌸 Step-by-Step Crochet Instructions
🌀 Step 1: Make the center (Start circle)
- Use Color A (red).
- Make a magic ring.
- Round 1: Crochet 6 single crochets (sc) into the ring.
- Pull the yarn tail to close the ring tightly.
- Do not join; this pattern is worked in continuous rounds.
🧵 Tip: Place a stitch marker in your first stitch so you know where each round starts.
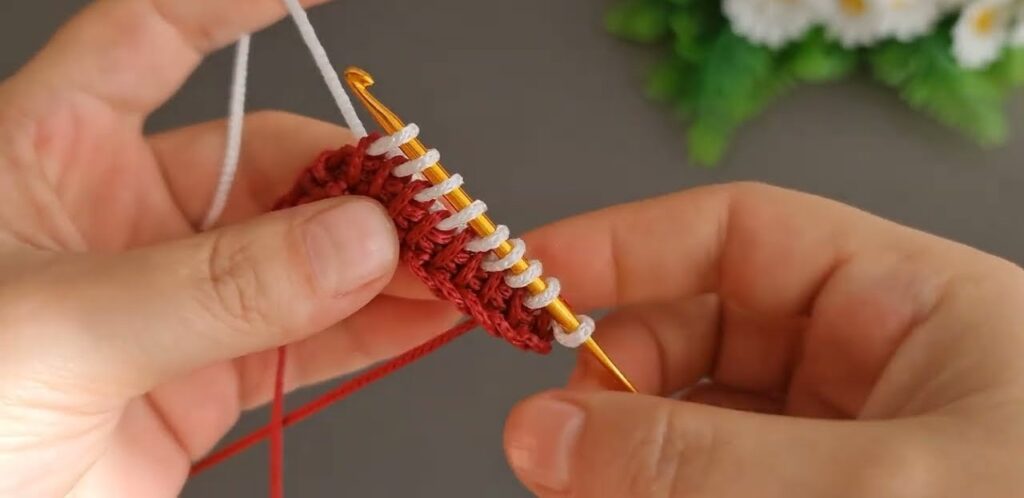
🧷 Step 2: Add the second color
- Before finishing the last stitch of Round 1, change color to white (Color B).
- To change color: On the last red stitch, stop before the final yarn-over, then yarn-over with the white yarn and pull through.
- You now have two colors attached — keep them both at the back and carry the unused one along as you crochet.
🌀 Step 3: Begin the swirl pattern
Each “spoke” in the circle forms from increasing stitches and switching colors every few stitches.
We will increase slowly while alternating the colors to make the spiral.
Round 2:
- Work 2 sc in each stitch, alternating colors each time.
Example:- Stitch 1: red
- Stitch 2: white (2 sc)
- Stitch 3: red (2 sc), etc.
- You’ll end with 12 stitches total (6 red, 6 white segments starting to form).
Round 3:
- Now, do 1 sc in the first stitch, 2 sc in the next (the increase pattern).
- Keep alternating colors as before (carry the yarn not in use).
- You’ll start seeing the “rays” appear — white and red stripes from the center.
Round 4:
- 1 sc in next 2 stitches, 2 sc in next — repeat around.
- Keep switching colors where you see the previous color stripe.
- Total stitches: 24
Round 5 and onward:
- Continue increasing one more stitch between increases each round:
- Round 5: 1 sc in next 3, 2 sc in next
- Round 6: 1 sc in next 4, 2 sc in next, etc.
- Follow the spiral pattern: every time you reach a red stitch, make it red; white stitches stay white.
- As you continue, the piece will form a flat circle with a swirl pattern.
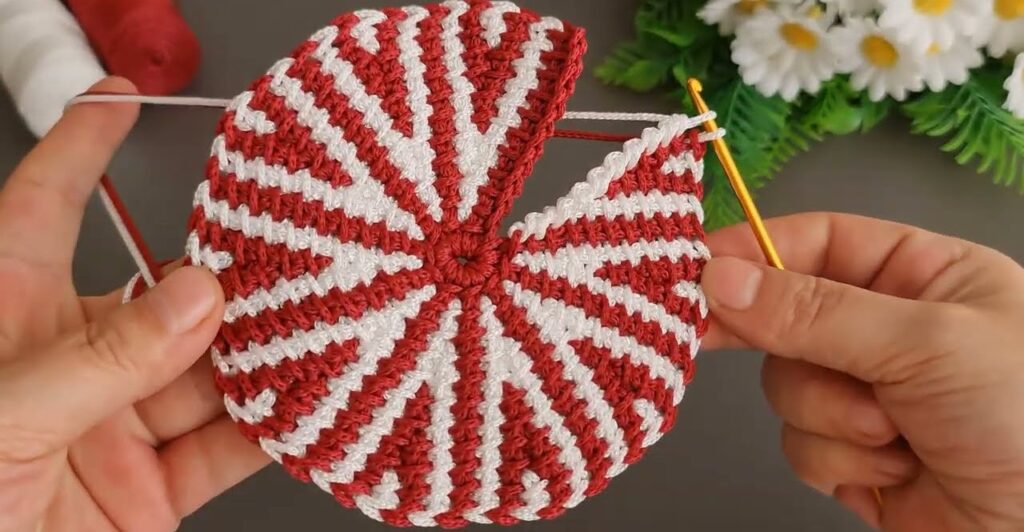
✂️ Step 4: Make the “cut” section (the missing slice)
When your circle is about 10–12 cm (4–5 inches) across:
- Stop crocheting a full circle — leave a “slice” (like a Pac-Man mouth).
- You can do this by stopping 2–3 segments before the circle closes.
- This gives you that open section shown in the photo.
🪡 Step 5: Finishing
- Cut both yarns, leaving 10–15 cm tails.
- Pull through and tighten.
- Weave in all ends neatly with a yarn needle.
- Lightly steam block or press to flatten it perfectly.
🌼 Optional:
If you make two pieces like this, you can sew them together to create:
- A coaster (flat)
- A potholder
- Or a decorative flower piece for bags, hats, etc.