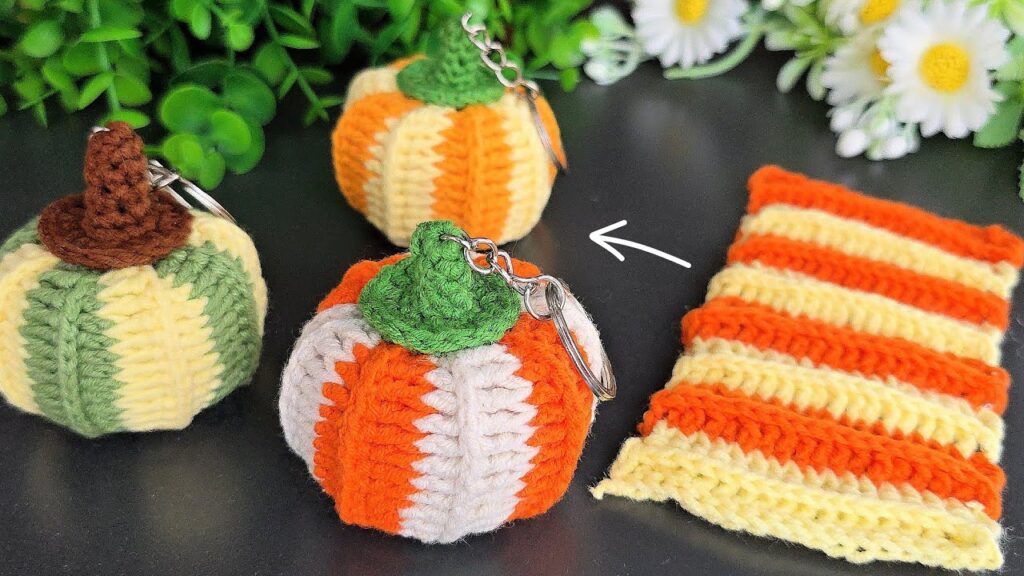
crocheted pumpkin keychains 🎃 — perfect for fall or Halloween! Let’s go over how you can make them step by step.
🎃 Crochet Pumpkin Keychain – Detailed Pattern
🧶 Materials
- Yarn: Medium weight (Category 4) acrylic yarn
- Orange (or green, yellow, white — for stripes)
- Cream or beige (for alternating stripes)
- Green or brown (for stem)
- Hook: 3.0 mm or 3.5 mm crochet hook
- Stuffing: Polyester fiberfill
- Yarn needle
- Scissors
- Keychain ring
🪡 Abbreviations (US Terms)
| Abbreviation | Meaning |
|---|---|
| ch | chain |
| sc | single crochet |
| BLO | back loop only |
| st | stitch |
| sl st | slip stitch |
| FO | fasten off |
🍂 Step 1: Crochet the Pumpkin Body (Rectangle)
This is the striped piece on the right of your photo.
- Foundation chain: ch 25
(This creates the pumpkin’s height; you can make it shorter for a smaller pumpkin.) - Row 1: sc in 2nd ch from hook and across (24 sc). ch 1, turn.
- Row 2–6: sc in BLO across (24 sc). ch 1, turn.
- Change color (e.g., switch from orange to cream).
- Rows 7–12: sc in BLO across (24 sc). ch 1, turn.
- Continue alternating colors every 6 rows until you have about 36 rows total.
✅ You should now have a striped rectangle, about 15 cm x 8 cm.
- FO leaving a long tail (30–40 cm) for sewing.
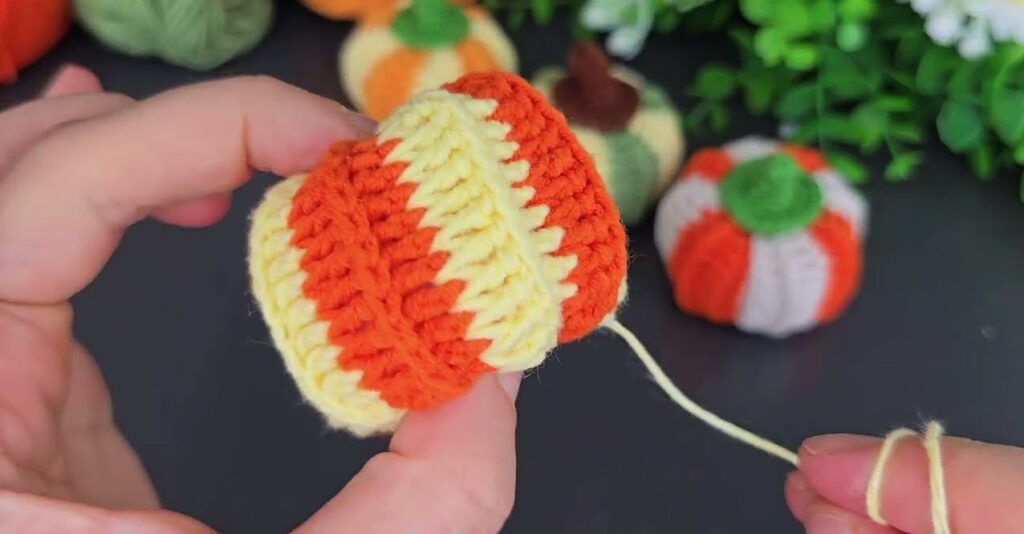
🎃 Step 2: Form the Pumpkin Shape
- Sew the sides together:
Fold the rectangle so the short ends meet.
Using your yarn needle and the long tail, whip stitch the short edges to form a tube. - Close the bottom:
Weave your needle through the loops around one open edge and pull tight to cinch closed. Secure with a knot. - Stuff:
Fill the tube with fiberfill until it’s firm but soft. - Close the top:
Weave the needle through the top edge loops and pull tight again to close.
Now you have a soft ball shape.
🧵 Step 3: Create Pumpkin Sections (the grooves)
- Use about 60 cm of yarn (same or slightly darker color).
- Thread your yarn needle and insert from the top center to the bottom center.
- Pull the yarn snugly around the pumpkin to create an indented line.
- Repeat this step 6–8 times evenly spaced around the pumpkin — it creates those cute ridges.
Tie off securely at the top center.

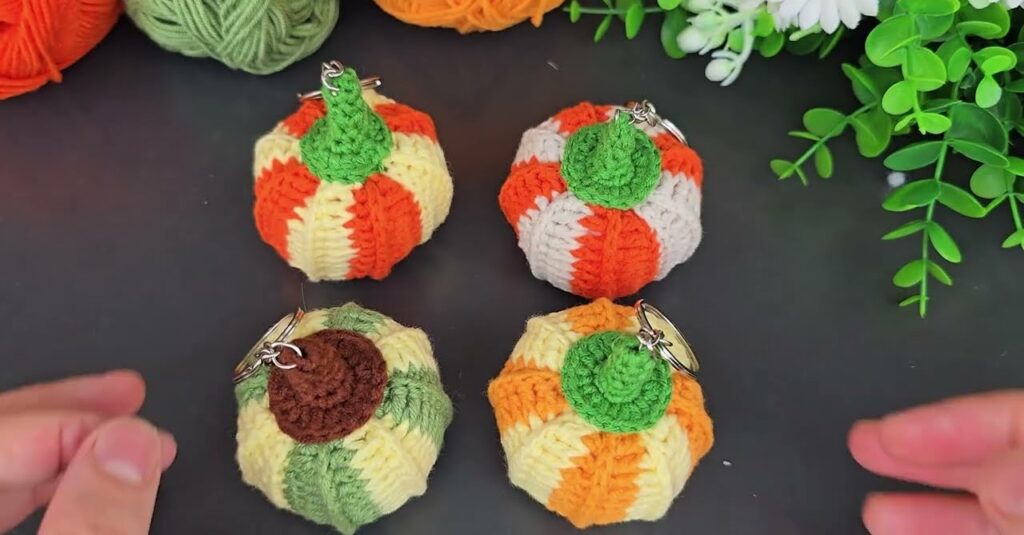
🌿 Step 4: Crochet the Stem
- With green or brown yarn:
- Make a magic ring.
- Round 1: 6 sc in ring (6 sts)
- Round 2: sc around (6 sts)
- Round 3: sc around (6 sts)
- (Optional) Round 4: sc around for a taller stem
- FO leaving a long tail.
- Sew the stem to the top center of the pumpkin.
🔑 Step 5: Add Keychain
- Insert the metal ring through the top of the stem or sew it securely to the side.
- You can also add a small chain or lobster clasp for easier attachment.
💡 Tips & Customization
- Want smaller pumpkins?
→ Chain 15 instead of 25 and make only 24 rows. - Add a tiny crochet leaf:
- ch 5, sc in 2nd ch, hdc in next, dc in next, sl st in last — FO.
- Sew beside the stem.
- Use metallic yarn for a festive fall look!

